

 자동차
자동차
 트럭
트럭
 버스
버스
 모터사이클
모터사이클
 군용 차량
군용 차량
 전자 기기
전자 기기
 무기
무기
 건축물
건축물
 항공기
항공기
 가구
가구
 캐릭터
캐릭터
 동물
동물
 우주선
우주선
 음식
음식
 선박
선박
보기
There are many reasons you might want to render images or videos with a transparent background. Whether it’s for VFX, image composites, graphic design, or simply because you want the option to change the background later on, rendering with transparency in Blender is common for all sorts of workflows.
So, how exactly does transparency work, and how do you set it up? And why isn’t it working how it’s supposed to!?
If any of those questions sound familiar, you’ve come to the right place.
Before getting into Blender-specific instructions, let’s take a step back; when we say “transparent” in relation to images and rendering, what does that actually mean?
When an image has transparency, it means that in addition to the Red, Green, and Blue channels, it also has an Alpha channel – this Alpha channel tells your computer what opacity value to use for each pixel of the image, essentially masking out all the parts of the image that are meant to be transparent.
When we render images with transparency, it means that instead of the background of the 3D scene being visible, it’s masked out in the Alpha channel – still in the 3D scene, and affecting lighting and reflections, but transparent in the final image.
In principle, rendering images with transparency in Blender is simple – in fact, it can be explained in a single line: In the Properties Panel, under the Render Properties tab, navigate to the Film section and check the box for Transparent.

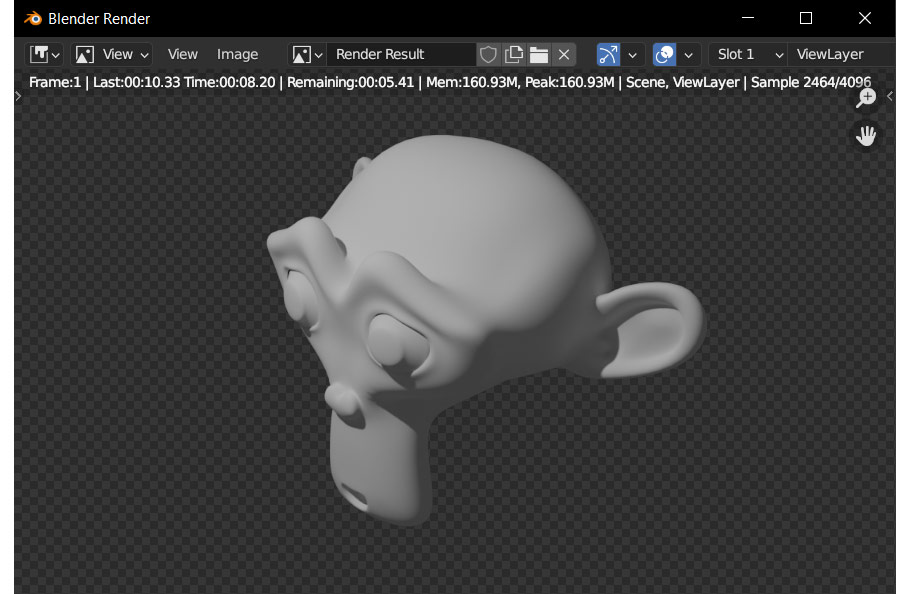
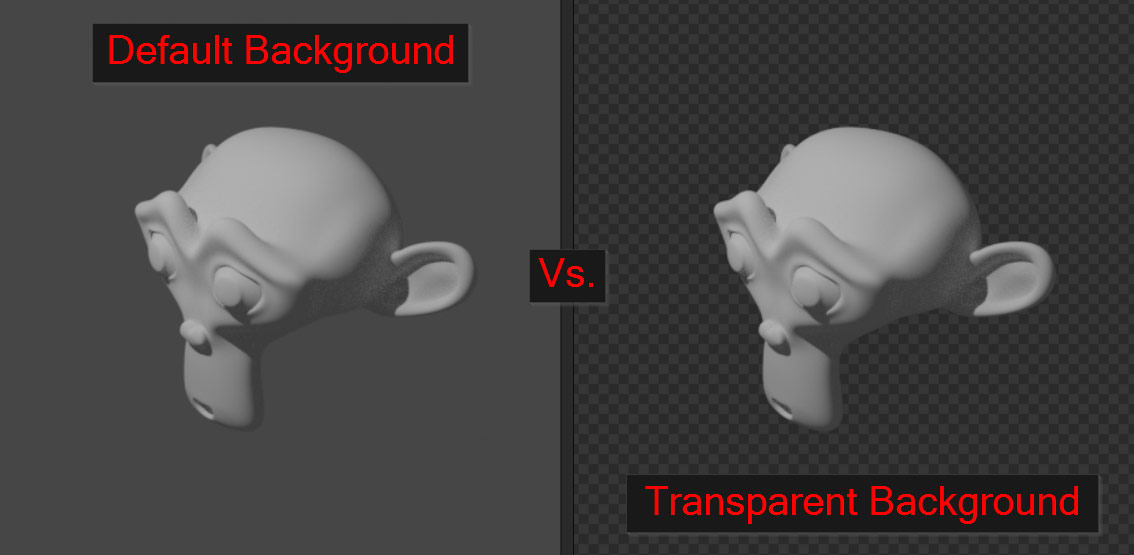
In Rendered mode, you should see the background of your scene disappear, replaced with a gray checkered pattern – this indicates that the background will be rendered as transparent!
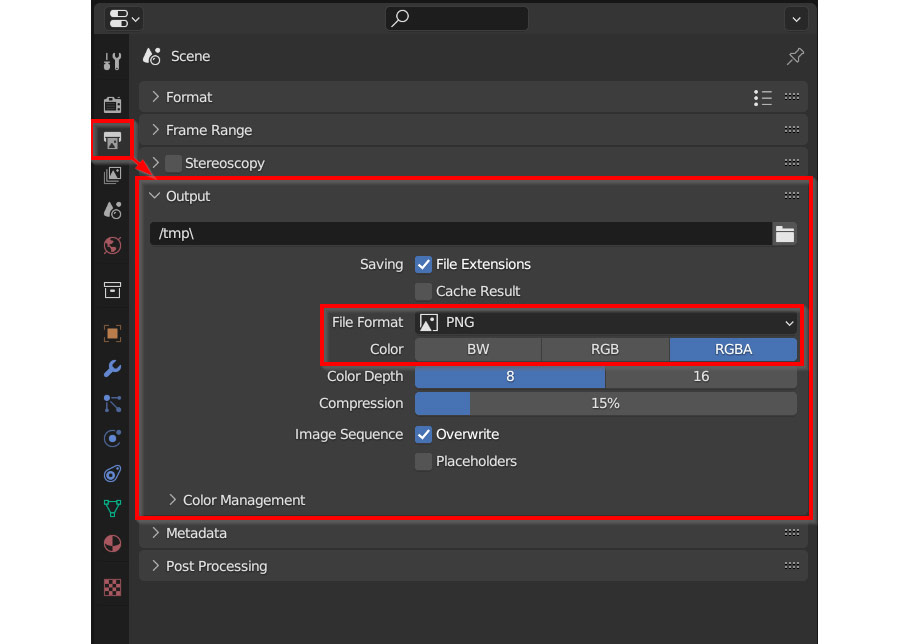
In order for the rendered image to be transparent as well, make sure you’re exporting in an image format that supports an Alpha (transparency) channel. The default settings will work fine – but if you want to double check, navigate to the Properties Panel, and look under Output in the Output Properties tab. Make sure File Format is set to PNG, and check that Color is set to RGBA (otherwise the Alpha channel won’t be included).
Now, rendering your image and saving it as a PNG should give you a transparent image, ready for use in your project – simple as that!
This method is the same for Cycles, Eevee, and even the Workbench render engine – The Render Properties menu items are a bit different for each render engine, but all three of them have a Film section with a checkbox for Transparent.
So, that seems easy enough. Problem solved, right? Well, not quite – while rendering transparent images is simple in most situations, sometimes things can get a bit more complicated!
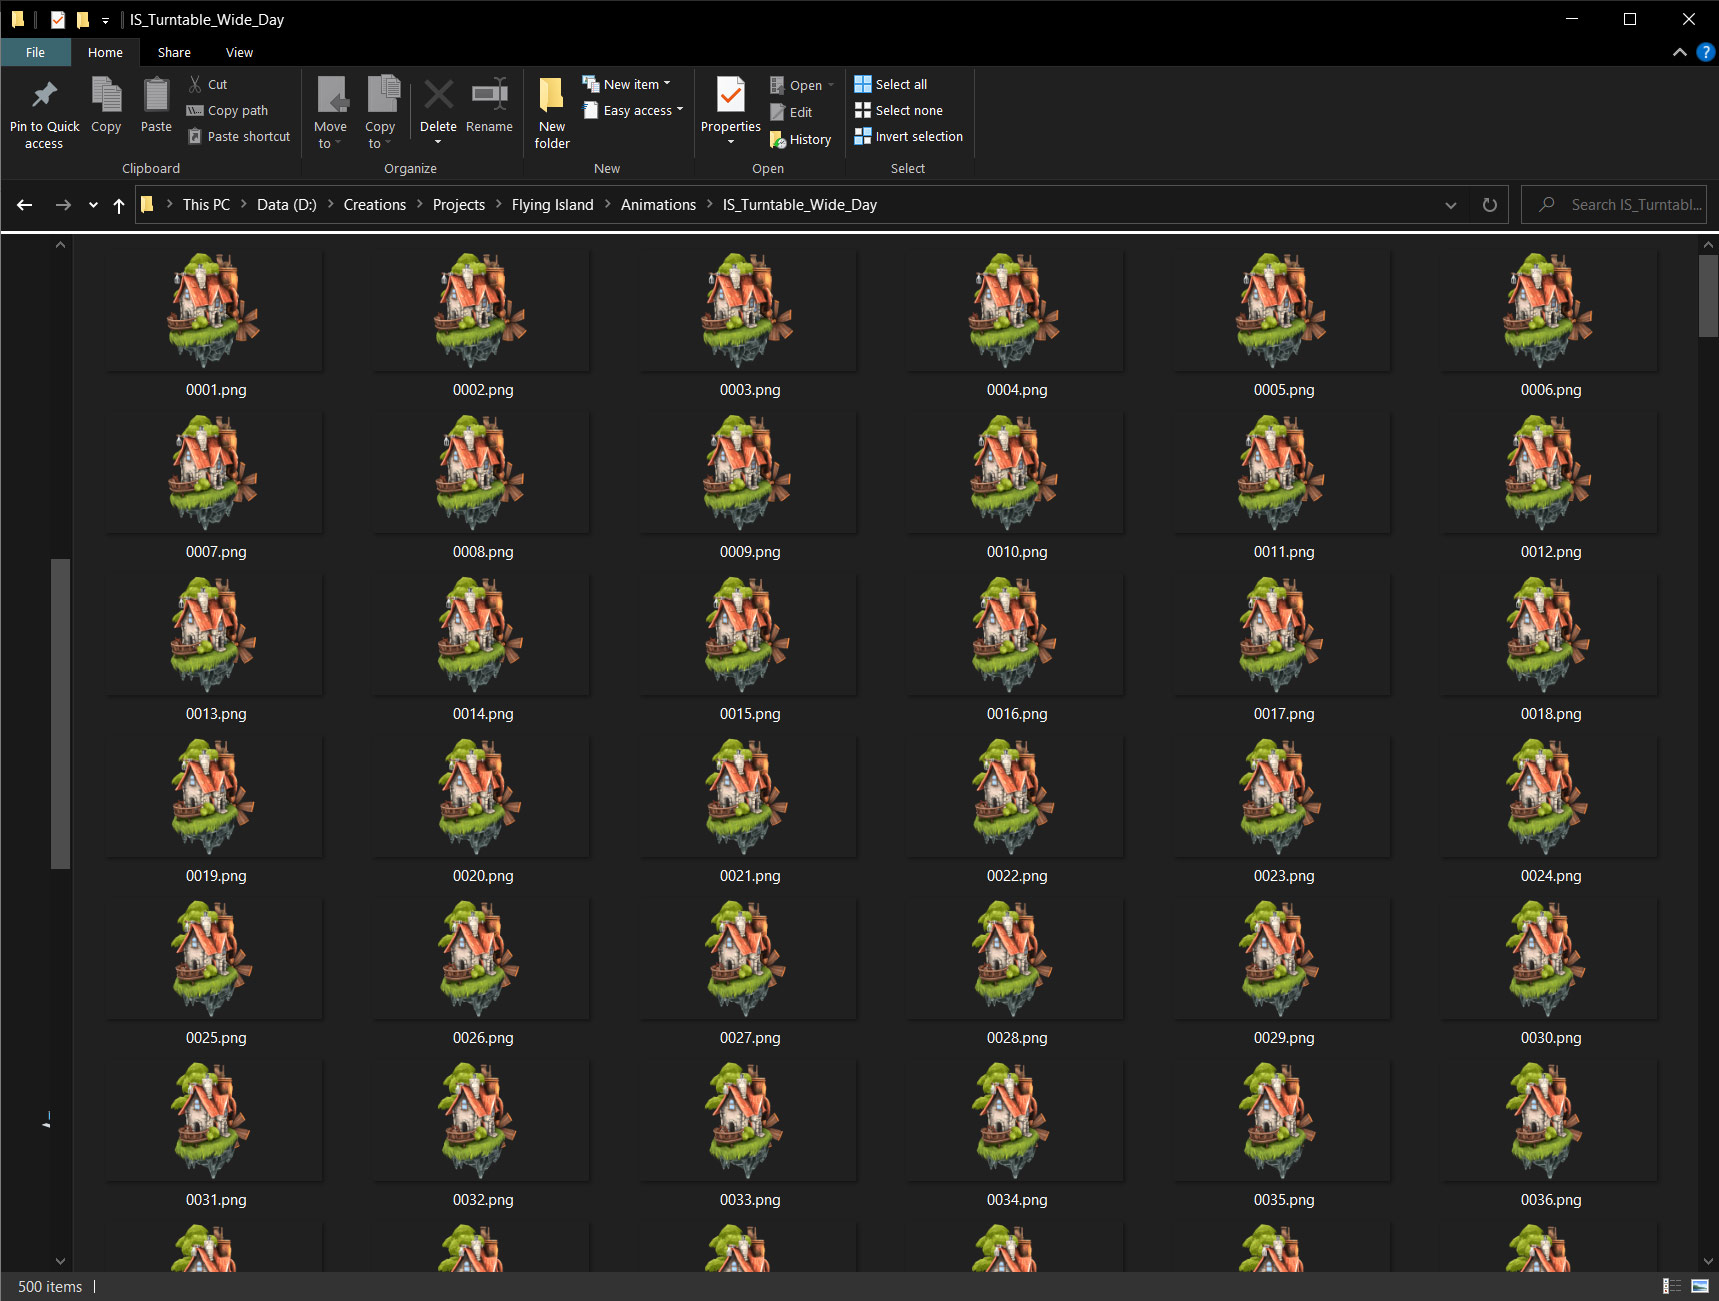
At a basic level, the process to render video from Blender is no different from rendering transparent images – after all, video is just a sequence of images shown in quick succession. But on a practical level, how do we actually make it work in Blender?
Well, perhaps surprisingly, the answer is right there in the description. Almost always, the best way to export video in Blender isn’t as a video file at all, but as an Image Sequence; although it might seem counterintuitive, rendering out each frame as a separate image gives you higher quality, is more flexible for animation workflows, and allows you to cancel or change your animation midway through without restarting the render. But most importantly (in this case), as long as either PNG or OpenEXR formats are used, transparency is fully supported!
To start with, as before, go to the Properties Panel, and under the Render Properties tab, navigate to the Film section and check the box for Transparent.

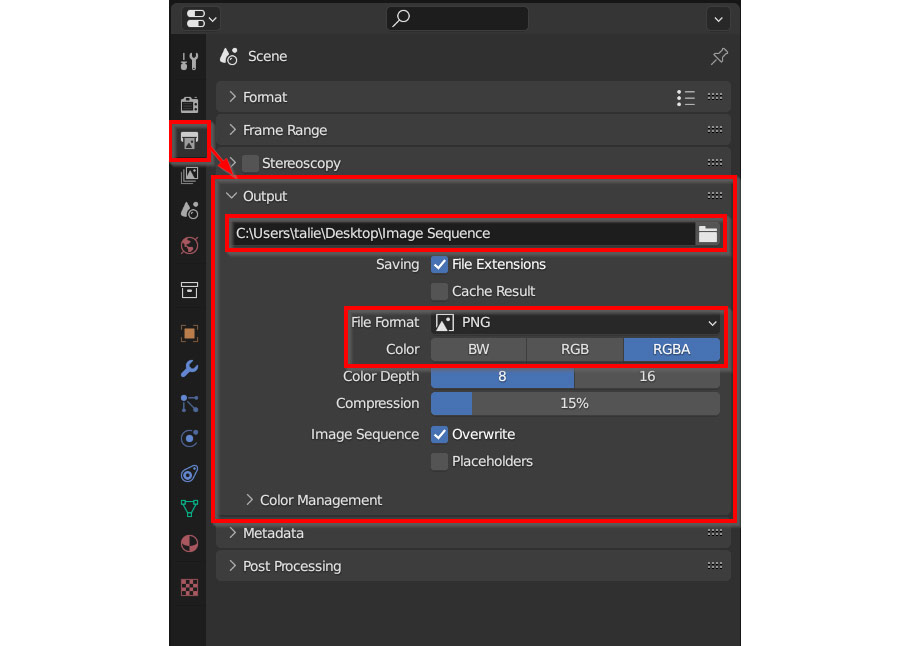
To render an animation as a PNG sequence, navigate to Properties Panel > Output Properties > Output. File Format should be set to PNG, and Color should be set to RGBA. You’ll probably want to select an output folder as well – next to the address bar, click the Folder icon and choose a destination folder for your animation.
After starting the render (either by selecting Render > Render Animation in the top bar or hitting Ctrl/Cmd – F12), navigate to the destination folder you selected in your File Browser – if all is well, you should see individual animation frames appearing as Blender works away!
After that, the next steps depend on what you’re planning to do with your animation – but since it’s a common workflow for animations, all major video editing programs should accept a PNG sequence.
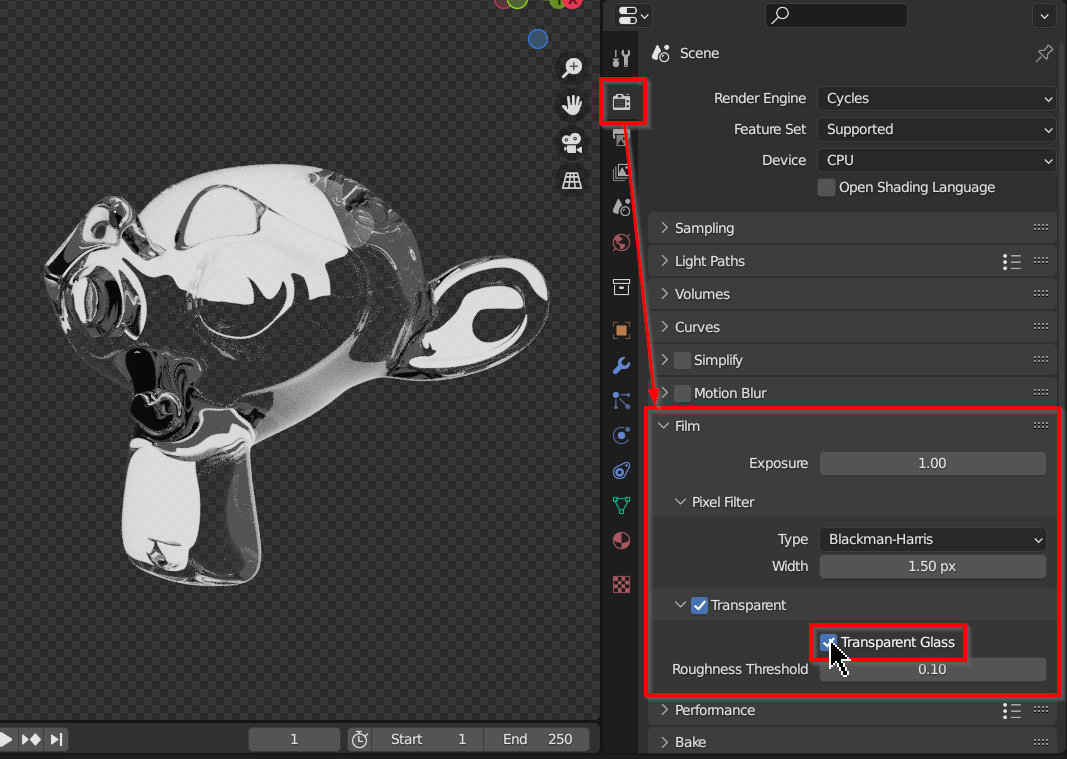
When you’re creating renders with transparent backgrounds, one important thing to keep in mind is any objects in your scene that are themselves transparent; for example, glass. Your options for rendering glass in Blender will be different depending on whether you’re using Cycles or Eevee – and although the changes are subtle, it’s still important to consider!
In Cycles, after enabling Transparent under Film (as mentioned earlier), you are also given the option to enable Transparent Glass. By default, glass materials will refract whatever objects are in your scene as well as whatever color or image is in the background, ignoring transparency – but when Transparent Glass is enabled, transparency will show up in glass as well. Either option is valid, depending on your project and goals for your render – but one important note is that, if you enable transparent glass, any images composited behind the glass won’t be distorted realistically.
In Eevee, things aren’t quite so straightforward. Switching the render engine from Cycles to Eevee, you’ll notice the Transparent Glass option disappears; unfortunately, there’s no easy way to get this effect in Eevee. If your project requires transparent renders of glass in Eevee, your best option is to create a custom shader node setup – and that’s beyond the scope of this article!
Like any subject in 3D art, rendering with a transparent background isn’t always smooth sailing; with dozens of settings and parameters to keep track of, it’s easy to mess up!
Here are a couple of the most common issues you might encounter while trying to create transparent renders.
If the background of your rendered image appears as black instead of transparent after saving it to your computer, it may be an issue with your image format settings. To check these, go to the Properties Panel, and under the Output Properties tab, look for Output; check that File Format is set to PNG, and make sure Color is set to RGBA. Make sure the file format isn’t set to JPG – the JPG format does not support transparency.

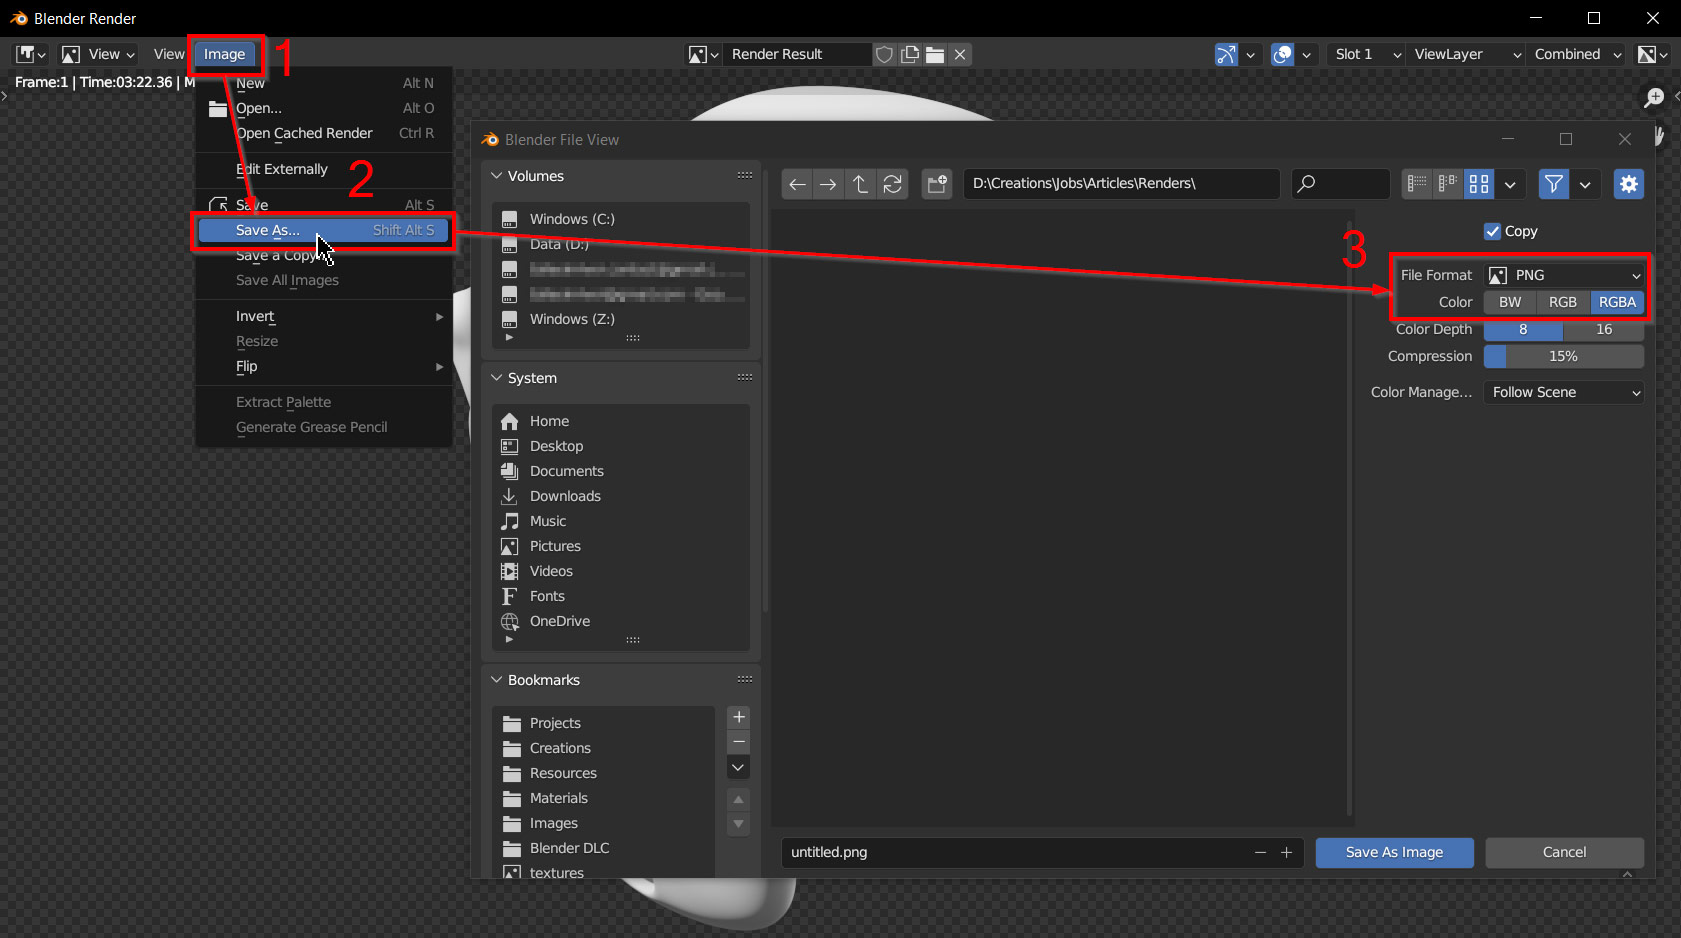
If you’ve already rendered your image, don’t worry! As long as it’s still open in Blender, you can change the output settings in the Save As window as well. In the render window, go to Image, Save as, and check the settings on the far right – again, make sure they’re set to PNG and RGBA, and press Save As Image.
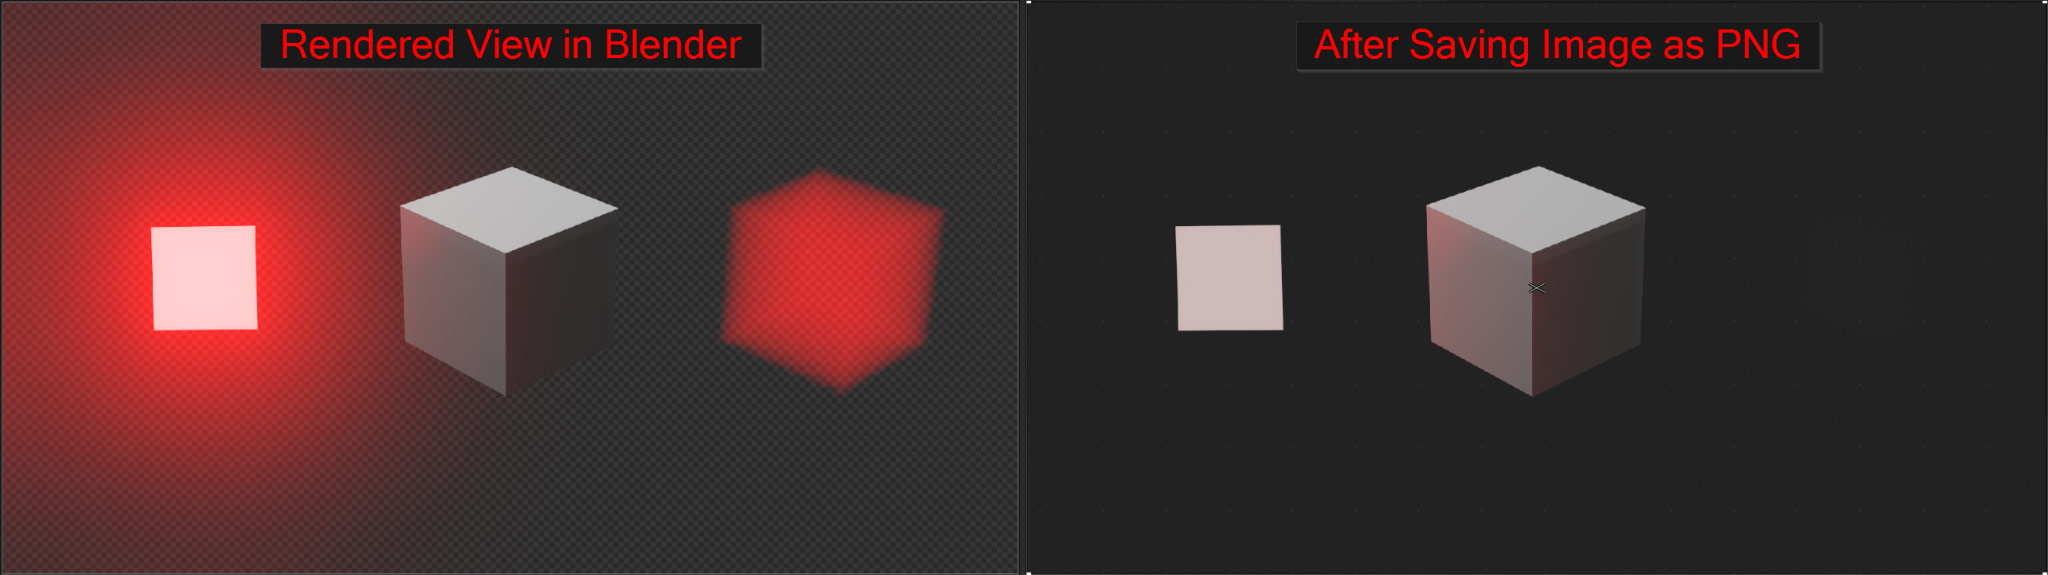
In certain situations, you create a render with transparency, and it looks great in the viewport and while rendering, but after saving the image it looks completely wrong.
While this issue won’t affect most renders, this tends to crop up whenever you try to save a transparent PNG of glowing or luminous objects, and occasionally with other scenes as well – and from experience, I know it can be extremely frustrating!
So, is there a solution? Well, kind of. There are two fixes for this issue, and neither is perfect; the first is using the OpenEXR format instead of PNG, and the second is to create a simple Compositor node setup to manually fix the alpha channel.
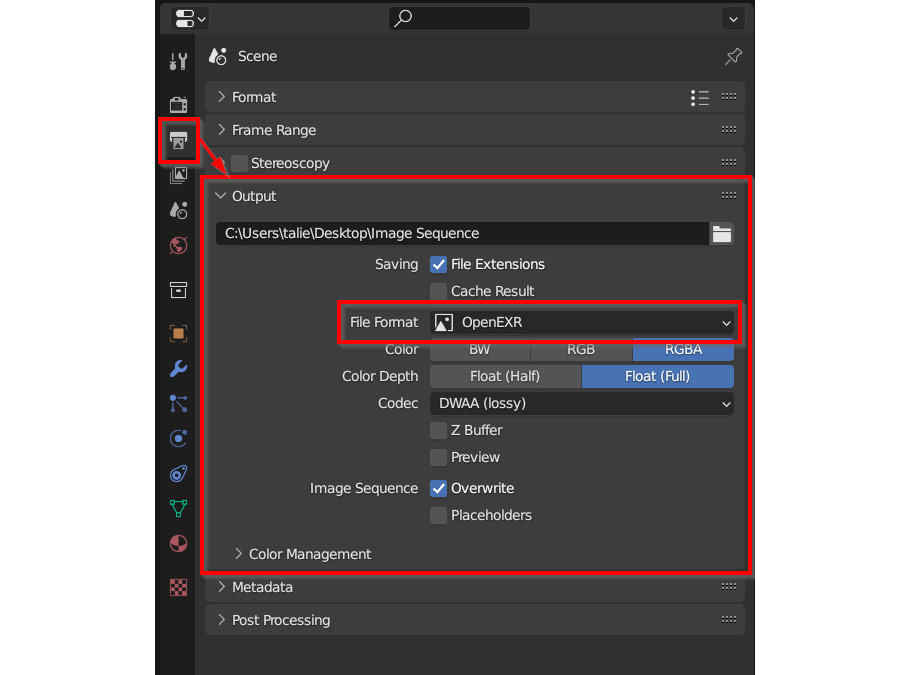
Let’s start with using EXR; to render images in the EXR format, go to the Properties Panel and navigate to the Output section of the Output Properties tab – then for File Format, select OpenEXR. If you’ve already rendered your image, you’ll see the same options in the Image > Save As menu. With your image saved as an EXR, the correct alpha channel will be saved – if you load your image in Blender’s compositor, it should look exactly as it did while rendering! But again, this isn’t a perfect solution – not all software supports EXR files, and even when it does, getting the colors and transparency to display correctly can be very confusing.
The second solution, using Blender’s compositor nodes, requires some basic knowledge of nodes in Blender – but it will allow you to export your image as an ordinary PNG, which can be used in any software.
To start, navigate to the Compositing workspace and enable Use Nodes; then copy the nodes shown below! It’s important to match the settings within each node as well – make sure the Clamp is enabled in the Add node, and check that the Set Alpha node is set to Replace Alpha.
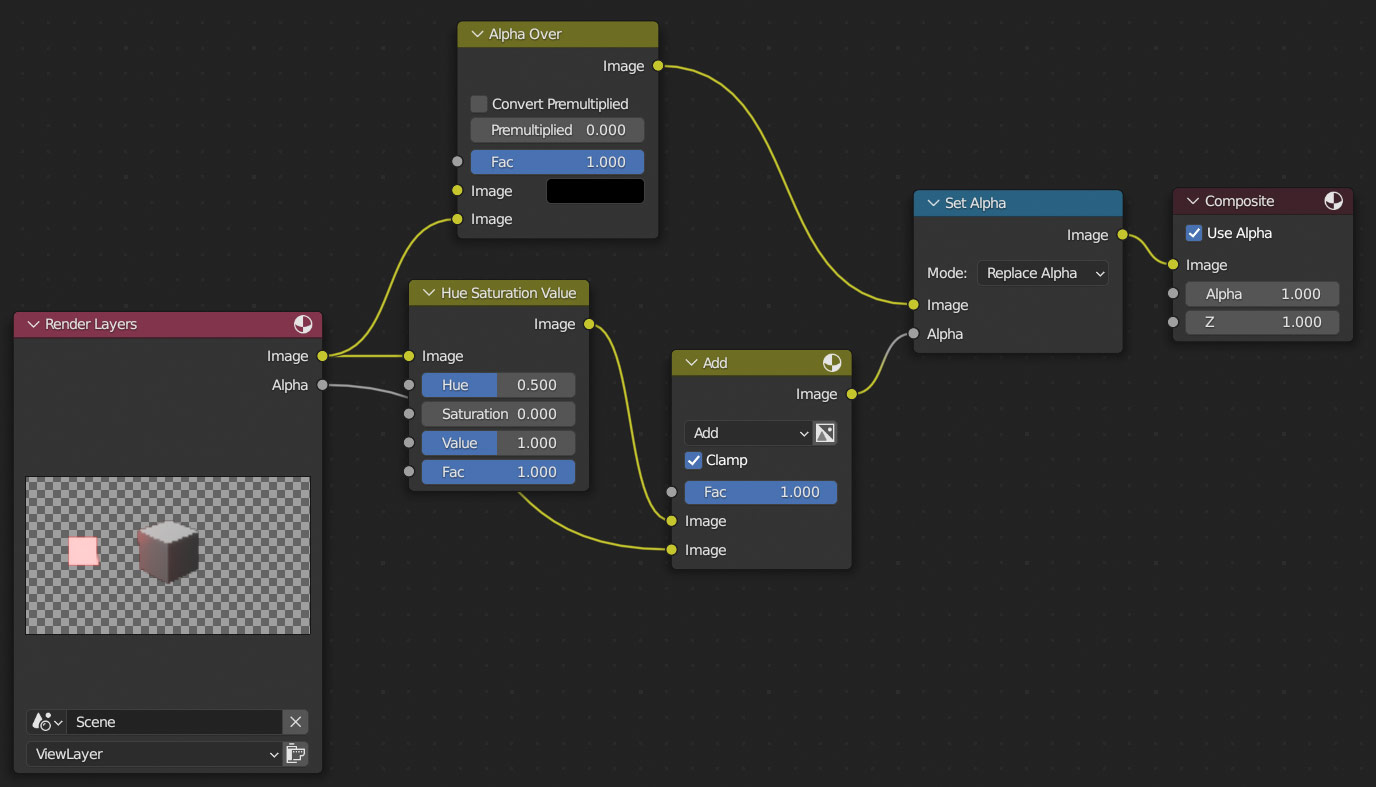
This method works by taking the brightness values from the image and adding them to the pre-existing alpha channel – and although it should work for many situations, it is also not fully accurate due to how color spaces work in Blender. But unfortunately, this is currently all we have to work with!
With that, hopefully I’ve managed to clear up some of the mystery around transparent renders in Blender! Who would have thought such a seemingly simple concept could end up being so complicated? But despite how confusing it may seem at first, once you get used to all the various settings, formats, and different workflows, things will eventually fall into place.
Thanks for reading!

Hello! I’m a self-taught 3D modeler and texture artist with experience on a variety of projects, ranging from planet creation to game props, vehicles, and environments. Although I’ve tried out a bit of everything, my main software is Blender. I’m a big fan of sci-fi and fantasy shows and books like The Expanse and Lord of the Rings, so most of my personal work has a fantasy or sci-fi theme – but I also love to experiment and try new things!


Add a comment