

 Cars
Cars
 Trucks
 Buses
Buses
 Motorcycles
 Military
 Electronics
 Guns
Guns
 Buildings
 Aircraft
 Furniture
 Characters
 Animals
 Spacecraft
 Food
Food
 Ships
Ships
More
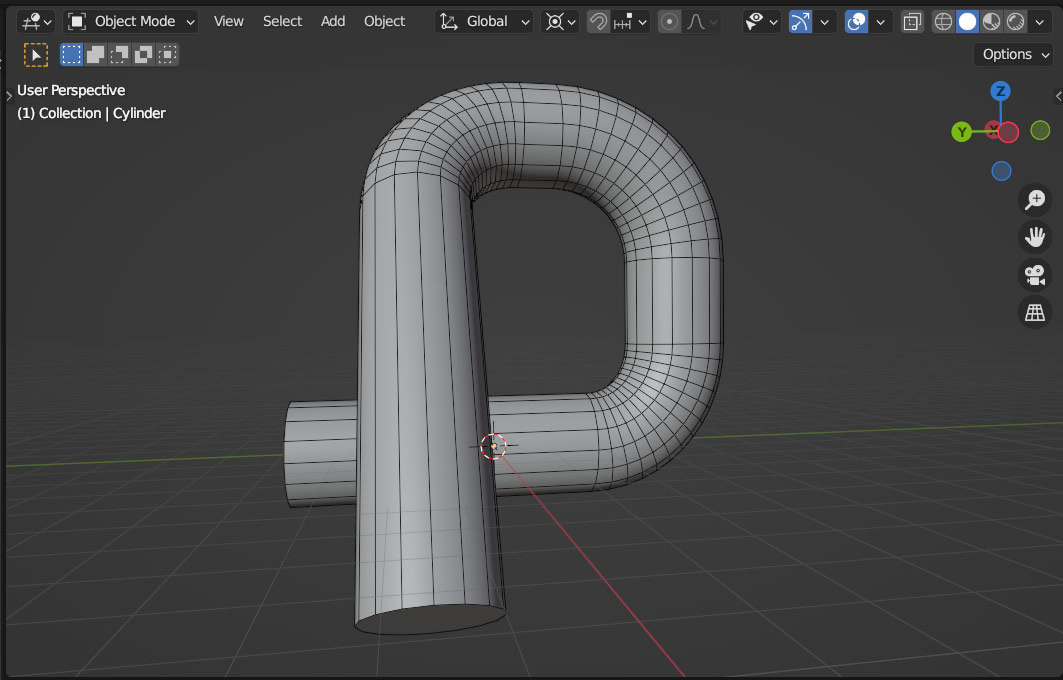
Say you’re working on part of your model in Blender, but suddenly you realize you need it flipped the other direction – or maybe you’ve found the perfect model on BlenderKit, but it’s facing the wrong way. Whatever the reason, often you just need to flip your model. But how?
Luckily for us, Blender has a simple solution: The Mirror Tool.
In almost any situation where an object needs to be flipped or mirrored, Blender’s built-in mirror tool is the way to go. Although it’s not difficult to use, it does come with some nuances that you’ll need to know about; so before you rush back to Blender to try it out, read on!
Unlike many tools in Blender, the mirror tool works both in edit mode and object mode – but both have their quirks, so I will cover methods for both here.
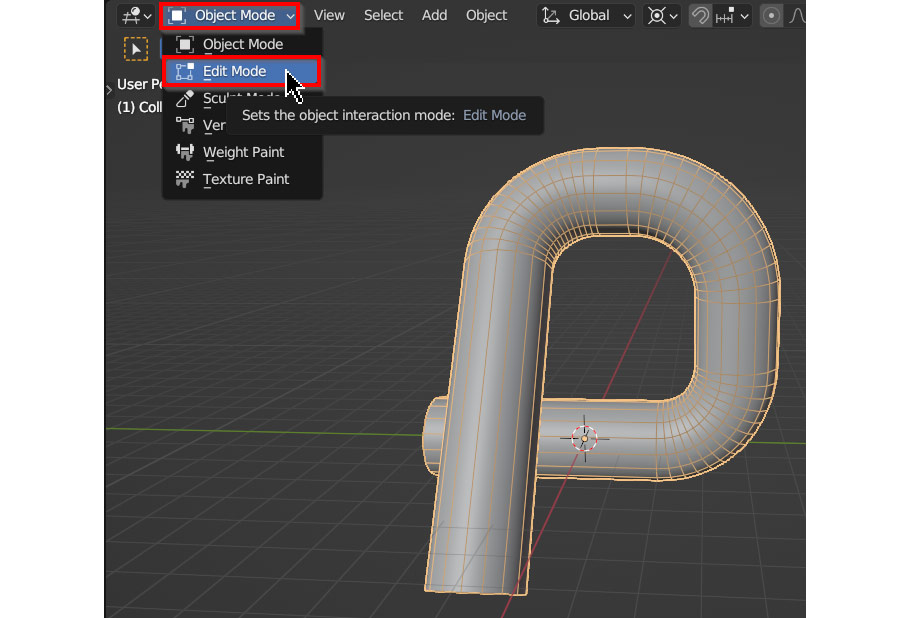
To start, let’s go over using the Mirror tool in edit mode. To switch to edit mode, click the “Interaction Mode” dropdown and select “Edit mode”. Then select the faces you wish to mirror by left clicking, or select all with the A key.
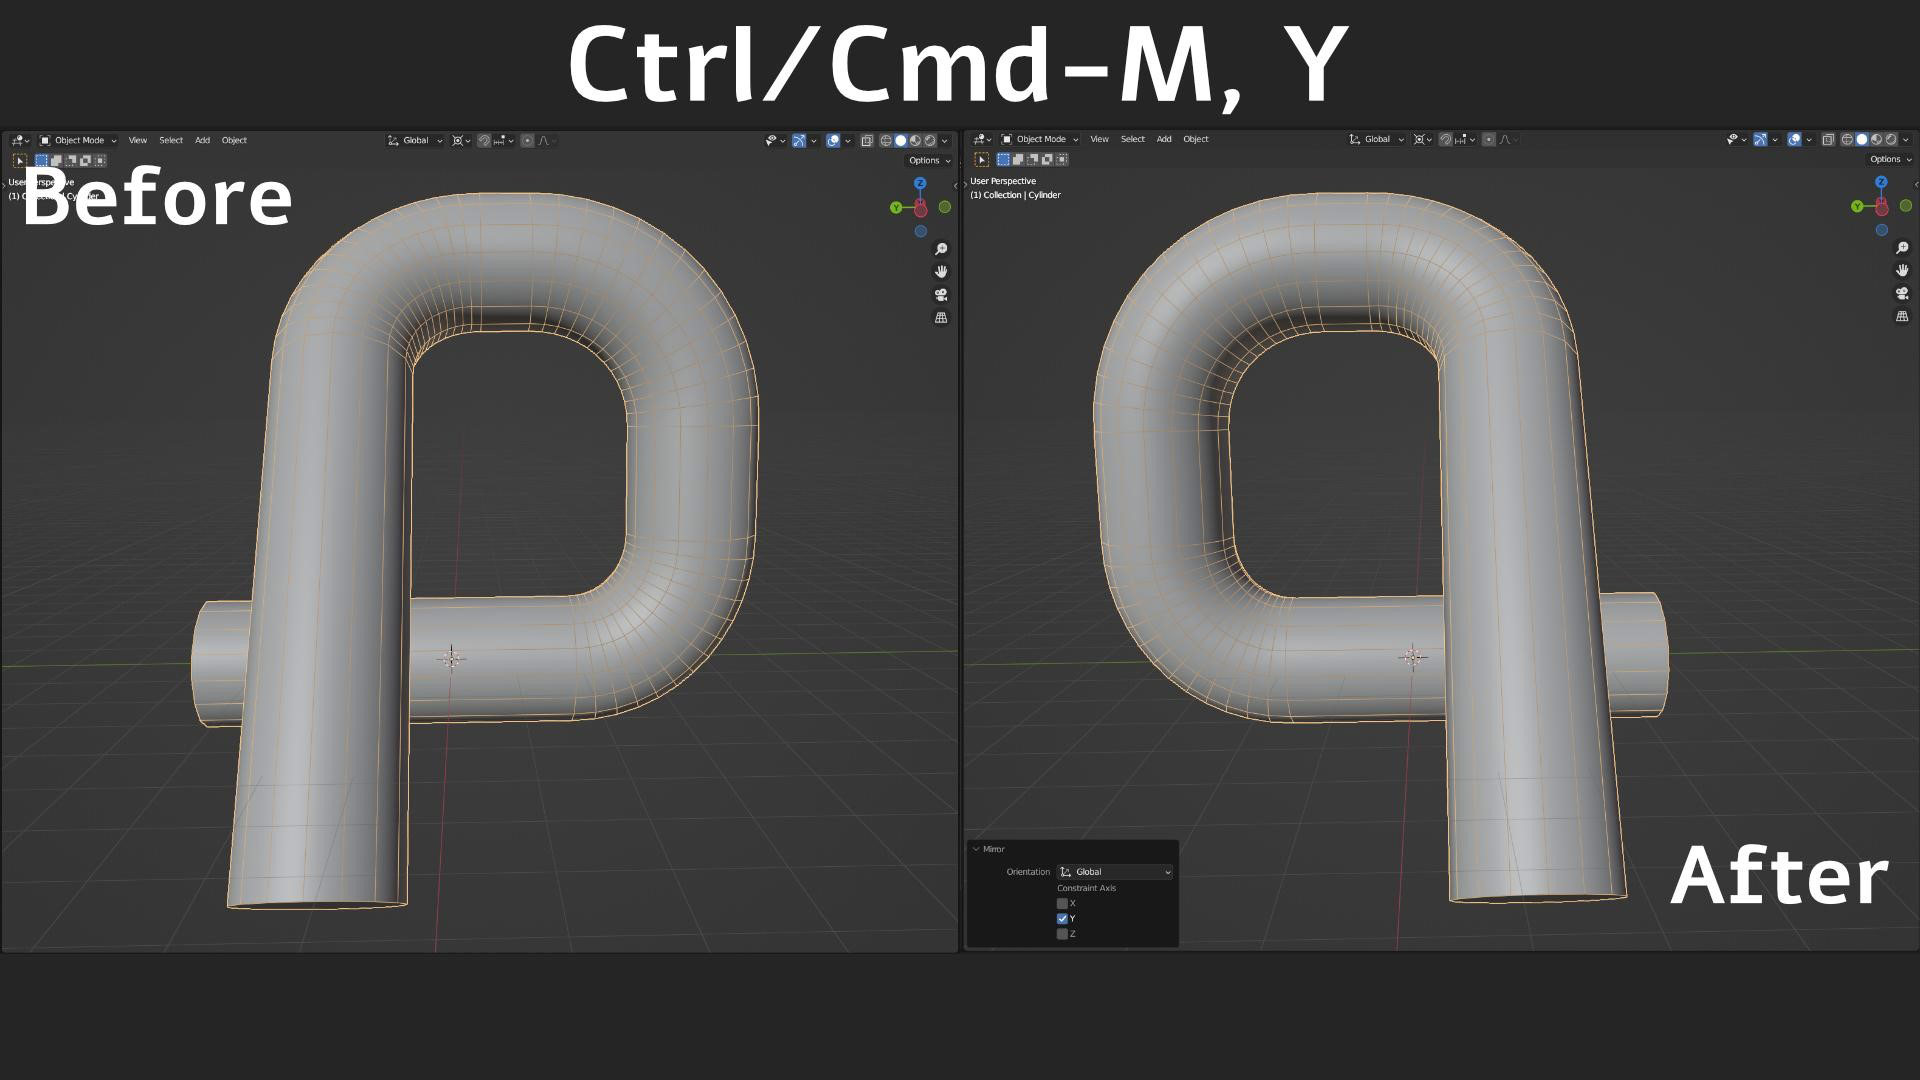
When you’ve selected the faces you want to mirror, simply hit Ctrl-M (or Command-M on a Mac), and then press either X, Y, or Z to choose a world axis to mirror along. Once you press an axis key, your object should flip along that axis – if you’re happy with the result, simply left click or hit the enter key to confirm!
Easy enough, right? But here’s the catch: Whenever you flip an object in this way, you’re also flipping every single face on the object, so faces that were pointing outwards will now be facing inward, essentially turning your model inside out – and although it might not seem like a big deal now, flipped faces like this can cause some very confusing issues later on. To see the problem, turn on the “Face Orientation” overlay in the Overlays dropdown – the front sides of faces will be shaded blue, and the backsides will be shaded red.
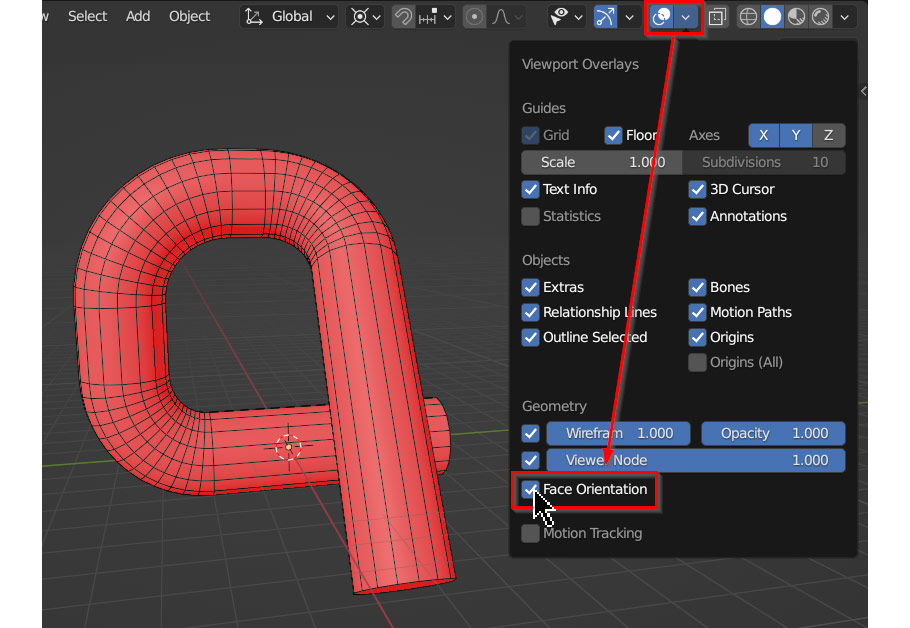
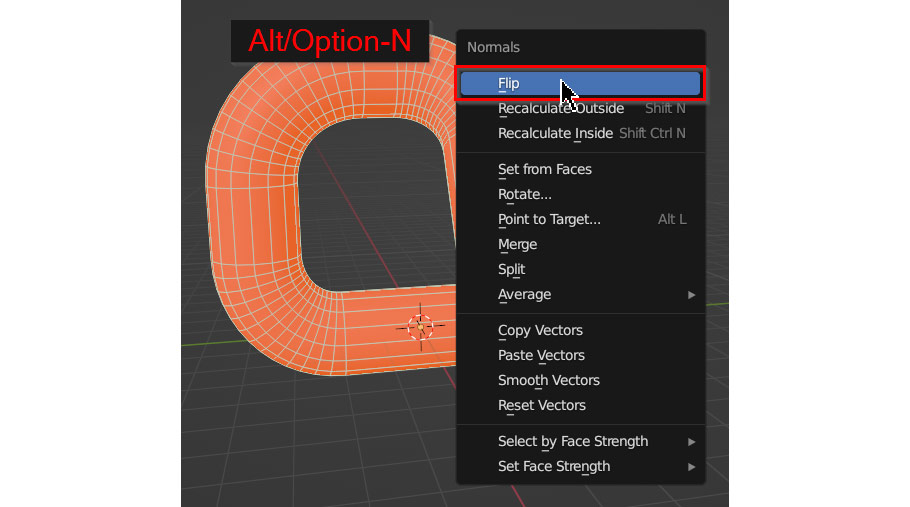
So, that’s a lot of red. How do we fix this issue? Well, luckily there’s an easy solution for this as well. In edit mode again, with your mirrored faces selected, press Alt/Option-N, which will bring up the Normals menu (“normal” basically refers to the orientation of faces). Now select “Flip” – this will flip all the selected faces, and should quickly reset them back to the correct orientation.
Now, as mentioned above, the mirror tool works in both edit mode and object mode; but there are some minor differences. I’ll cover the process for Object Mode here more briefly, as most of the steps are the same!
To start, select the object you wish to mirror, and then like before, hit Ctrl/Cmd-M, and then X, Y, or Z to select an axis. Again, left click or hit enter to confirm.
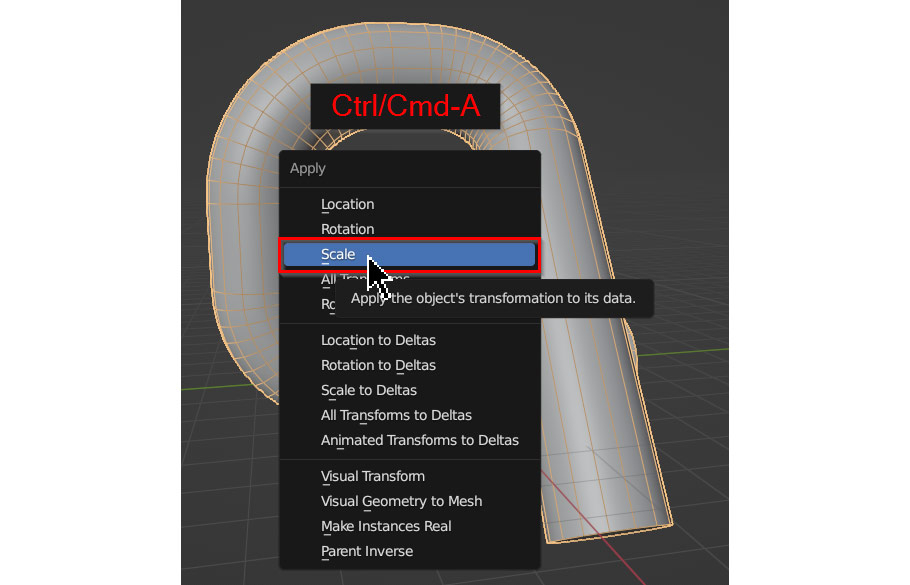
Here’s where the extra step comes in: before flipping the faces, you’ll need to apply scale on your object, which essentially “locks” the mirroring action into the geometry. To do this, with the object still selected, hit Ctrl/Cmd-A, and select “Scale”.
After that, enter into edit mode – from here, all the steps are the same! So, as before, select all the inside out faces, hit Alt/Option-N, and select “Flip”.
So, that just about covers it! As with most things in Blender, there’s a simple solution – with a mildly confusing twist. But once you get used to using these steps, the process for mirroring objects will become second nature, along with everything else you learn in 3D.
Thanks for reading!

Hello! I’m a self-taught 3D modeler and texture artist with experience on a variety of projects, ranging from planet creation to game props, vehicles, and environments. Although I’ve tried out a bit of everything, my main software is Blender. I’m a big fan of sci-fi and fantasy shows and books like The Expanse and Lord of the Rings, so most of my personal work has a fantasy or sci-fi theme – but I also love to experiment and try new things!


Add a comment