

 Coches
 Camiones
 Autobuses
 Motos
Motos
 Militar
 Electrónica
 Armas
Armas
 Edificios
 Avión
Avión
 Muebles
 Personajes
 Animales
 Nave espacial
 Alimentos
 Barcos
Más
At the center of all 3D modeling tasks, there are vertices – and being able to adjust, move, and align these vertices is a critical part of 3D modeling. But when it comes to aligning vertices in Blender, it can be a little confusing. With no obvious tool to get the job done, how do you do it?
Well, there are actually a couple different ways to align vertices that you might use, depending on your situation. In this article, we’ll cover every option you have for aligning vertices, as well as how to even out vertices and how to align vertices to a circle!
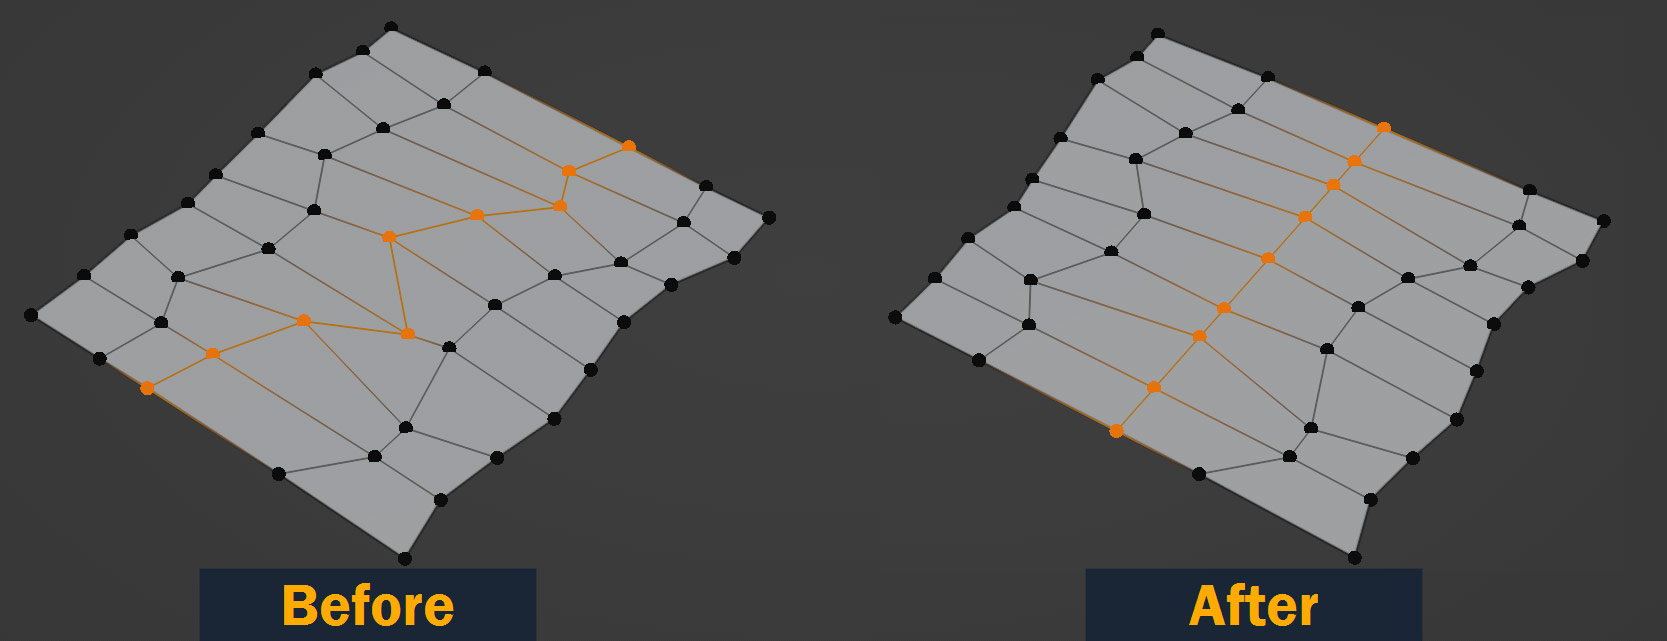
First up, the most basic way to align vertices – along an axis.
First let’s cover the simplest way to align vertices in Blender. Aligning vertices along an axis is useful on all sorts of 3D models, especially hard surface – in any situation where you need a straight line of vertices along the X, Y, or Z axis, this is what you’ll use!
As an example object, I’m using this plane object with uneven vertices:
To align vertices along an axis, you don’t actually need to learn any new tools or keyboard shortcuts – for this, we’ll just be using the familiar Scale tool in a new way.
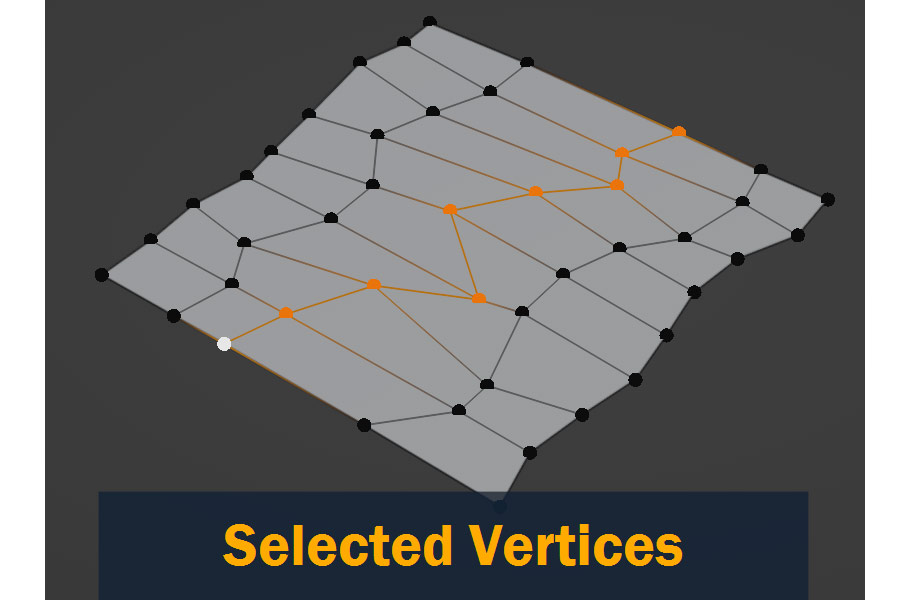
So, let’s get started! To begin with, select the line of vertices that you want to straighten, either by Shift – Clicking each of them in Vertex Select Mode, or select a row of vertices by selecting the first in the line and then Ctrl/Cmd – Clicking the final one to select all the vertices in between.
Now, before you align your vertices, you need to make sure they’re already approximately in the final line you want them in – so if they’re not, you may need to rotate the selection of vertices or even adjust them individually to get them close to where you want them before you straighten them. If you’re not sure, don’t worry too much. If you don’t get the result you want, you can always press Ctrl/Cmd – Z to go back and try again!
Now, let’s straighten out those vertices! With the vertices selected, press S, Shift – X/Y/Z, and then type 0 and press Enter to confirm. This should align the vertices along the axis you select.
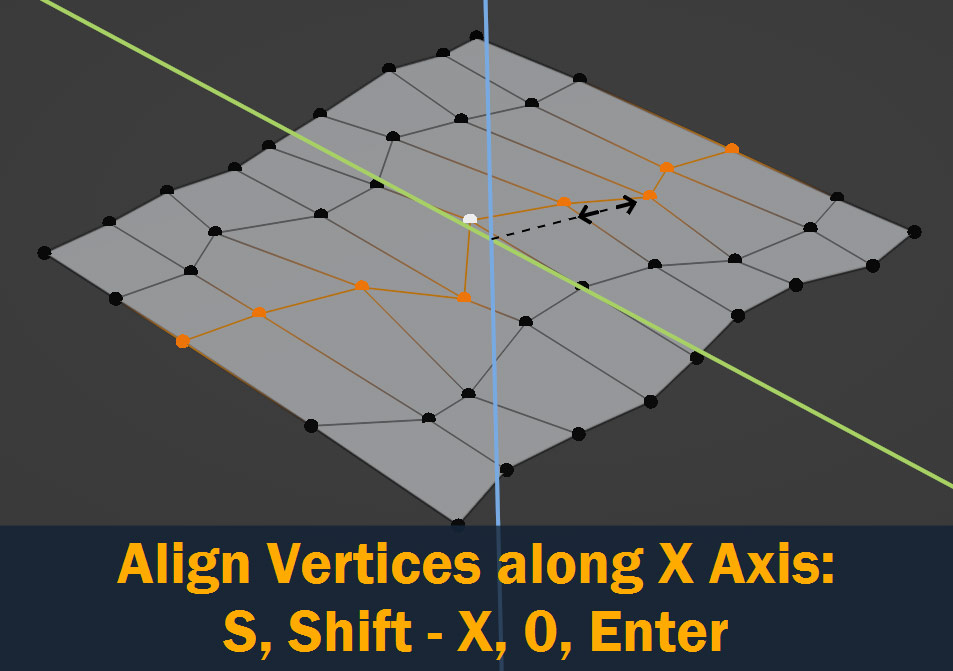
What you’re actually doing here is activating the Scale tool, Locking the X, Y, or Z axes to prevent scaling in that direction, and scaling all the other axes to 0. If you’re confused, try manually moving the mouse to scale instead of typing 0 – this might give you a better idea of what’s going on!
So, we’ve covered aligning vertices along a world axis – great. But what about all the situations where we need vertices aligned in a direction that’s not along an axis?
This is actually very doable as well – we just need to enable the LoopTools addon, which is included with Blender by default!
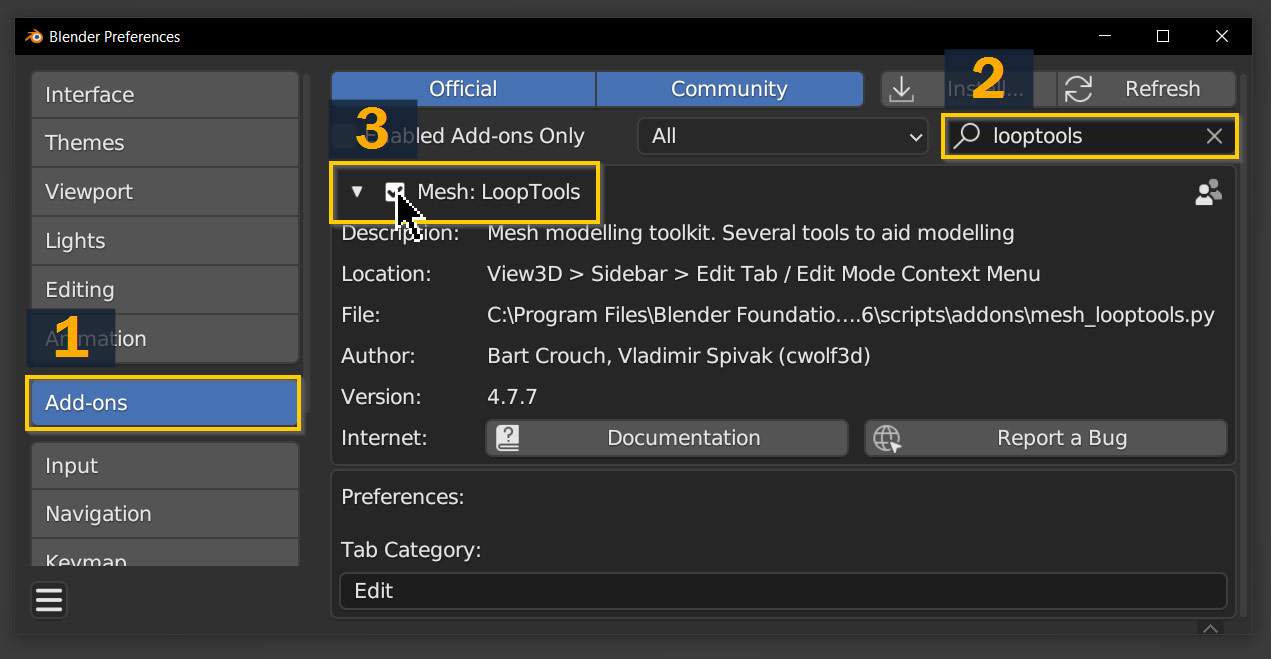
To install LoopTools for free, go to Edit > Preferences to open the preferences window, and click on the Add-ons tab; next, click on the search bar and search for LoopTools. Once it shows up, activate it using the checkbox – now you’re ready to go.
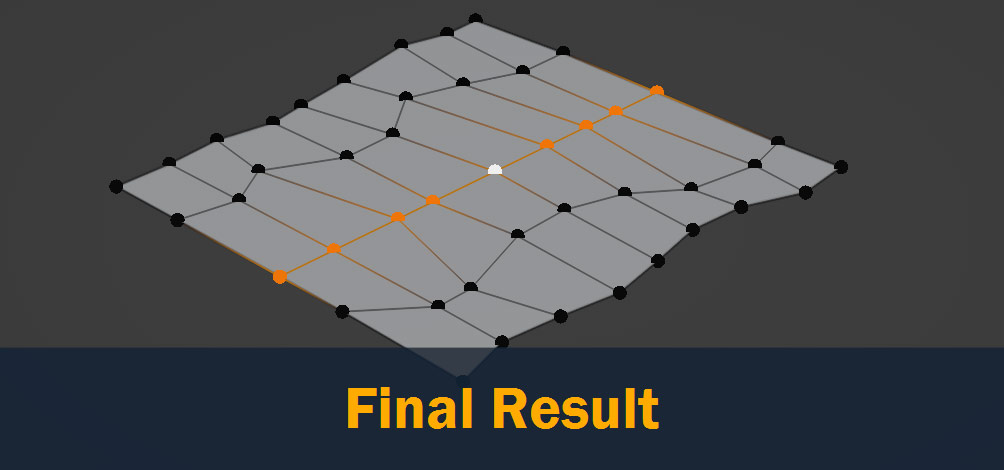
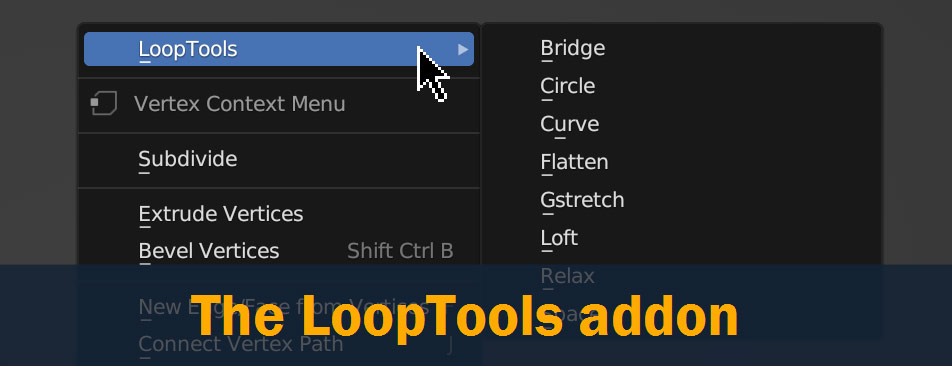
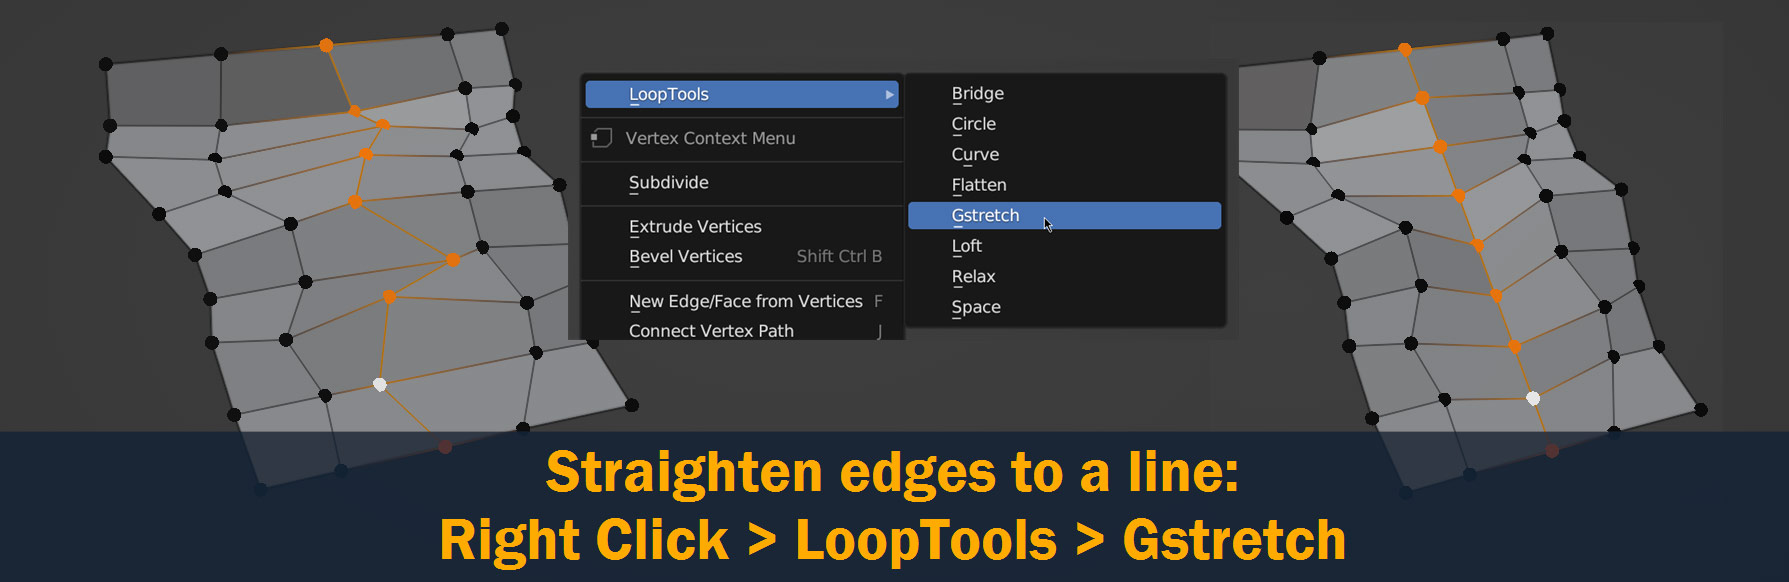
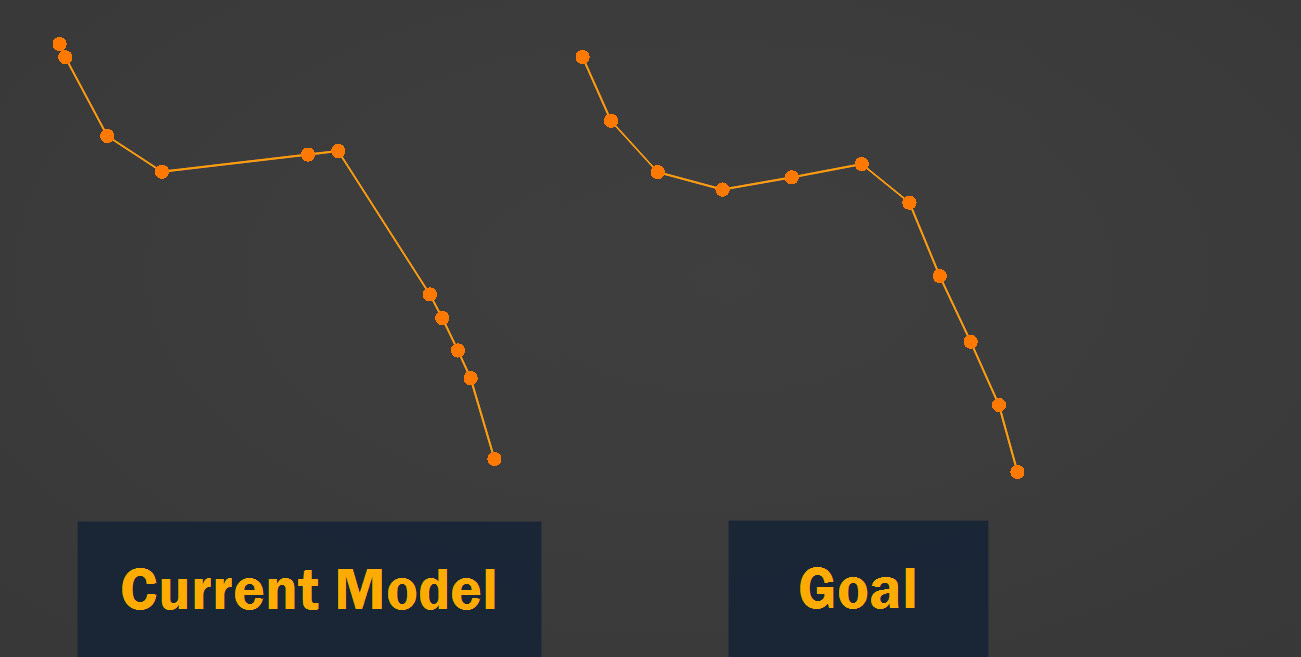
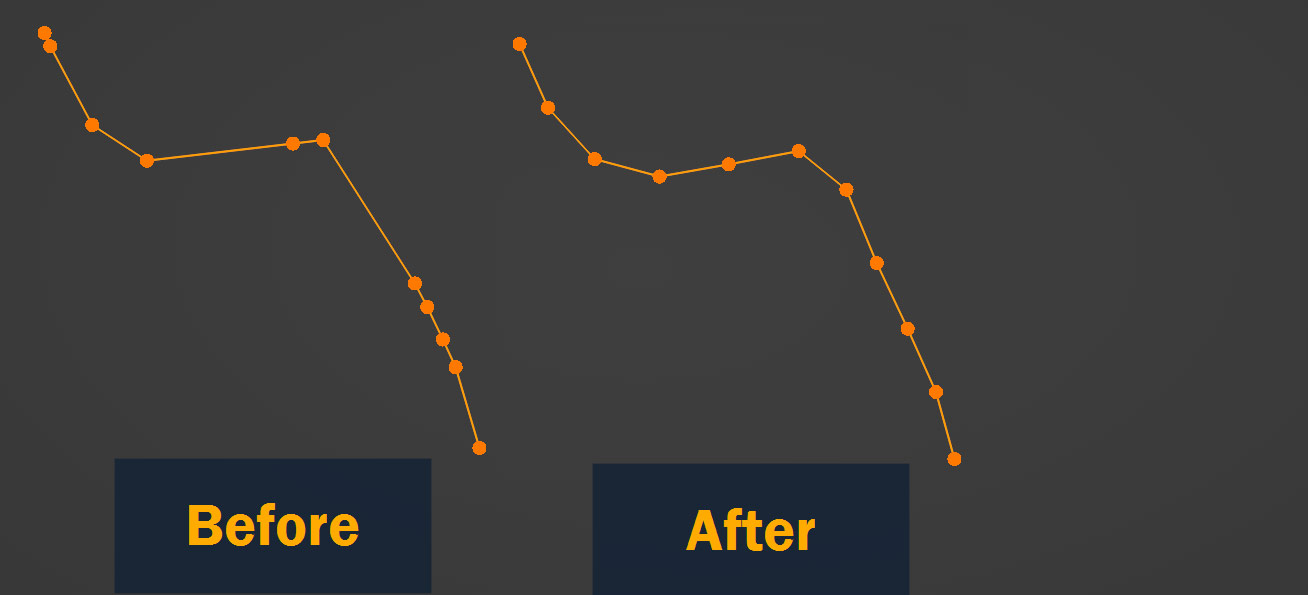
Let’s get straightening! To start with, Select a row of vertices just like we did in the previous section. Next, Right Click, go to the LoopTools, and select Gstretch. As you’ll see, this will stretch out the vertices into a straight line between the first and last points!
By default, Gstretch will also spread out the vertices evenly along the line. Sometimes this is helpful, but sometimes it isn’t – so if you want to disable this feature, go to the Gstretch pop-up and choose Spread instead of Spread Evenly. This will preserve the original distribution of the vertices.

With that, we’ve covered how to align vertices – now, let’s look at a couple other ways to get vertices where we want them!
So, aligning vertices is a great tool to have available. But what if we just want to even out the positions of a row of vertices without actually straightening them?
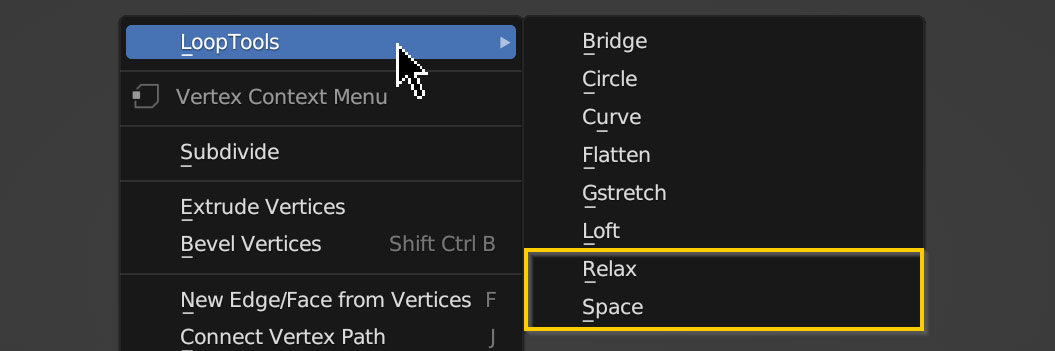
The LoopTools addon actually helps us out here, too! Two tools in particular are good for evening out rows of vertices: Relax, and Space. But first, make sure you’ve got the looptools addon installed – refer to the previous section for instructions on how to enable it (for free).
With LoopTools enabled, you’ll be able to access the tools by Right Clicking on a row of selected vertices, going to LoopTools, and selecting either Relax or Space.
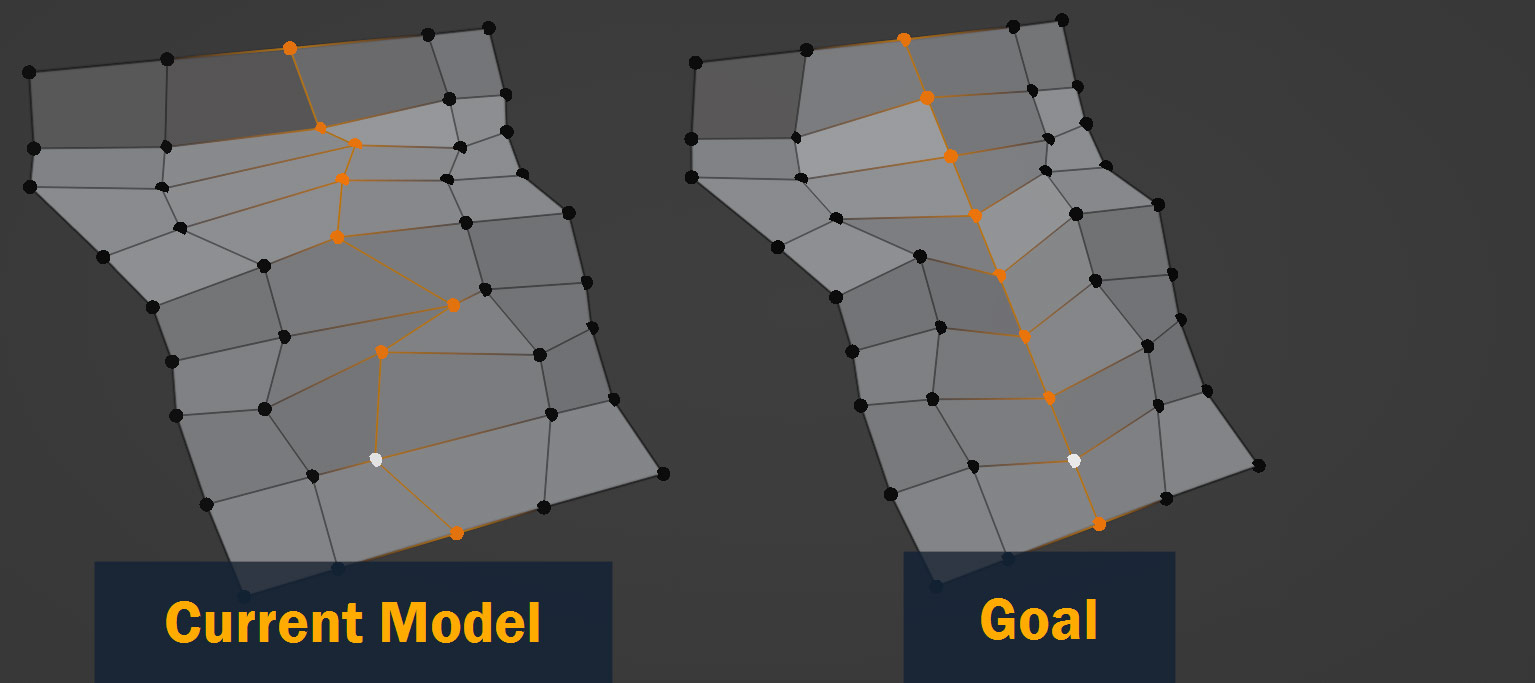
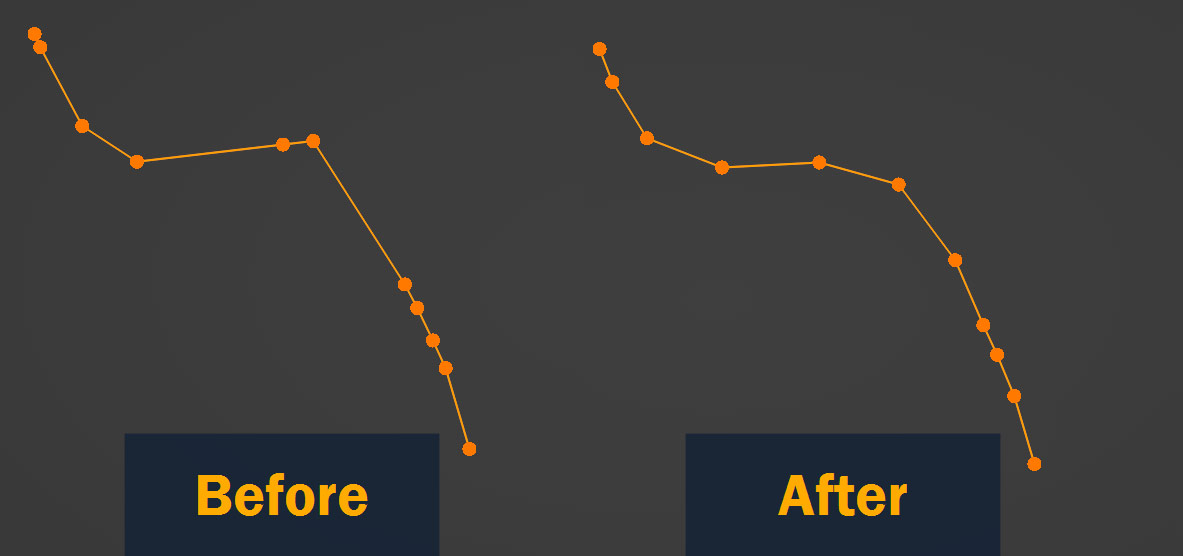
The Relax tool essentially smooths out the selected vertices and evens out their positions, as shown. You can adjust how strong this effect is in the Relax pop-up – more iterations will have a smoother, more curve-like result!
On the other hand, the Space tool doesn’t smooth out the vertices – it just spaces out their positions along the row, as shown:
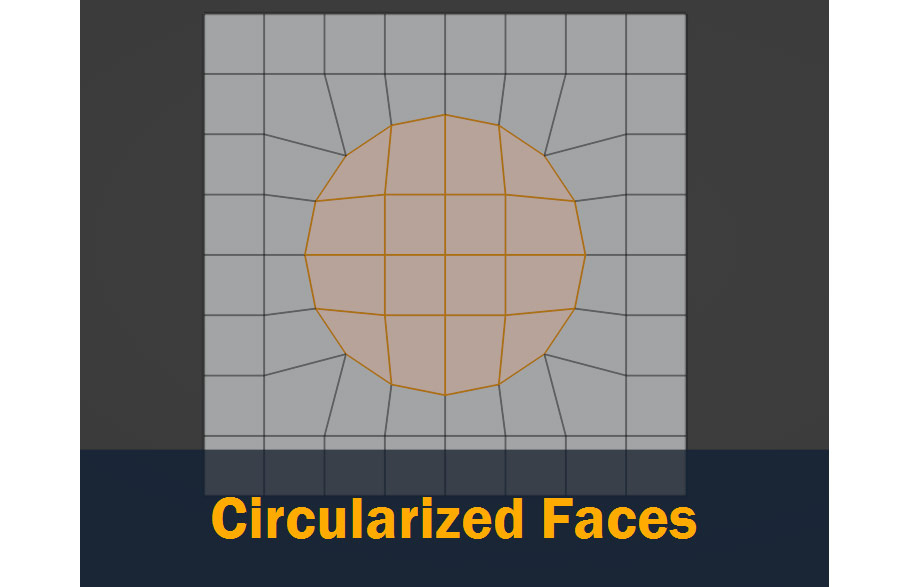
Before I finish up the article, let’s look at one last very useful tool that LoopTools gives us: the Circularize tool. This allows us to quickly shape selected vertices, edges, or faces into a circle, and it’s very useful for many different kinds of modeling – so let’s take a look at how to use it!
Again, this requires the LoopTools addon, so if you don’t have it installed, refer to the How to Align Vertices Along a Straight Line section above for instructions!
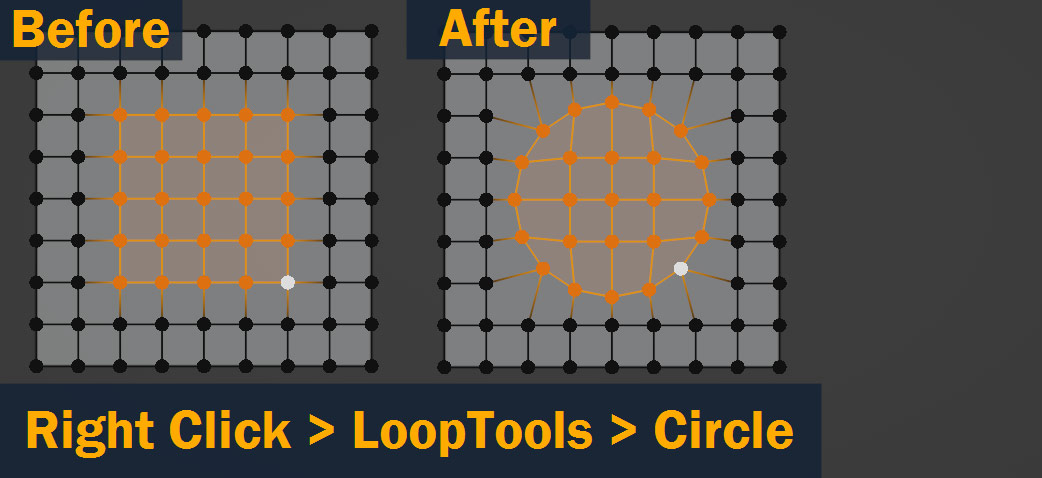
To start with, select an area of vertices, edges or faces. For best results, you’ll need to make a selection that’s roughly the shape of the circle you want to create – for example, selecting a square of faces will usually work fine, but selecting an elongated line won’t.
Next, Right Click, go to LoopTools, and select Circle to circularize the selected components!
So, that’s how to align vertices in Blender!
Before we finish up, let’s go over the steps we’ve covered here one last time:
That’s it!
I hope you found this article helpful – if you have any thoughts about the subjects I’ve covered here, feel free to leave them in the comments.
Best of luck on all your future projects, and thanks for reading!

Hello! I’m a self-taught 3D modeler and texture artist with experience on a variety of projects, ranging from planet creation to game props, vehicles, and environments. Although I’ve tried out a bit of everything, my main software is Blender. I’m a big fan of sci-fi and fantasy shows and books like The Expanse and Lord of the Rings, so most of my personal work has a fantasy or sci-fi theme – but I also love to experiment and try new things!


Thanks Taliesin for this wonderfully clear article!
I’ve been using Blender for many years but never realised how useful the Looptools -> Gstretch feature was. I was messing around with trying to align vertices using a custom Transform Orientation based on the surrounding Faces and even tried Machin3Tools (which was a bit steep for the purpose) but Gstretch is just perfect for this case.