

 Voitures
 Camions
 Autobus
 Motos
Motos
 Militaire
 Électronique
 Armes
Armes
 Bâtiments
 Avion
Avion
 Meubles
 Personnages
 Animaux
 Véhicule spatial
 Aliments
 Navires
Plus
If you want to pose or animate characters, creatures, or machines in Blender, getting your mesh properly parented to an Armature is an essential step. But this can be a difficult process, especially if you have to manually connect the vertices on your model to every bone of your armature!
Luckily, Blender gives us the option to use Automatic Weights to speed up the process. In this article we’re going to cover exactly how to set up automatic weights, how to edit weights, and finally how to solve some common errors that might show up during the process in the Troubleshooting section.
Let’s get started.
So, you’ve got a 3D model, and you’ve got an armature to control it – how do you link the two of them together?
Setting up automatic weights in Blender is actually a fairly easy process. Let’s go over it step by step.
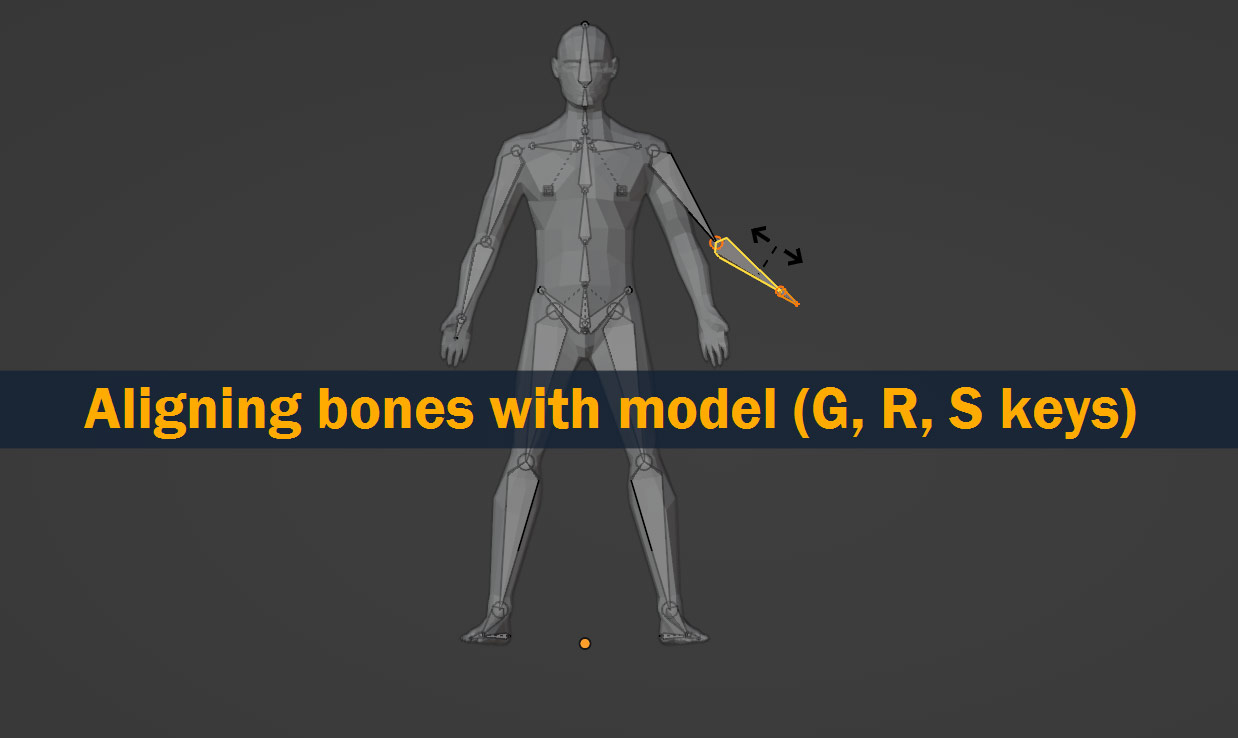
Before we link our armature with our model, we have to make sure that the positions of the bones match up with the parts of our mesh. If you’ve created a custom rig, you’ve probably already taken this into consideration – but if you’re using a pre-made rig or model, you might need to make some adjustments!
To adjust your rig to fit your model, you’ll need to go into Edit Mode and make some changes – to do this, press Tab on your armature, and use G, R, and S to move, rotate, and scale the bones to match your model. To get everything perfectly aligned, it’s a good idea to switch between front, side, and top views frequently by pressing Numpad 1, Numpad 3, and Numpad 7.
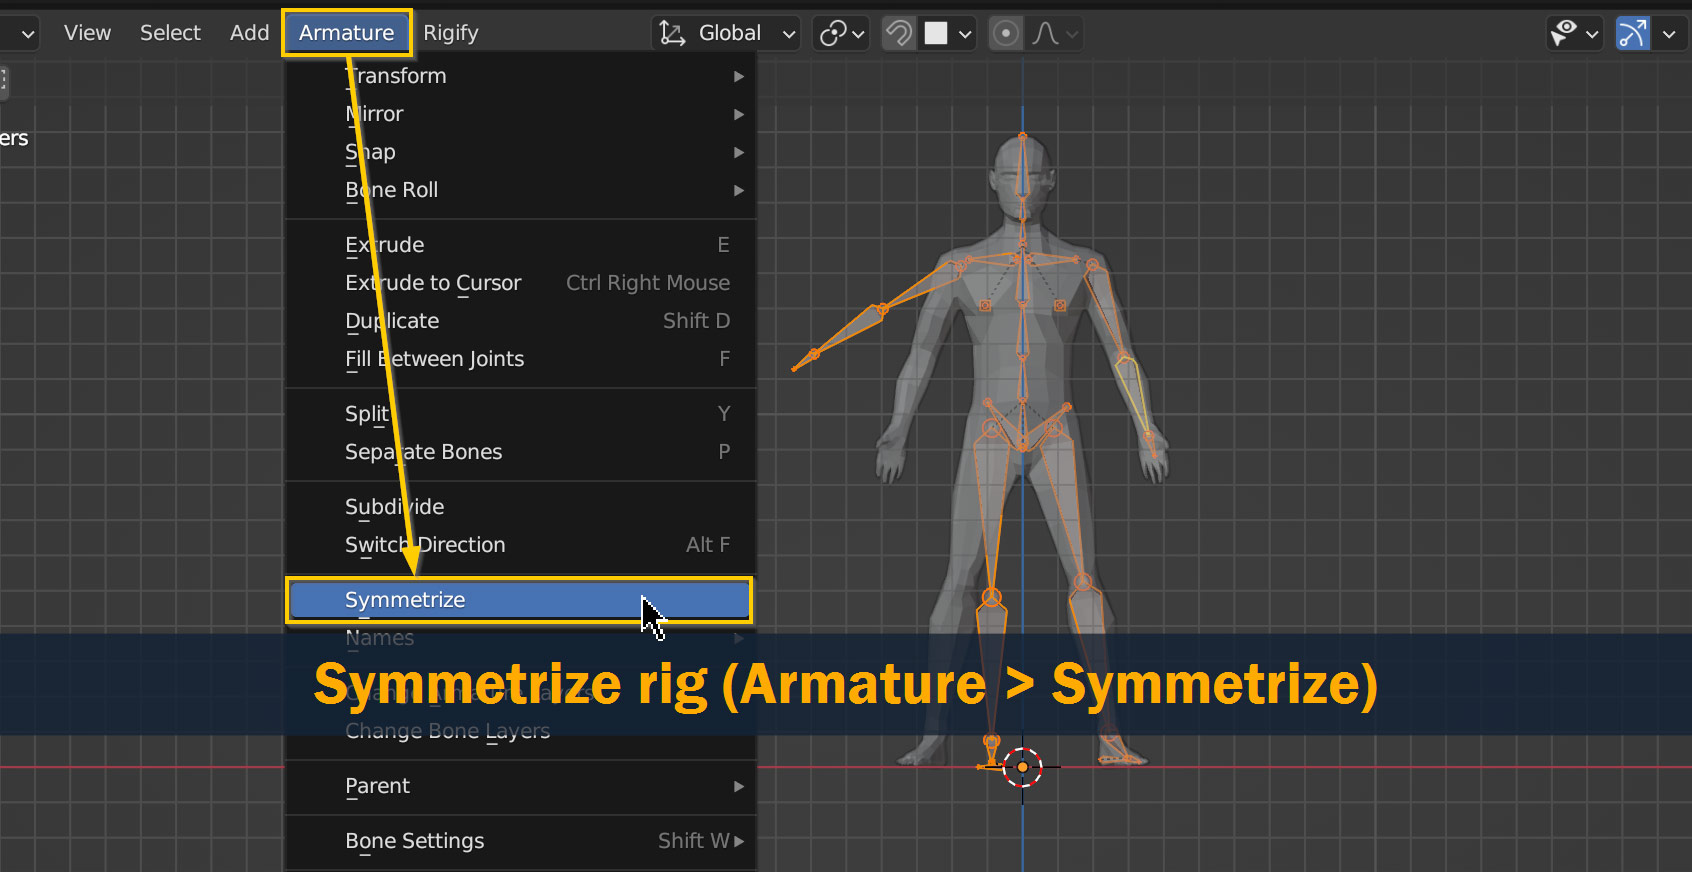
Edit one side of your armature first – once you’re done, you can symmetrize it by going to Armature > Symmetrize in the topbar. When you’re done, press Tab again to go back to Object Mode.
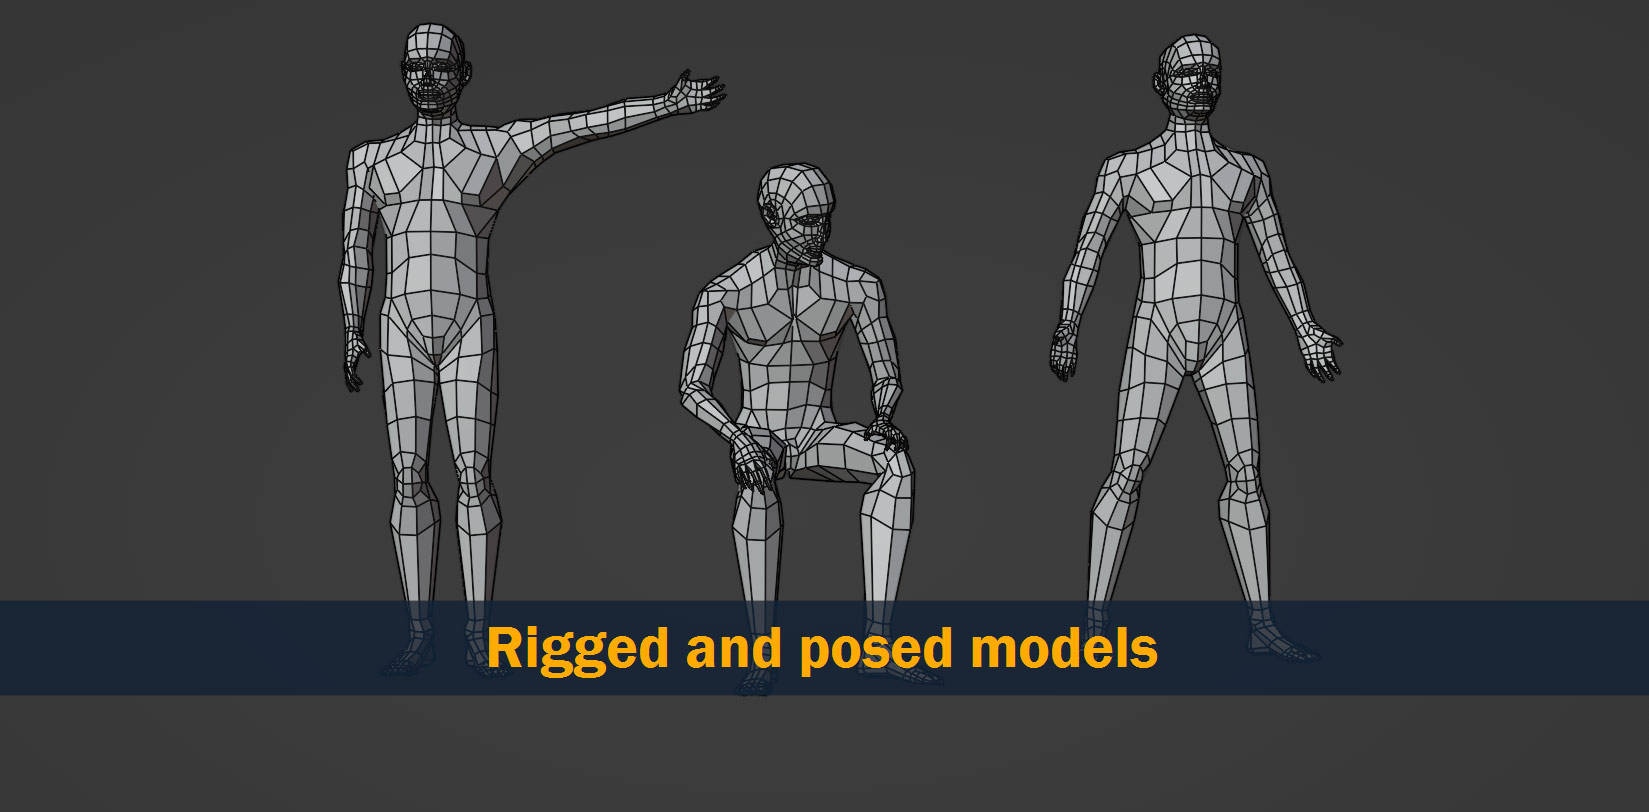
In the end, your model rig should be positioned inside your model with all the bones matched up to the parts of your model – it helps to think of the armature as a skeleton!
Tip: If you’re having trouble seeing your rig when it’s inside your model, try pressing Alt/Option – Z to turn on X-Ray Mode.
We’re almost ready to parent the model to the rig – but first, it’s a good idea to do some checks on your model and rig, to make sure the parenting process goes smoothly.
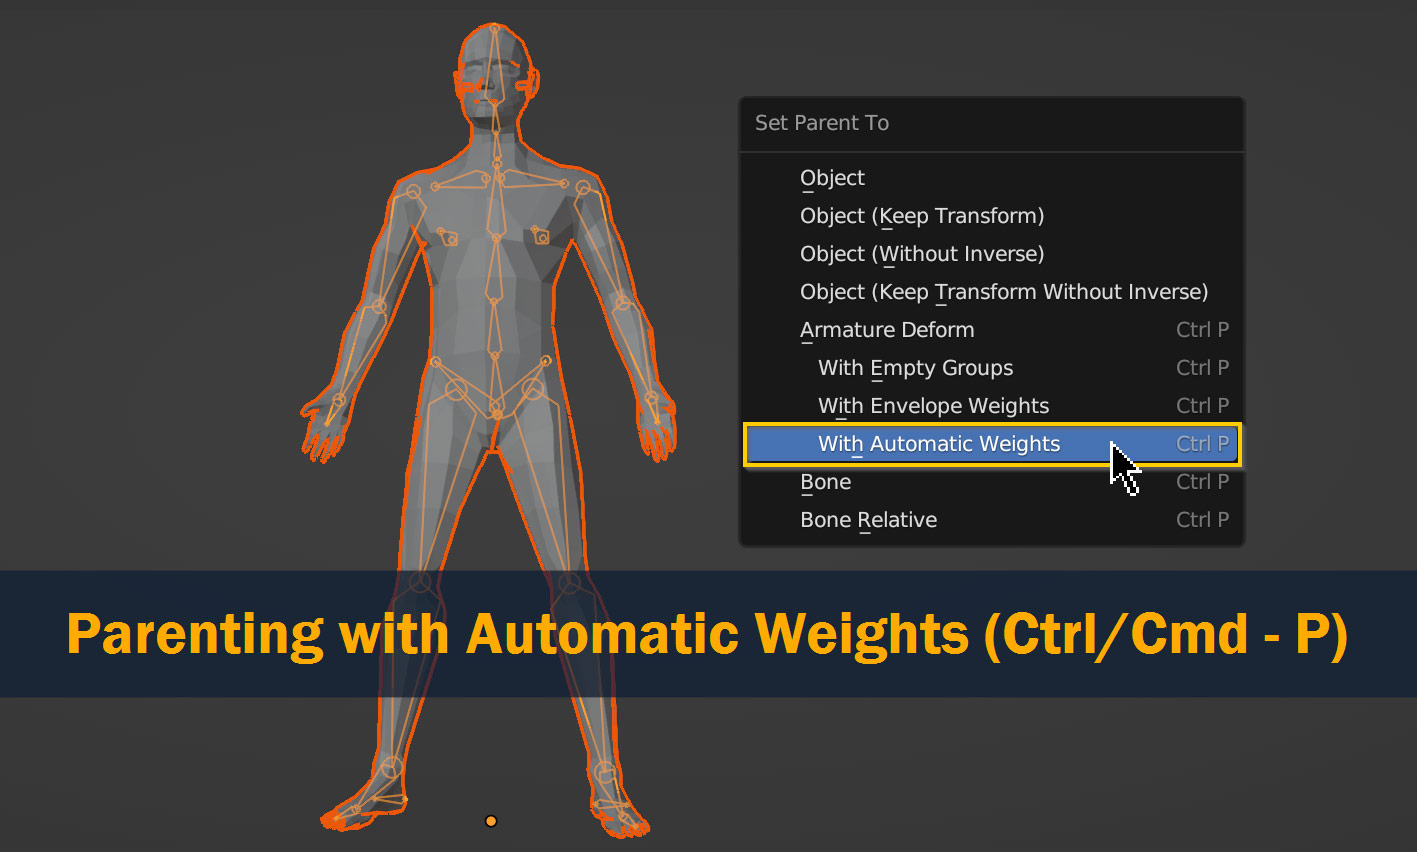
Time to connect your model to your armature!
In Object Mode, select your model first, then select your armature; press Ctrl/Cmd – P to open the parenting menu, and select With Automatic Weights.
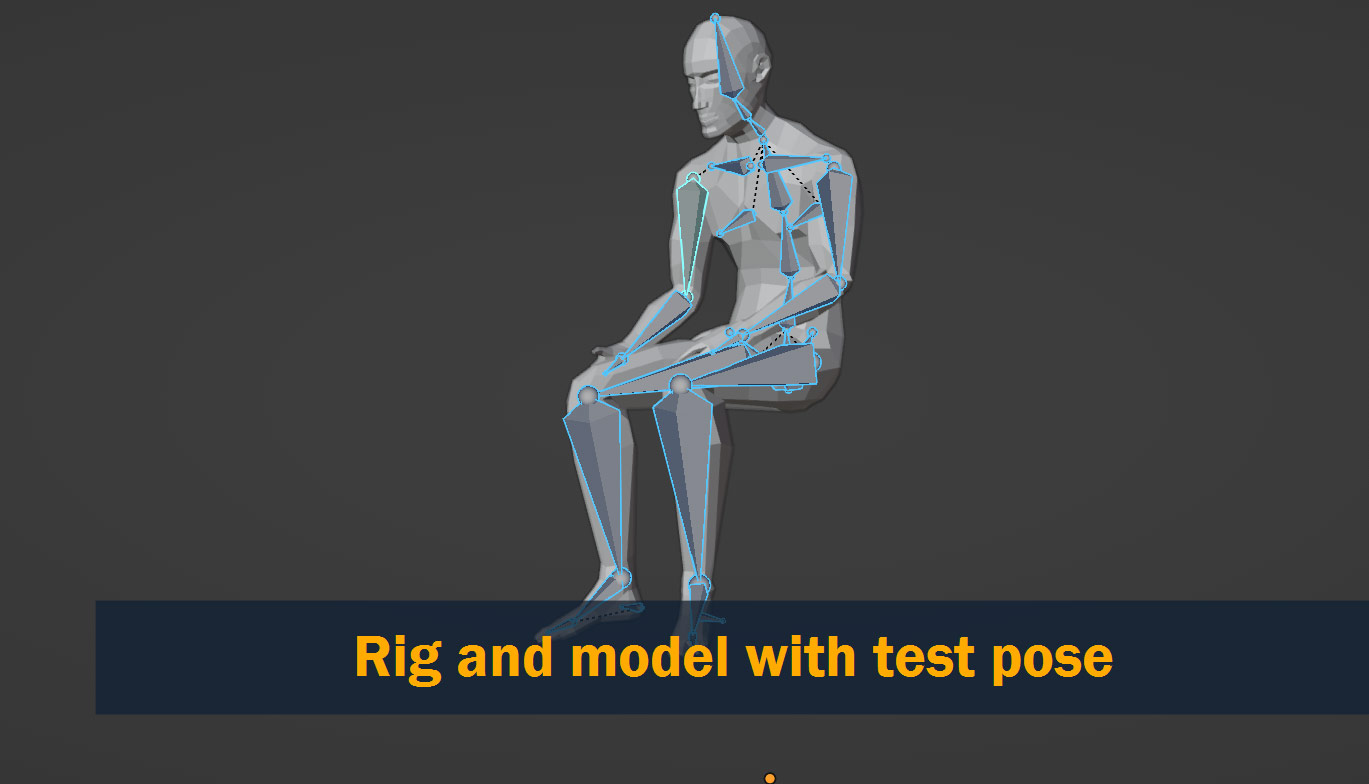
Your model should now be attached to your rig! To test it out, try entering Pose Mode by pressing Ctrl/Cmd – Tab and rotating a bone on your armature – if everything worked properly, your mesh should now move in sync with the bones on your armature.
On the other hand, if things aren’t working as expected, check the Troubleshooting section of this article for ideas. Rigging can be a tricky subject, but for most issues there’s a simple solution.
Tip: If you want to reset your rig after posing it, select all the bones in pose mode (A), right click, and press Clear User Transforms.
If you’ve parented your model to your armature using Automatic Weights, every vertex on your model should now be assigned to a bone on your rig, with a certain weight that determines how much its movement is affected.
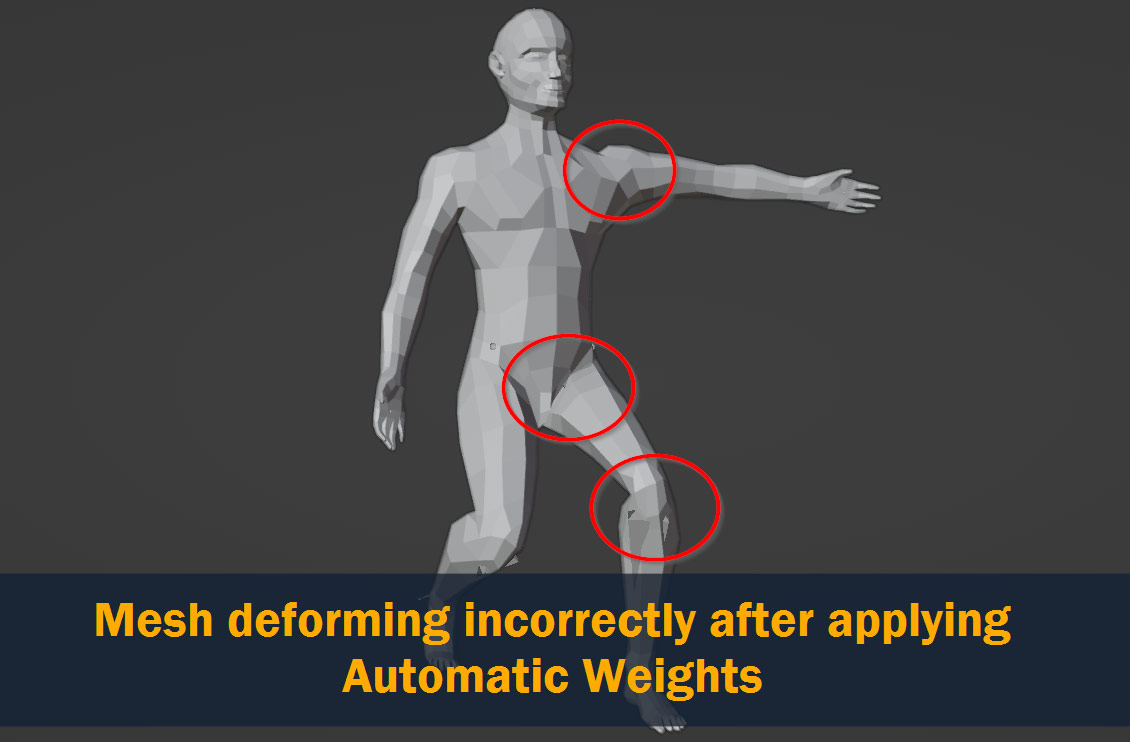
But if you’ve tried moving your armature around and setting poses, you might notice that the automatic weight assignments aren’t quite right. This is actually normal – although Automatic Weights takes a lot of effort out of rigging, it’s not perfect, and usually you still need to make some manual adjustments to get things working smoothly!
So, how do we start editing the weights?
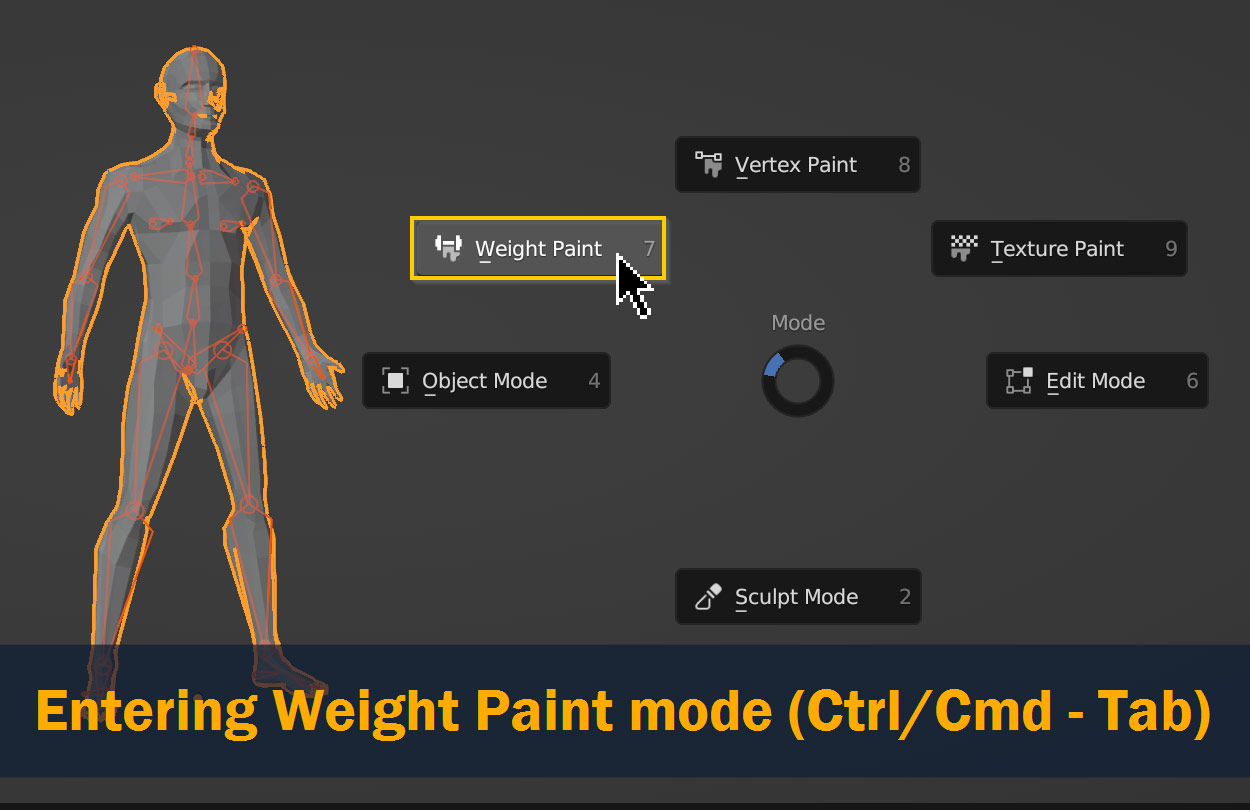
Start by Selecting your armature, and then Shift – Selecting your 3D model. Now, enter into Weight Paint mode by pressing Ctrl/Cmd – Tab and selecting Weight Paint.
To start adjusting the vertex weights on individual bones, Ctrl/Cmd – Click the bones in the viewport to select their respective vertex groups.
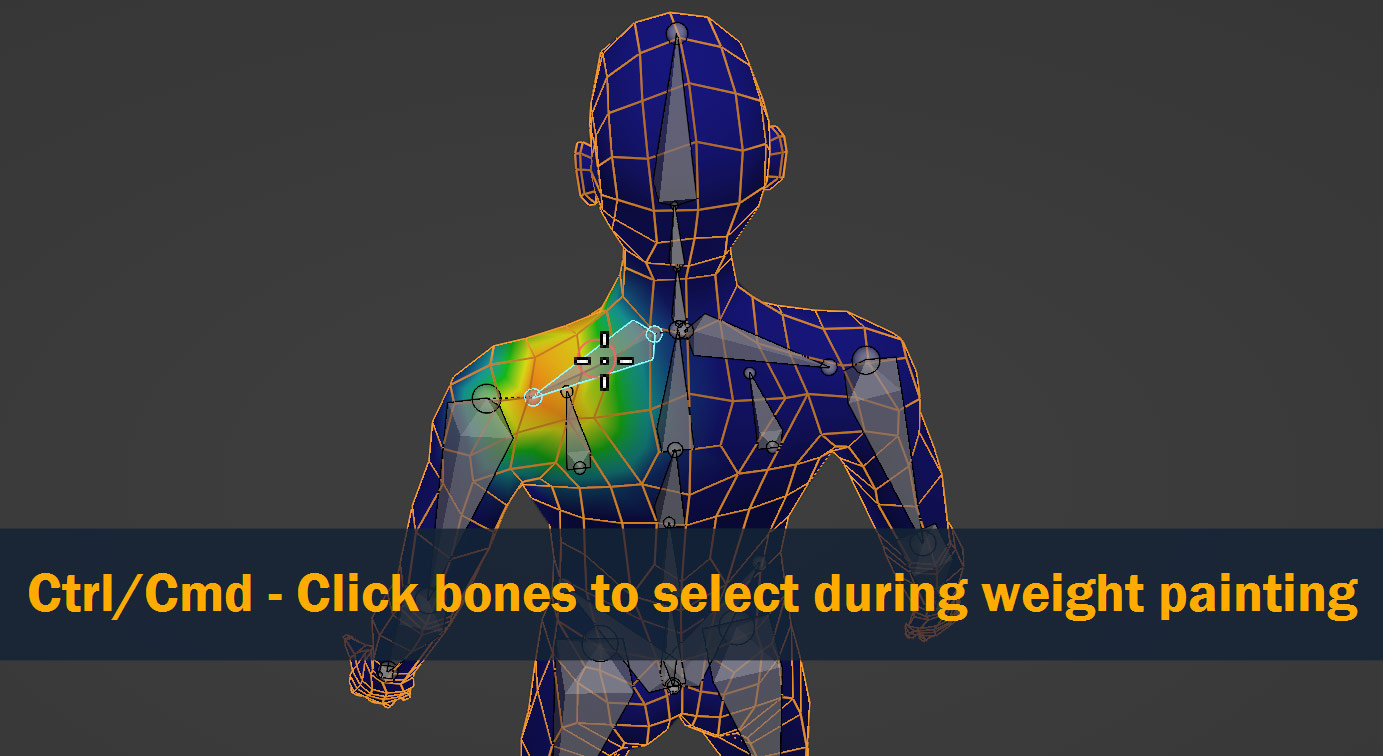
To weight paint, click or click and drag on the vertices of your model. You can change the Weight, Radius, and Strength in the topbar menu – higher weights on vertices means they will be affected more by the selected bone/vertex group, and lower weights means they will be affected less – so if certain vertices are being affected by a bone when they shouldn’t be, you can set the Weight to 0 and paint on them.
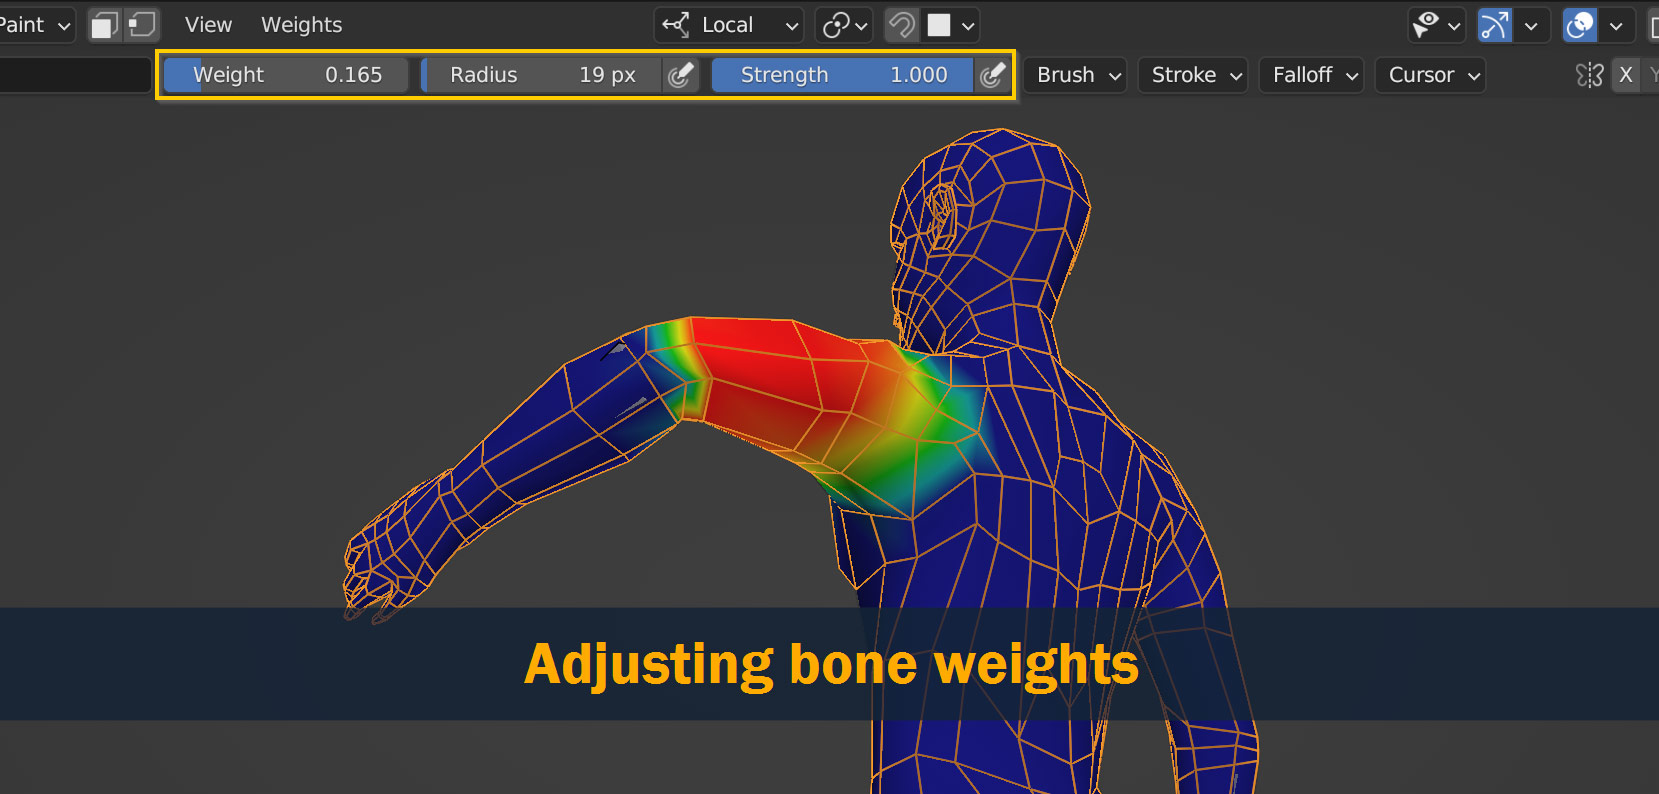
As you adjust the weight paint, try out different poses on your rig to see how your changes are affecting the result – you can even adjust the weight painting while your model is posed, as seen above!
Tip: You can make multiple instances of your model and rig (Alt/option – D) and assign different poses to them – as you edit the weight painting, the other instances will sync with the version you’re editing, and you’ll be able to see how it affects the models in the different positions.
In 3D art, things don’t always go according to plan – and although rigging using Automatic Weights is a simple process on the surface, there are lots of things that can go wrong or mess up your result.
In this troubleshooting section, we’ll take a look at a few common issues that can come up while rigging, and see how to fix them.
Sometimes, when you click With Automatic Weights, you get the error message “Bone Heat Weighting: failed to find solution for one or more bones”.

This means that Blender couldn’t figure out automatic weights for your model, and it’s a very common problem – but luckily, there are a couple different possible solutions that can usually help to fix it!
Try out these solutions in this order:
If your mesh is changing shape or moving when you parent it to your armature with automatic weights, it’s probably because you’ve previously tweaked your armature in Pose Mode. When you edit the pose in Pose Mode and parent your mesh afterwards, your mesh will automatically parent to the original position of your rig and then be transformed to whatever pose you’ve assigned in Pose Mode.
To make sure this doesn’t happen, make sure that you only make changes to your model in Edit Mode and not Pose Mode – and if you’ve previously changed the pose in Pose Mode, you can reset it by going back into Pose Mode, selecting all the bones (A), right clicking, and selecting Clear User Transforms. This should reset all the bones in the armature to their default positions.
If your model is changing size when you parent with automatic weights, it’s probably the same issue as the previous troubleshooting item – try resetting the pose by going into Pose Mode, selecting all the bones (A), right clicking, and selecting Clear User Transforms. This should reset the scale of all the bones – try parenting again and see if the problem goes away!
Note: If your armature is now the wrong size after resetting the pose, try scaling it up either in Edit Mode or in Object Mode.
Sometimes when using automatic weights, you’ll find Blender might miss groups vertices or parent vertices to the wrong bones. Unfortunately, there isn’t a simple fix for this – Automatic Weights isn’t perfect, and sometimes it just connects the vertices to the wrong bones.
To solve this issue, you’ll have to manually adjust the bone weights on your model – to see how to do this, refer to the How to Edit Weights in Blender section above.
Sometimes, editing weights isn’t enough to get a totally clean result – it might also be necessary to adjust your armature in edit mode, to do things like better align bones with parts of your mesh, and add bones in places that need more support. The changes needed will depend a lot on your specific model and rig!
Rigging and weight painting in 3D can be a tough subject – but hopefully this article was able to help clear up some confusion around the subject!
Before we finish up, let’s review. Once again, here are the basic steps we covered above:
That’s it!
If you have any ideas or thoughts about rigging and automatic weights, feel free to leave a comment down below.
Best of luck on your 3D projects, and thanks for reading!

Hello! I’m a self-taught 3D modeler and texture artist with experience on a variety of projects, ranging from planet creation to game props, vehicles, and environments. Although I’ve tried out a bit of everything, my main software is Blender. I’m a big fan of sci-fi and fantasy shows and books like The Expanse and Lord of the Rings, so most of my personal work has a fantasy or sci-fi theme – but I also love to experiment and try new things!


Add a comment