

 Voitures
 Camions
 Autobus
 Motos
Motos
 Militaire
 Électronique
 Armes
Armes
 Bâtiments
 Avion
Avion
 Meubles
 Personnages
 Animaux
 Véhicule spatial
 Aliments
 Navires
Plus
In Blender, adding objects to your scene is a simple process, even for a beginner. But what if, for whatever reason, you want to add a single vertex? By default, there’s no clear way to do it; but even though it’s not obvious at first glance, Blender has us covered!
In this article, I’ll go over methods for adding vertices as new objects, adding vertices to pre-existing objects, and adding vertices directly to edges on your model. I’ll also cover a couple common issues that can arise during this process!
To start out, let’s cover adding a single vertex as a new, independent object. To do this, we’re going to enable the Extra Objects addon included with Blender by default; this will add Single Vert to the default Add menu, along with several other new base objects!
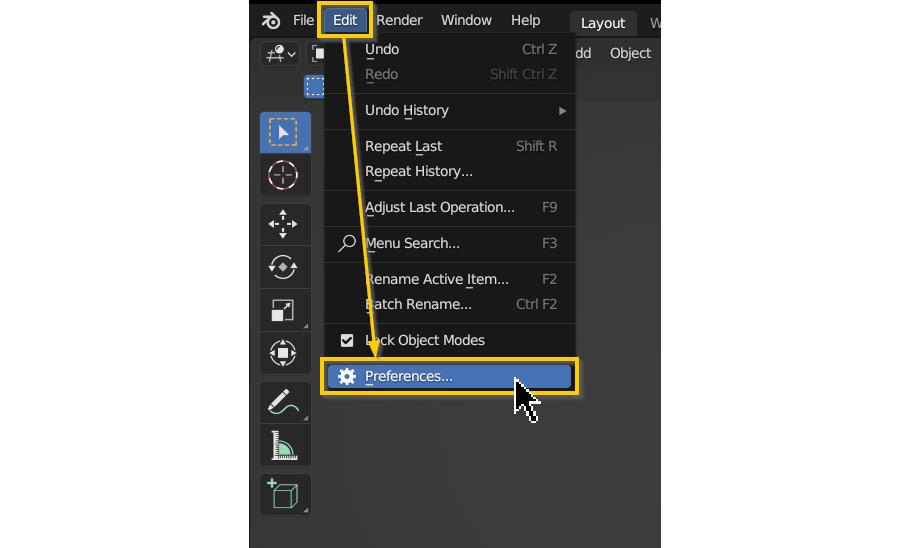
To enable Extra Objects, start by opening the Preferences window by going to the Edit dropdown and selecting Preferences.
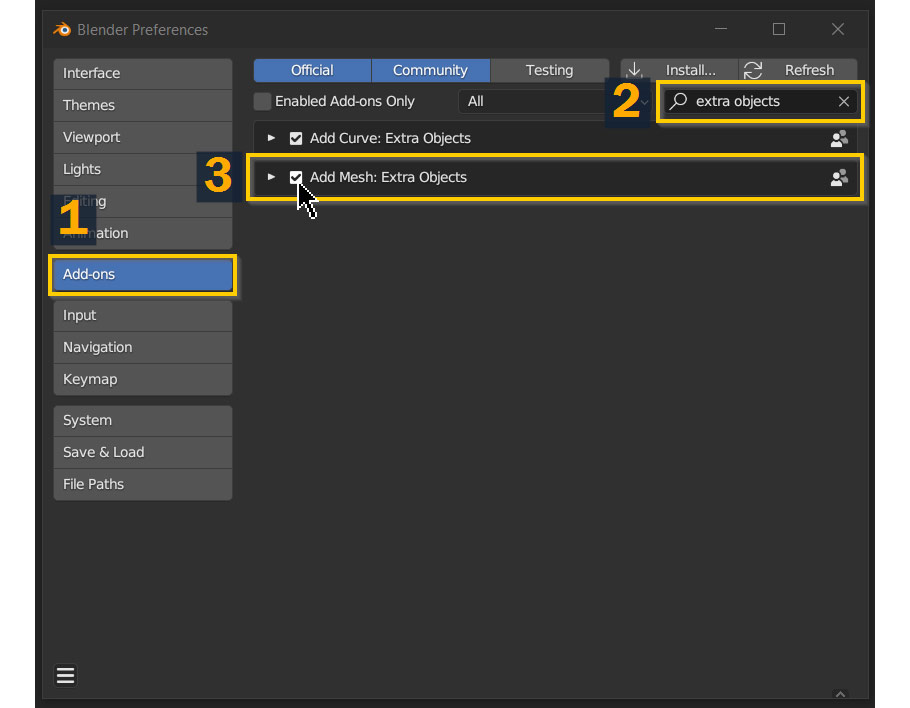
In the Preferences window, Click Add-ons, and type “extra objects” into the search bar – once it shows up, enable Add Mesh: Extra Objects.
Now you’re ready to add a single vertex to your scene. So, in the 3D viewport, press Shift – A to open the Add menu; now select Mesh > Single Vert > Add Single Vert.
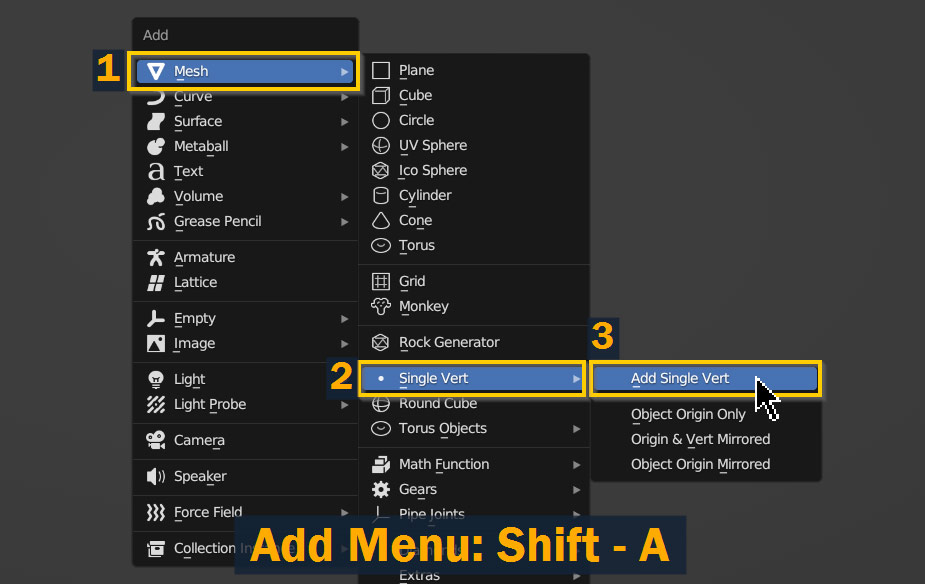
A single vertex will now be added to your scene at the location of your 3D cursor!

So, now we know how to add a vertex as a new object; but what if you want to add a vertex to a pre-existing model? Well, as it turns out, there’s actually a very easy way to do this in Blender!
To add a vertex to a pre-existing object, select the object and press Tab to go into edit mode – next, making sure nothing on your model is selected, hold Ctrl/Cmd on your keyboard and Right Click where you want your vertex to appear on your model.

When you add a new vertex, by default it will appear at the depth of the 3D cursor compared to your viewport position – but once you’ve added it, you can move it to where you want it using the G shortcut.
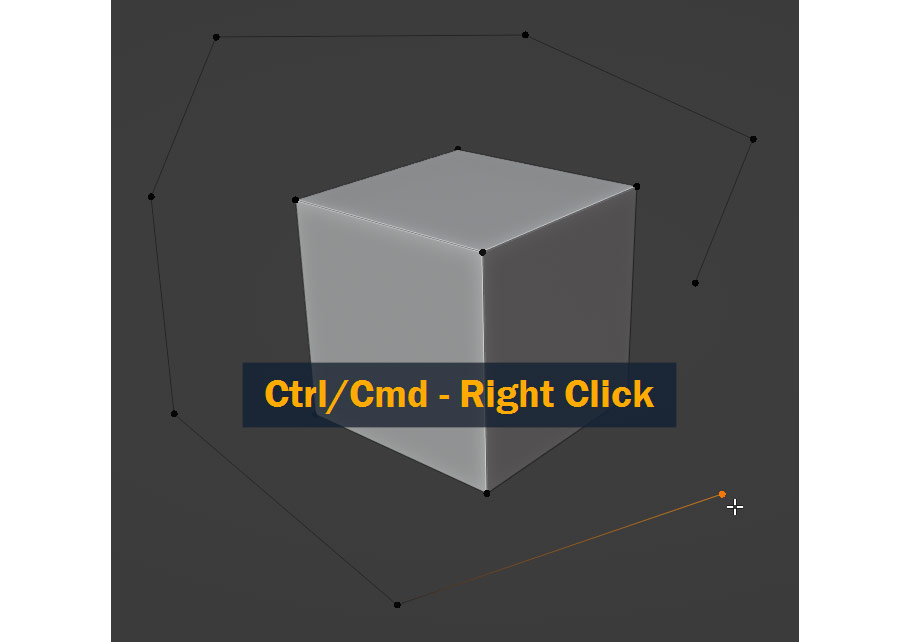
With a vertex, edge, or face selected in your scene, you can also use Ctrl/Cmd – Right Click as a quick way to extrude, in a more free-form way than the E shortcut allows – for example, with my new vertex selected, I can Ctrl/Cmd – Right Click several times in a circular pattern to create this result:
Lastly, I want to cover adding a vertex to a pre-existing edge on your model – in other words, subdividing the edge into two smaller edges.
To do this, enter into edit mode using Tab and select an edge (or two adjacent vertices).
Next, Right Click in the 3D viewport and press Subdivide! By default, this will split your edge into two pieces, adding a single vertex in the center.

You can also add more than one vertex using this method – after pressing Subdivide, locate the tool options pop-up that appears at the bottom of the 3D viewport, and open it; here, you can change Number of Cuts to whatever number of vertices you need!

If a vertex on your model becomes invisible after entering Edit Mode, make sure you’re in Vertex Select mode and not Face Select or Edge Select. Individual vertices on your model will only be visible when Vertex Select is enabled!

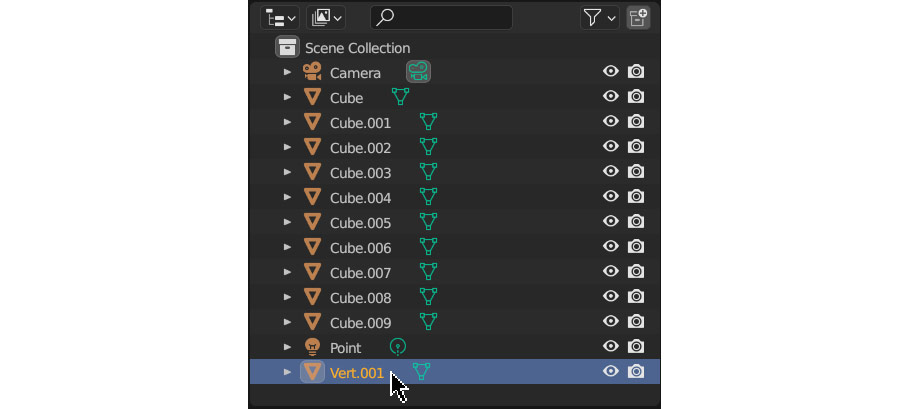
Sometimes with tiny objects the size of vertices, it’s easy to lose them in a large 3D scene. This is where the Outliner comes in handy! In the Outliner pane, search for an object called “Vert” and select it in the outliner.
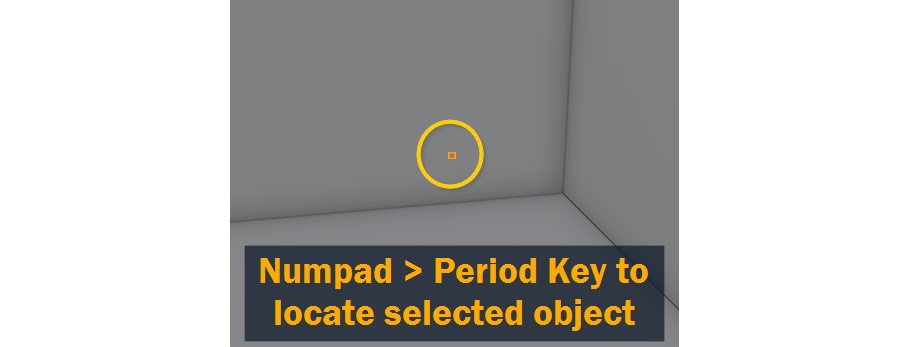
Now, in the 3d viewport, press the Period key on your number pad to automatically focus the view on the selected object!
To summarize, let’s quickly go over the three main methods of adding vertices that I covered today:
So, that just about covers it. In 3D art, when there’s a will, there’s a way – and if there isn’t, there’s probably an addon you can install that will help!
Thanks for reading, and best of luck with all your 3D projects!

Hello! I’m a self-taught 3D modeler and texture artist with experience on a variety of projects, ranging from planet creation to game props, vehicles, and environments. Although I’ve tried out a bit of everything, my main software is Blender. I’m a big fan of sci-fi and fantasy shows and books like The Expanse and Lord of the Rings, so most of my personal work has a fantasy or sci-fi theme – but I also love to experiment and try new things!


Add a comment