

 車
車
 トラック
トラック
 バス
バス
 オートバイ
オートバイ
 ミリタリー
ミリタリー
 電子機器
電子機器
 銃
銃
 建物
建物
 航空機
航空機
 家具
家具
 キャラクター
 動物
動物
 探査機
探査機
 食品
食品
 船
船
っと見る
When it comes to the fundamental tools of 3D, selecting is at the top of the list.
In Blender, there are a lot of tools, options, and tricks to speed up selection – and since selecting is something you’ll be doing all the time, you owe it to yourself to learn what they are!
In this article, I’ll go over all the basic selection tools for faces, edges, vertices, and objects, as well as more advanced functions like selecting edge loops and connected geometry. By the end, you’ll have everything you need to speed up your workflow and start selecting like a pro.
Let’s get started!
To start off, let’s talk about selecting objects in the 3D viewport.
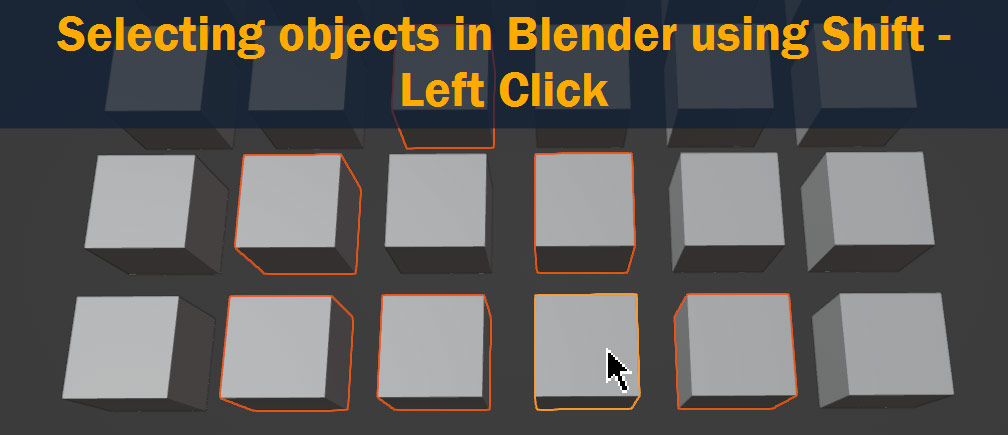
To select an object, simply Left Click it. To select additional objects, hold down Shift while clicking – and to remove objects from the selection, just Shift-Click them again (you may have to click twice depending on whether the object is currently Active).
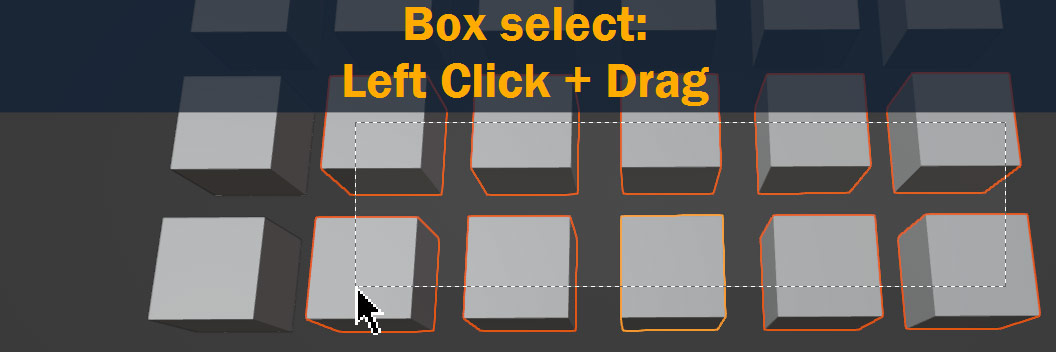
You can also select multiple meshes using Box Select, by left clicking and dragging – holding Shift allows you to select additional objects, and holding Ctrl/Cmd lets you Box Deselect.
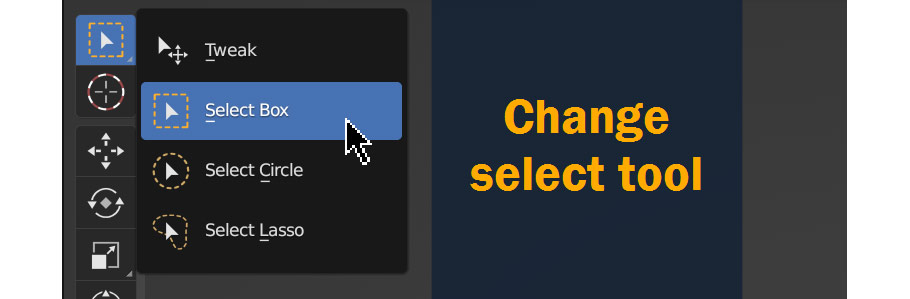
If boxes aren’t your thing, Blender has a few other modes to choose from. At the top of the toolbar on the left of the 3D view, you can click and hold the select tool to bring up some additional options:
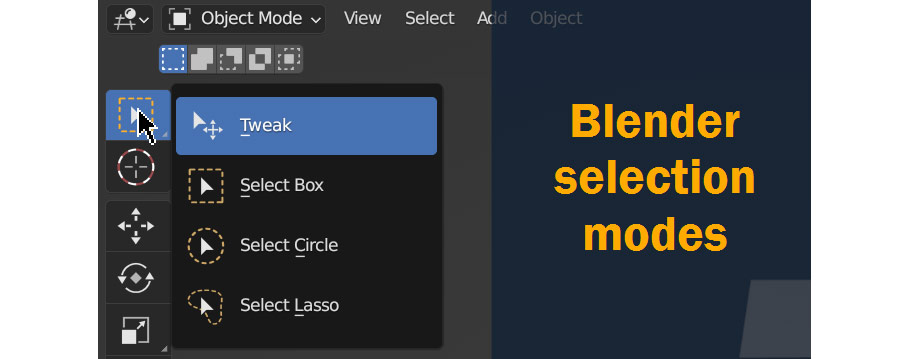
To get at these options more quickly, you can also hit W on your keyboard a few times to cycle through each of them – and you can also access a version of Select Circle at any time by pressing C.
So, now we know how to select Objects!
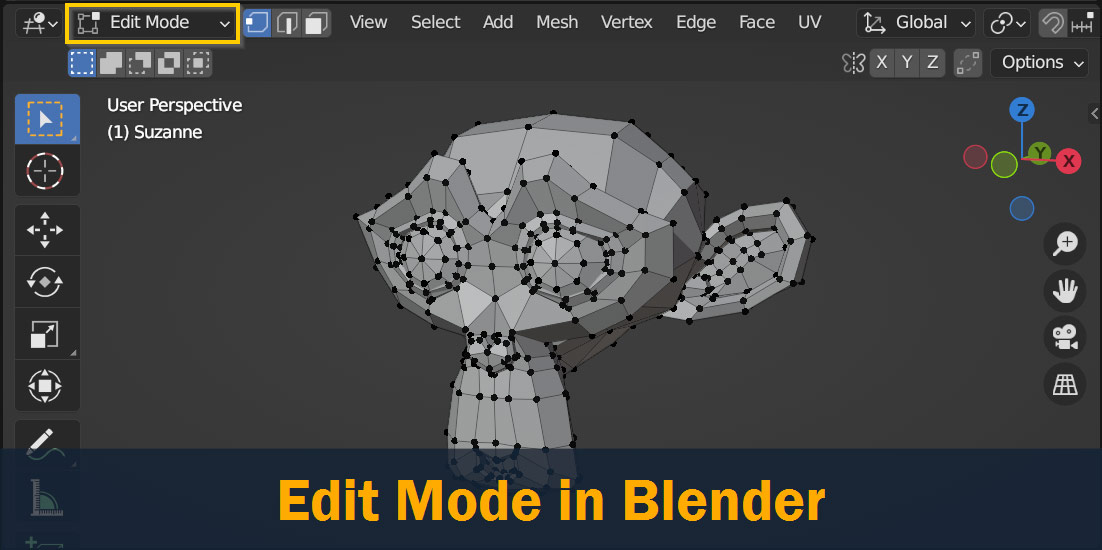
Let’s dive one level deeper and talk about ways of selecting geometry in Edit Mode.
First, switch to Edit Mode by selecting it at the top left of the 3D viewport, or by pressing Tab.
To start with, you’ll need to choose which type of geometry element to select by choosing a Select Mode. You can choose between Vertices, Edges, and Faces by selecting from one of the three options in the bar at the top of the viewport – or, simply press 1, 2, or 3 on your keyboard!

You can also Shift-Click these buttons to choose more than one selection mode at a time:

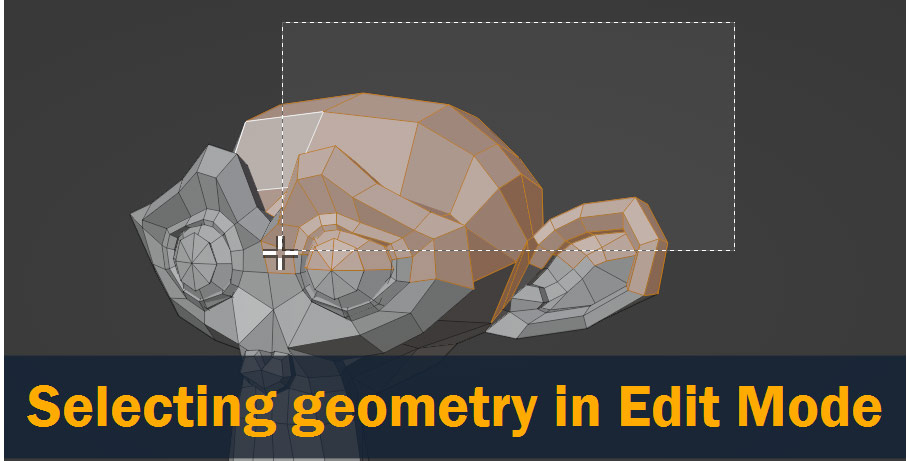
So that’s how to switch selection modes. Now, how do you actually do the selecting?
Well, selecting geometry elements in Blender actually works exactly the same way as selecting objects!
Left Click selects and deselects objects, Shift allows you to select multiple, and clicking and dragging allows you to Box Select by default – and just like with objects, you can click and hold the select tool or press W to switch between selection types.
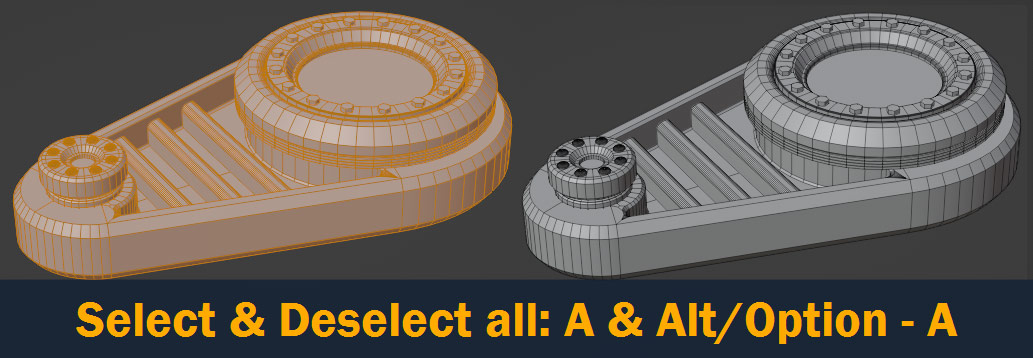
Before we get into more specialized selection tools, we’ve got one more quick (but essential) selection type to cover; that is, Selecting and Deselecting All.
In Object Mode, Edit Mode, and even the Shader and Geometry node editors, you can Select All by using the A keyboard shortcut – and to deselect all, press Alt/Option – A. Easy as that!
With selecting objects and geometry covered, we’ve got all the basics down pretty well – but if you want to get really fast at modeling, you’ll need to know some additional tools. That’s what I’ll be covering in the next few sections – starting with selecting Loops!
In 3D modeling, an Edge Loop refers to a line of edges extending across or around your mesh. We also refer to Face Loops and Vertex Loops – it just depends which selection mode you’re in.
Selecting loops can be a very useful tool for all sorts of tasks – for example, selecting a ring of edges on your model, or selecting the outer faces of a cylinder.
To select an edge loop, face loop, or vertex loop, simply Alt/Option – Left Click on one of the geometry elements in the loop.

With edges, clicking directly on the edge works – but with vertices and faces, you’ll actually have to click between them to select a loop; otherwise, you might select a loop going in the wrong direction by mistake.
Selecting loops is a great tool. But what if you want to select a line of edges, faces, or vertices without selecting the entire loop?
Luckily, Blender allows you to do this using the Pick Shortest Path tool. With an edge selected, select an additional edge while holding Ctrl/Cmd to select all the edges in between!
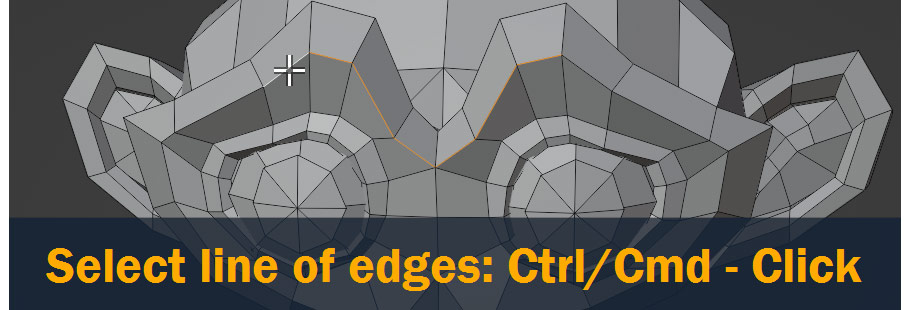
You can do this many times in a row to make a larger selection – just keep holding Ctrl/Cmd and clicking new edges.
And of course, this also works with faces and vertices!
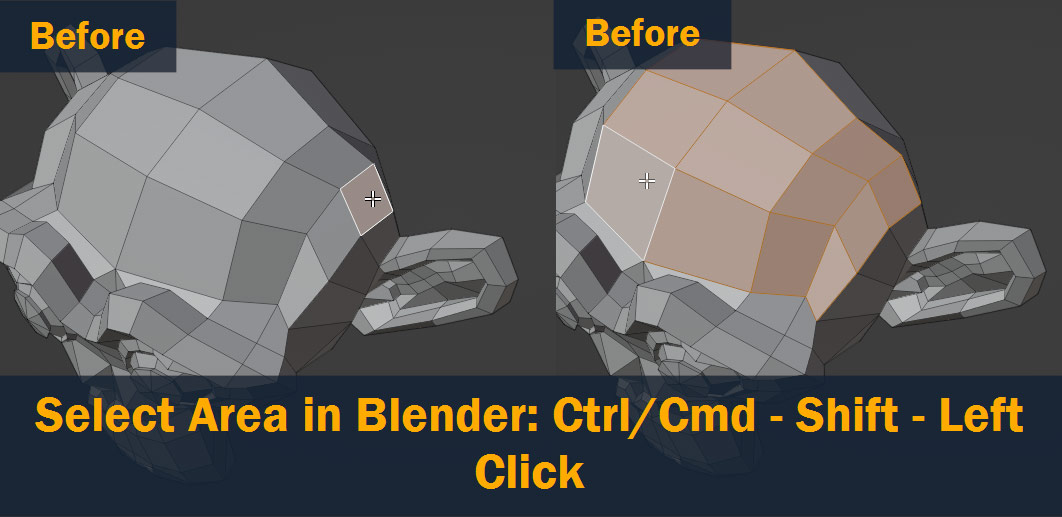
Holding Shift down while Ctrl/Cmd – Clicking adds even more functionality, letting you select the Area in between the two selection points, as shown:
Often during modeling, you’ll have a selection of faces that is just too small or too large. Sometimes, simply selecting or deselecting faces is an easy way to solve the problem – but an even quicker solution might be to Expand or Shrink the selection!
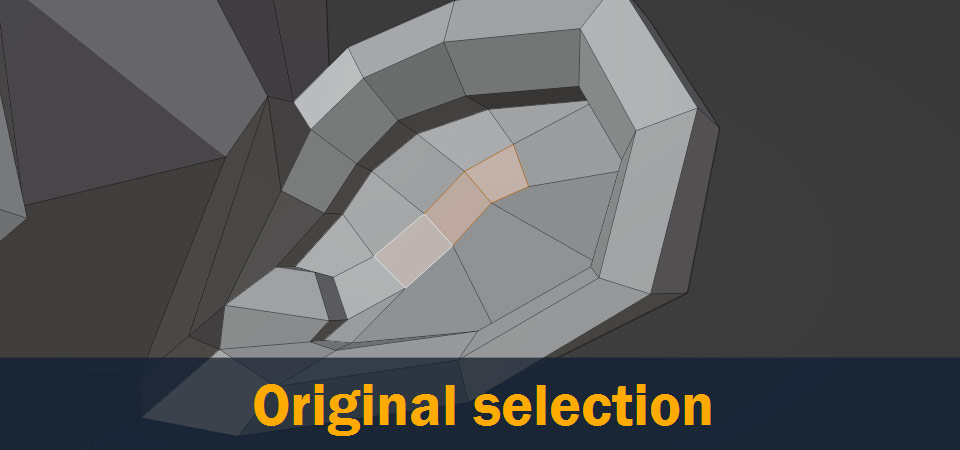
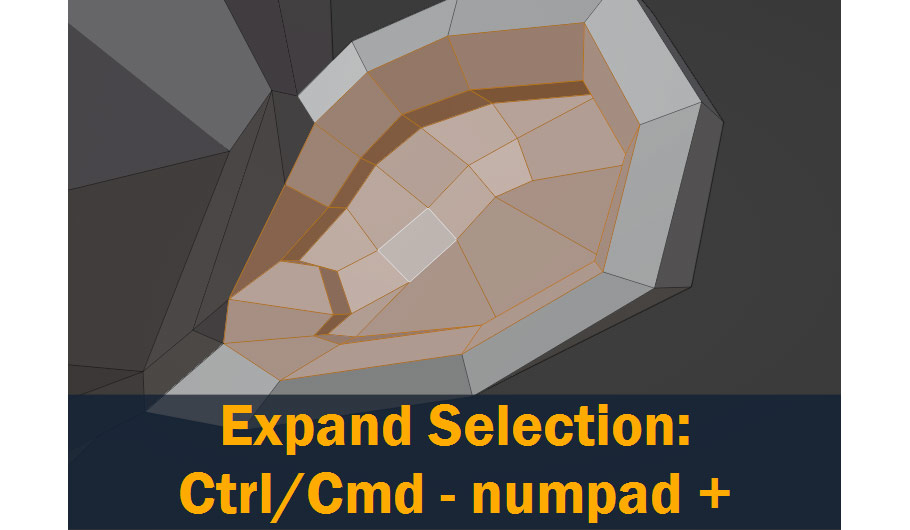
To do this, press Ctrl/Cmd – numpad +/- on the keyboard. “+” increases the size of the selection by one geometry element (vertex, edge, or face), while “-” shrinks it.
For example, here’s that original selection again after pressing Ctrl/Cmd – numpad + three times:
Box selecting, loop selecting, and expanding selections are all great ways to select multiple vertices at a time.
But in 3D, sometimes you need to select a group of vertices, edges, or faces that are all connected to each other – for example, if your object is composed of multiple separate parts – and using the tools I’ve mentioned so far, it might be difficult to control the selection precisely enough!
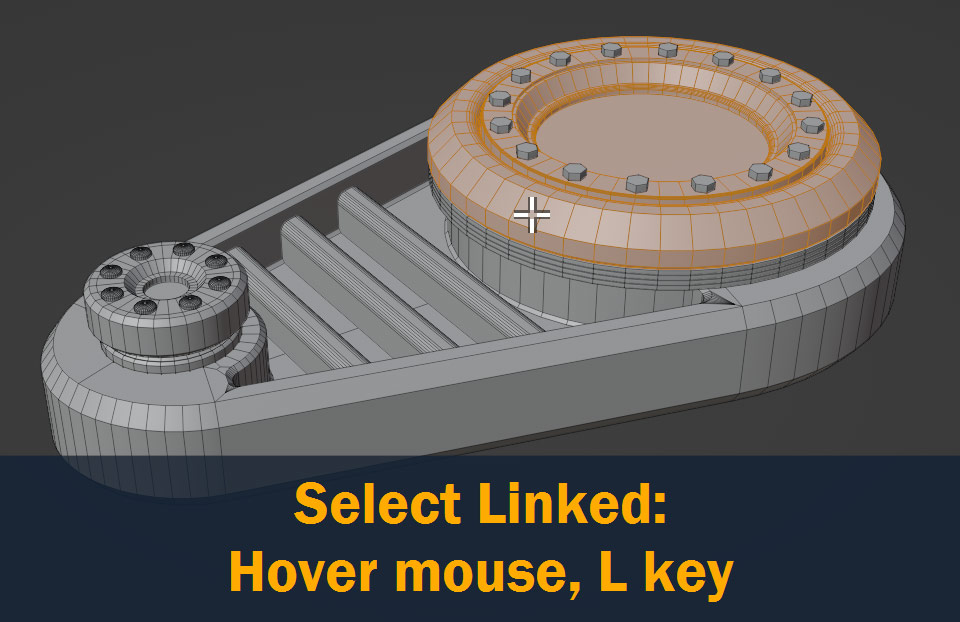
That’s where Blender’s Select Linked tool comes in.
To use Select Linked, hover your mouse pointer over the part you want to select, and press the L hotkey. This will select all the geometry connected to whatever is currently under your mouse.
To add additional geometry parts to the selection, repeat the same steps.
To Deselect Linked, you can press Shift – L instead.
This tool is especially helpful when working on large, complex models – sometimes, using Select Linked is the only way to select the exact parts you need, so it’s worth remembering!
So, we’ve come to the end of the article. But like all things in 3D, there’s plenty that can go wrong along the way!
In this brief troubleshooting section, I’ll try to address some of the most common issues that you may run into while selecting objects and geometry.
If you’re trying to select objects by Left Clicking and it’s not working, there are a couple different possible issues.
First make sure you’re in Object Mode and not Edit Mode – to switch modes, click the dropdown in the top left corner of the 3D viewport or just press Tab.

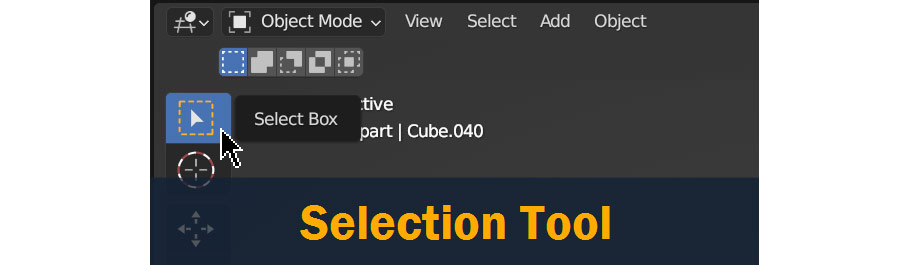
Also, check that you’re using the Selection tool in the tool menu on the left side of the 3D view – this will be set by default, but you may have changed it at some point and forgotten to switch back!
If that’s not the issue, check which version of Blender you’re using – versions before 2.8 had Right Click to select by default.
To set it back to left click, go to Edit > Preferences > Keymap, search for Select, and change the setting (this applies even in current versions of Blender).
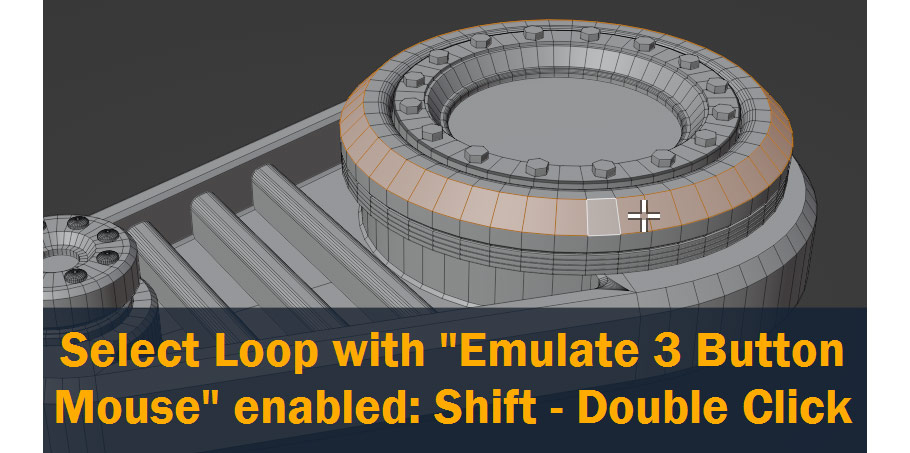
If you’re pressing Alt/Option – Left Click to select an edge or face loop and it’s not working, it may be because you’ve enabled Emulate 3 Button Mouse at some point. This is commonly done if you’re working on a laptop, and it changes some of the shortcuts.
When Emulate 3 Button Mouse is enabled, to select loops, hold Shift and Double Click instead.
If you’re trying to click and drag on your scene to Box Select and it’s not working as expected, first make sure the Select tool is set to Box Select. It should look like this:

If it doesn’t, reset it by clicking and holding on the button and moving the mouse to choose Select Box – or cycle through all the selection tools by pressing W.
If selecting objects or geometry elements isn’t working as expected, make sure the selection Mode above the toolbar is set to the leftmost option – other modes add, subtract, invert, or intersect the current selection instead of just selecting normally, which may be confusing.

So, that’s selecting in Blender!
In 3D, selecting is one of the most fundamental ways we interact with our models and scenes – so knowing how to do it right is important for new 3D artists hoping to advance.
Even though it might seem complicated at first, the tools I’ve introduced here will help speed up your workflow and let you get more done.
Let’s review:
With that, we’ve reached the end!
I hope this article was useful to you – feel free to leave a comment with thoughts, suggestions, or ideas below.
Best of luck on all your 3D projects, and thanks for reading!

Hello! I’m a self-taught 3D modeler and texture artist with experience on a variety of projects, ranging from planet creation to game props, vehicles, and environments. Although I’ve tried out a bit of everything, my main software is Blender. I’m a big fan of sci-fi and fantasy shows and books like The Expanse and Lord of the Rings, so most of my personal work has a fantasy or sci-fi theme – but I also love to experiment and try new things!


コメントの追加