

 汽车
汽车
 卡车
卡车
 公交车
公交车
 摩托车
摩托车
 军事
军事
 电子产品
电子产品
 枪支
枪支
 建筑物
建筑物
 飞机
飞机
 家具
家具
 角色
角色
 动物
动物
 航天器
航天器
 食品
食品
 船只
船只
更多
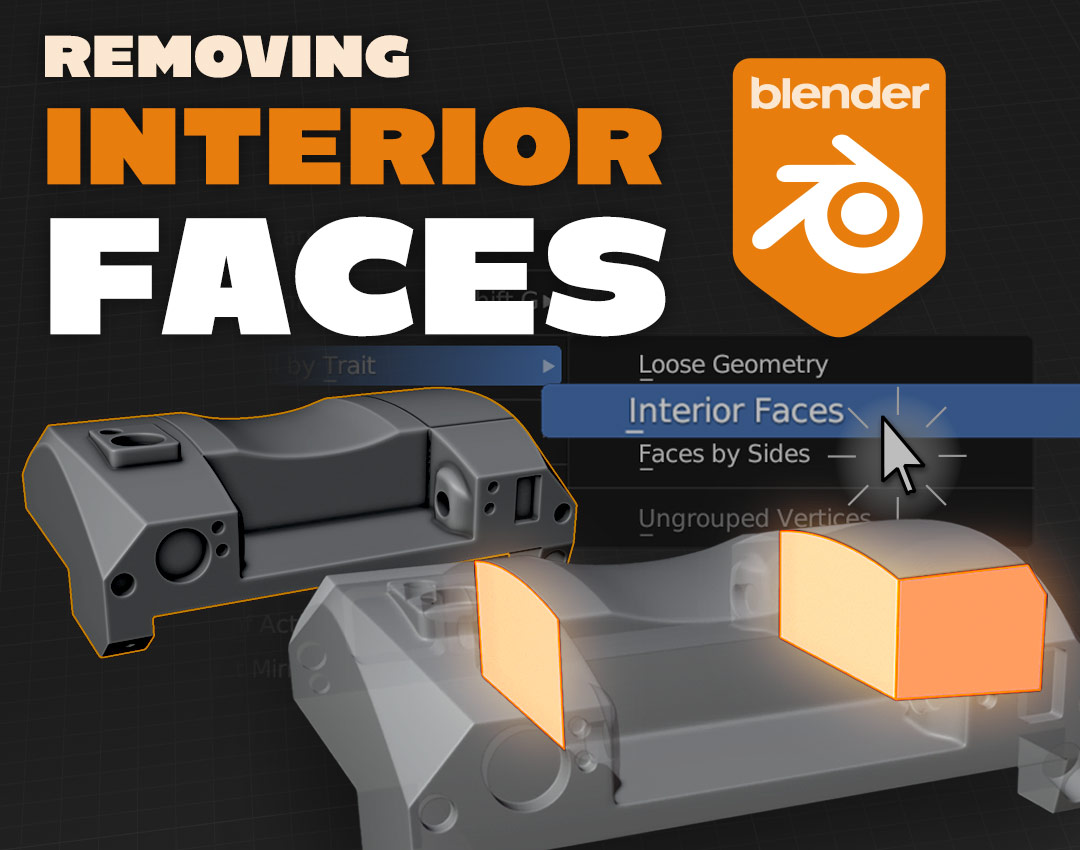
Sometimes while 3D modeling in Blender, you end up creating faces, vertices and edges inside your model where you don’t want them – and although you might not notice them at first, often these faces can cause trouble later on.
So, how can we delete these internal faces in Blender?
Well, that’s exactly what I’m going to cover in today’s article – so read on! In this tutorial, I’ll go over how to automatically select and remove interior faces, and how to manually remove internal geometry; and as a bonus, I’ll also go over how to delete floating/free geometry, and how to remove double vertices.
Let’s get started!
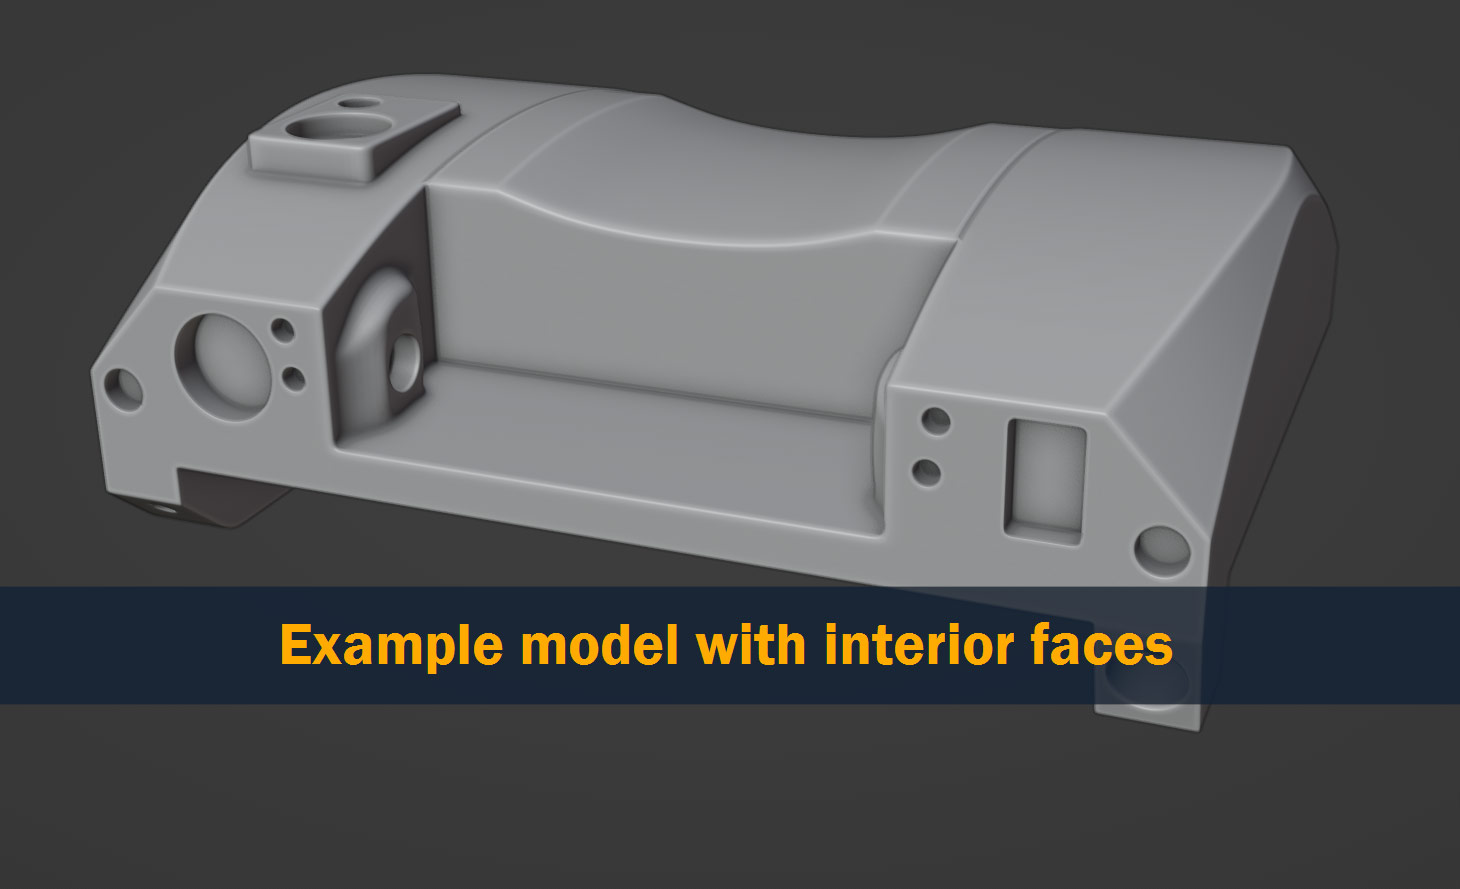
In Blender, if you suspect your model might have interior faces, one of the easiest ways to find them and delete them is using the Select Interior Faces option in the 3D viewport topbar – so let’s take a look at how to do that!
Start by going into Edit Mode on your model by pressing the Tab hotkey; making sure nothing is selected to begin with, go to Select > Select All By Trait in the topbar and choose Interior Faces. This will automatically select any interior faces on your model; now, you can delete them by pressing the Delete or X keys and choosing Faces.
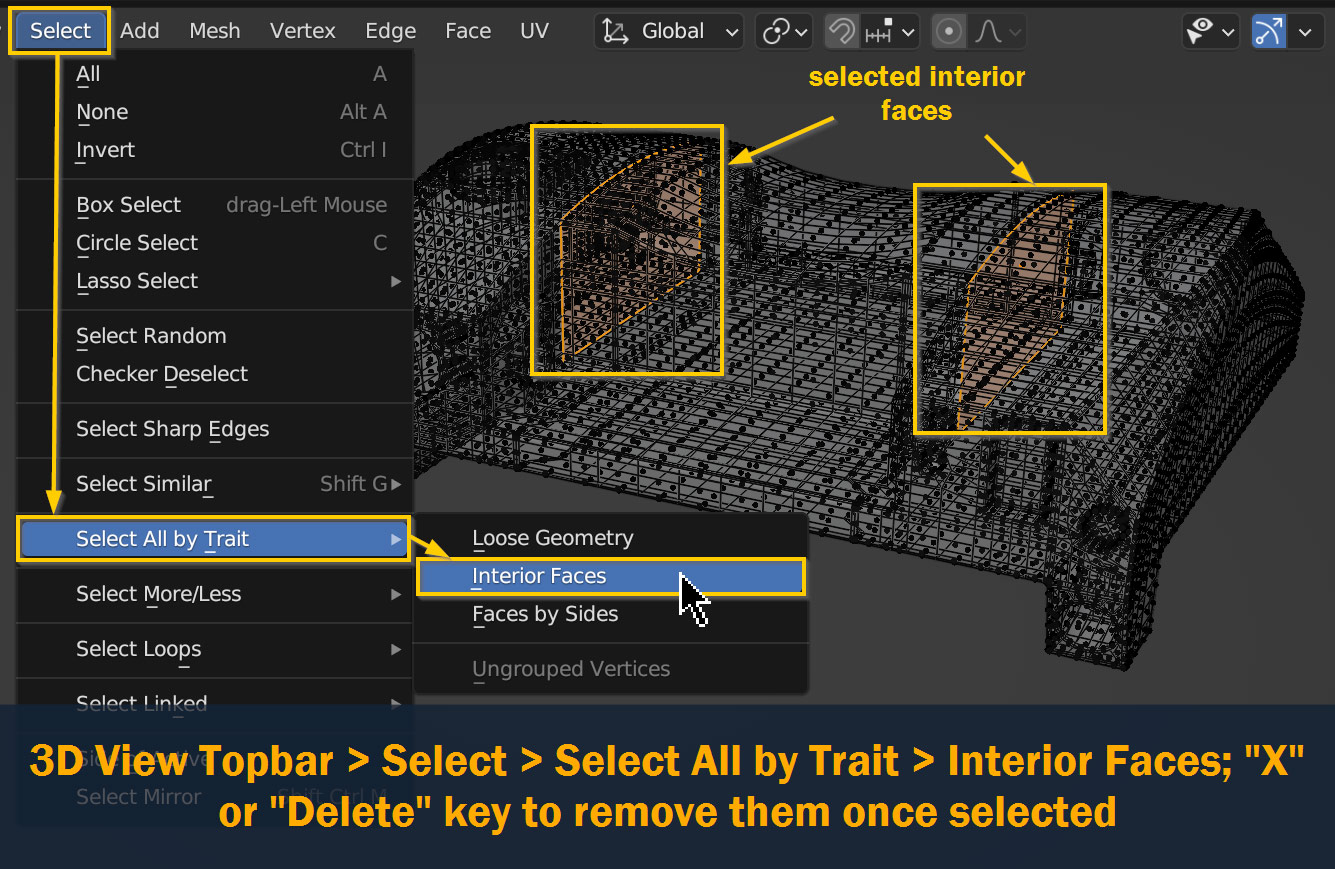
Tip: if you want to check which faces were selected on your model but can’t see inside, try using the Alt/Option – Z shortcut to turn on X-Ray Mode. This will let you see through your mesh.
So, now we know how to automatically select faces and delete them – but that’s not guaranteed to work in all situations. Luckily, removing internal faces manually in Blender is also easy. It just might take a little more time!
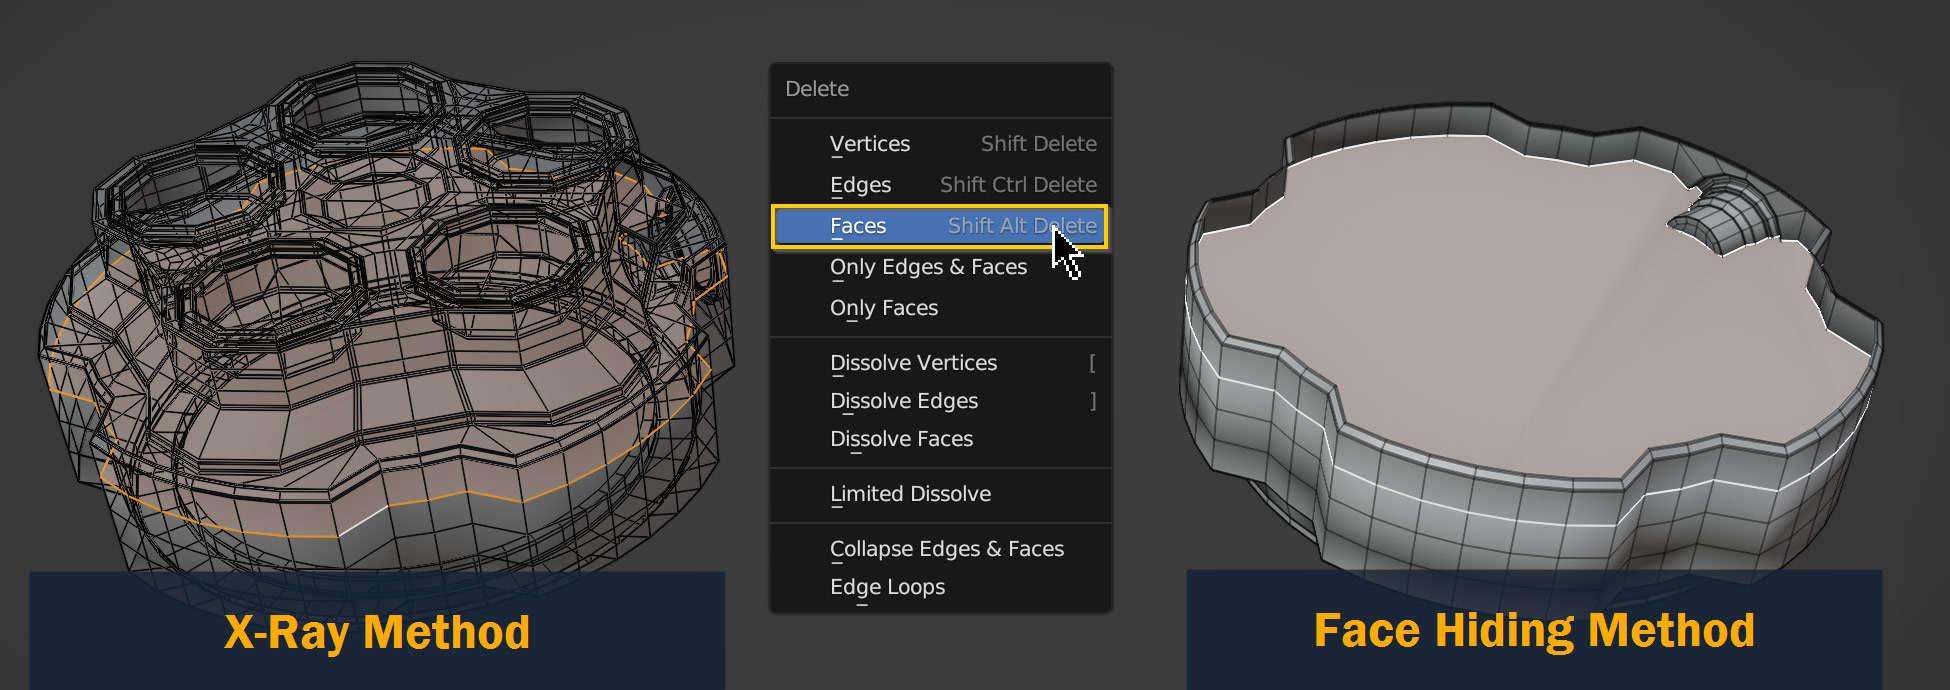
When you’re manually removing internal geometry, your main issue is going to be seeing inside your mesh to select and delete faces and vertices. To get around this, there are two possible solutions: You can either make your object transparent by activating X-Ray or Wireframe mode, or you can temporarily Hide exterior faces to allow you to access the interior of your model.
To activate X-Ray and Wireframe mode, you’ll need to go to the topbar at the top of the 3D view, and press either the Toggle X-Ray button or the Wireframe button (shown in the screenshot below).
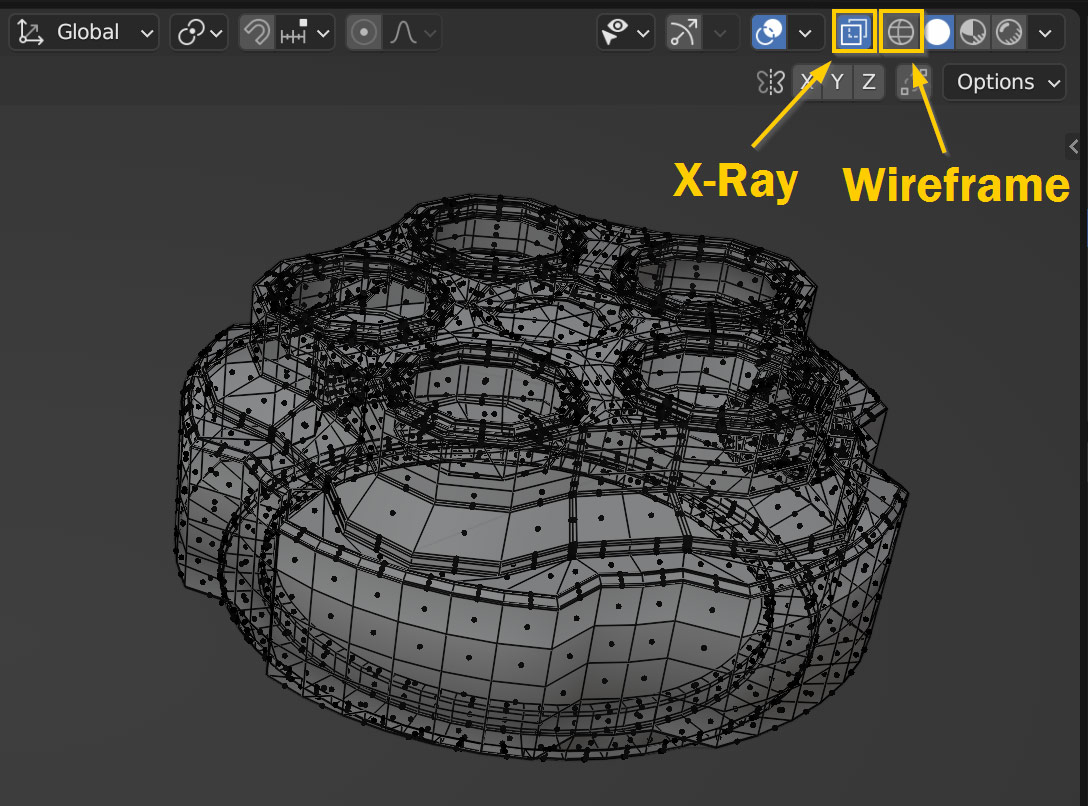
You can also use Alt/Option – Z to activate X-Ray mode, or Shift – Z to activate wireframe!
Alternatively, if you want to go with the hiding faces route, you’ll need to start by entering into Edit Mode using Tab, selecting faces that are blocking your view, and then pressing the H key to hide them (use Alt/Option – H to unhide when you’re done).
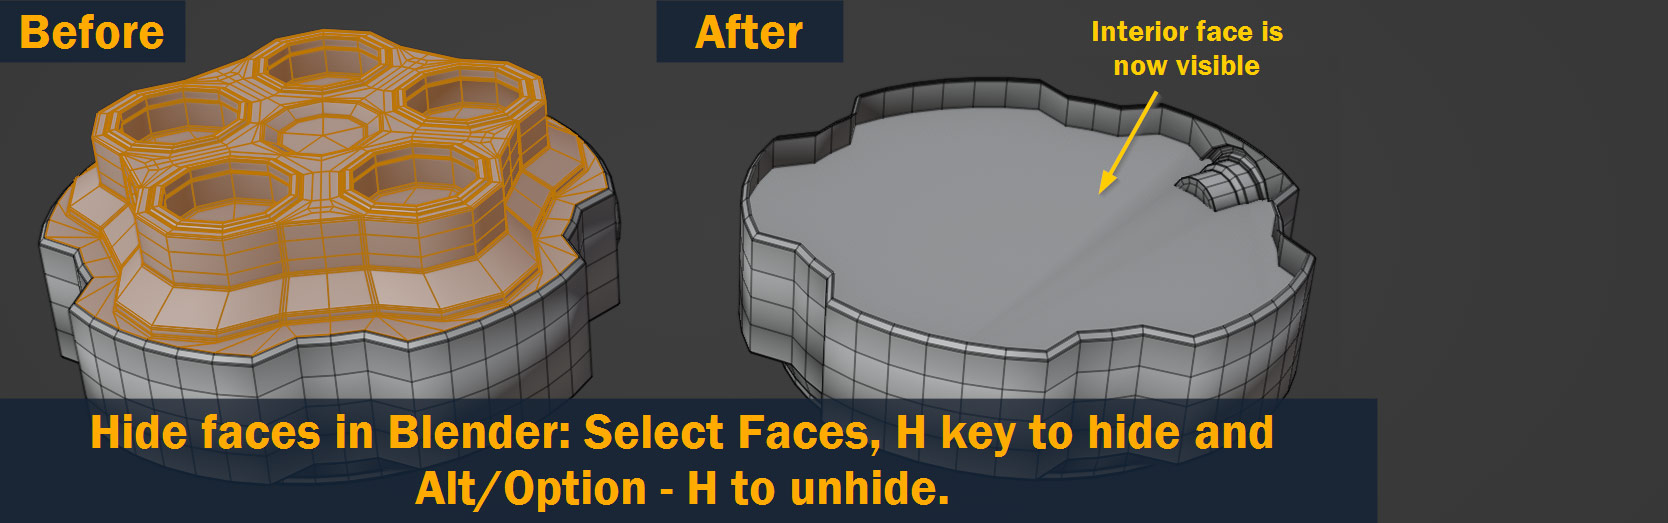
With your mesh either transparent or partially hidden, now you can select the faces you want to delete and press Delete or X on your keyboard, and select Faces to remove them.
Sometimes in Blender, instead of unwanted geometry inside your model, you can end up with vertices, edges, or faces, floating free where you don’t want them. And although it’s possible to delete these by hand (by selecting and hitting Delete or X), if there are a lot of them this can be a very tedious process!

So, instead of selecting them manually, a good strategy is actually to select the geometry you do want, and then invert the selection and delete. Let’s take a look at how to do this in Blender!
Start by entering Edit Mode by pressing Tab on your keyboard; next, hover the mouse over part of your mesh that you want to keep, and press the L key to select the entire portion of geometry at once. Repeat this with any other parts you don’t want to delete.
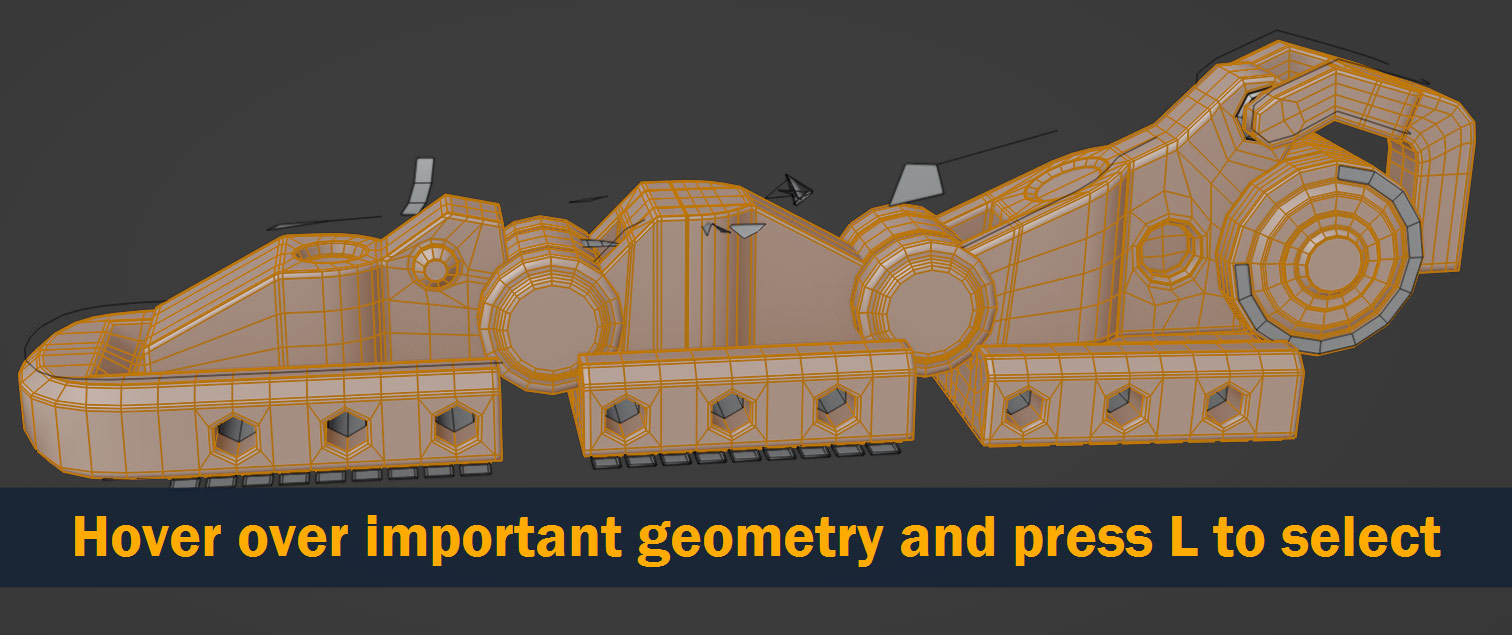
Once you’re done selecting everything you want to keep, press the Ctrl/Cmd – I key to Invert the selection. This should select any extra vertices or faces – you can now press X or Delete on your keyboard to get rid of them!

Tip: to make sure you catch all the free-floating geometry, make sure you’re in Vertex Select mode before inverting the selection. Other modes might miss free vertices or edges.
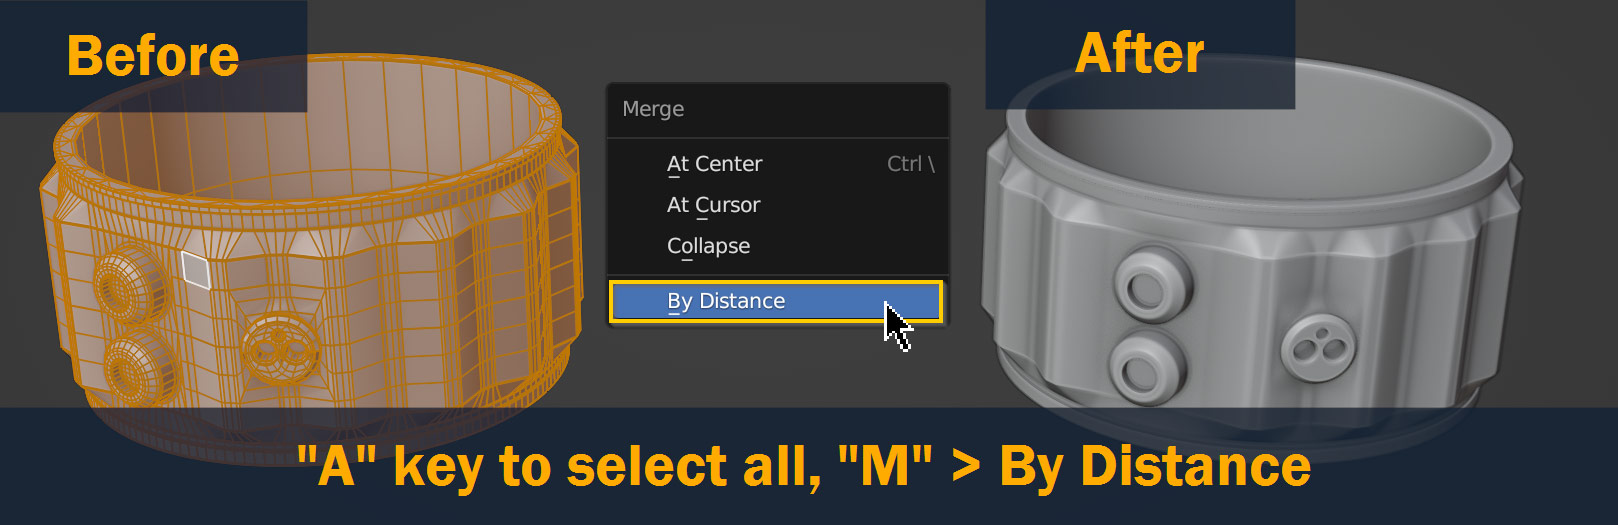
Another thing that can often go wrong with models in Blender is when you have Double Vertices – this is when two (or more) vertices share the same location, and it can wreak havoc with shading, bevels, and subdivision. Luckily, these double vertices are also very easy to remove – so let’s take a look at how to do that!
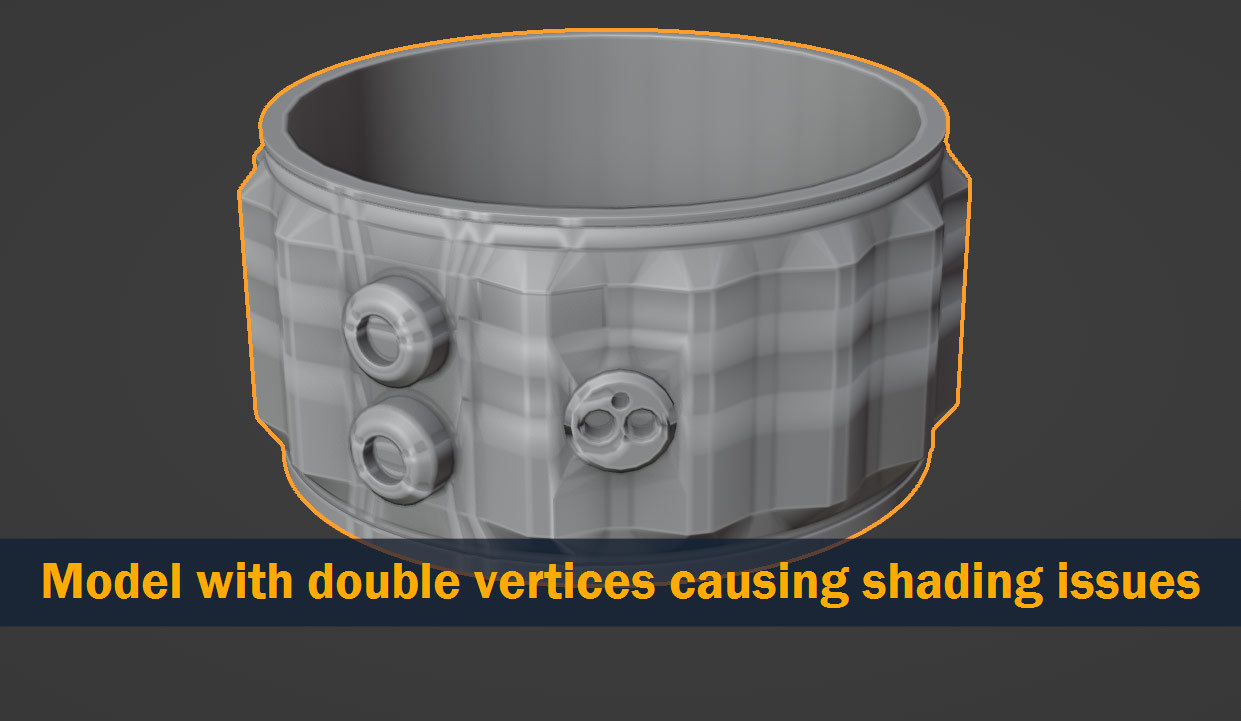
To remove (or merge) double vertices in Blender, start by pressing Tab to go into edit mode, and pressing A to select all. Next, press M to open the Merge menu, and select By Distance – this will automatically merge all vertices that are within a certain distance of each other removing anything that’s overlapping.
By default, this distance is very tiny – vertices need to be right on top of each other to be merged. But if you’ve got vertices that you want to merge that are a bit further apart, you can always increase this distance. Select Merge > By Distance like before, and look at the bottom of the viewport for the Merge By Distance tool options. Here, you can increase the Merge Distance until you get the result you want.

Warning: watch out when increasing Merge Distance – sometimes you can accidentally merge vertices you didn’t intend to, and if you discover this later on it’s hard to fix! As a general rule, it’s always a good idea to check your mesh for unintentional merged vertices after using this tool.
In Blender, there are a lot of things that can go wrong with models – but luckily, there are also a lot of different ways to fix them!
In this article, I went over just a few possibilities out of many; but if you make sure to keep these basic tools in mind while modeling, you might find they help solve a lot of problems.
To finish off, let’s review the steps we covered here:
For a quick reminder, refer back to this section if you get lost!
I hope this article was helpful – if you have any thoughts or ideas relating to this topic, feel free to leave a comment below.
Best of luck on your 3D projects, and thanks for reading!

Hello! I’m a self-taught 3D modeler and texture artist with experience on a variety of projects, ranging from planet creation to game props, vehicles, and environments. Although I’ve tried out a bit of everything, my main software is Blender. I’m a big fan of sci-fi and fantasy shows and books like The Expanse and Lord of the Rings, so most of my personal work has a fantasy or sci-fi theme – but I also love to experiment and try new things!


Add a comment