

 자동차
자동차
 트럭
트럭
 버스
버스
 모터사이클
모터사이클
 군용 차량
군용 차량
 전자 기기
전자 기기
 무기
무기
 건축물
건축물
 항공기
항공기
 가구
가구
 캐릭터
캐릭터
 동물
동물
 우주선
우주선
 음식
음식
 선박
선박
보기
If you’re 3D modeling regularly, you’ve probably run into issues with Normals and face orientation before – and if you don’t know what you’re dealing with, these can be confusing to identify and solve!
That’s why in this article, I’m going to go over what exactly normals are and what they’re for, how to identify issues with normals in Blender, and finally, how to fix them! And in the end, I’ll briefly cover a few additional things that can go wrong with normals in Blender in the Troubleshooting section. Let’s get into it!
In 3D rendering, Normal essentially refers to the Direction that elements of geometry are pointing. Faces and vertices both have normals – for every face and vertex on your model, a piece of Normal Data exists to tell the computer which direction it is facing, which affects how it is rendered.

Confusingly, normals don’t actually have to align with the physical geometry they’re on – normals can technically point any direction, and the direction they point will change how the geometry they’re on is shaded and rendered – and as we’ll see later, this can cause some confusing issues!
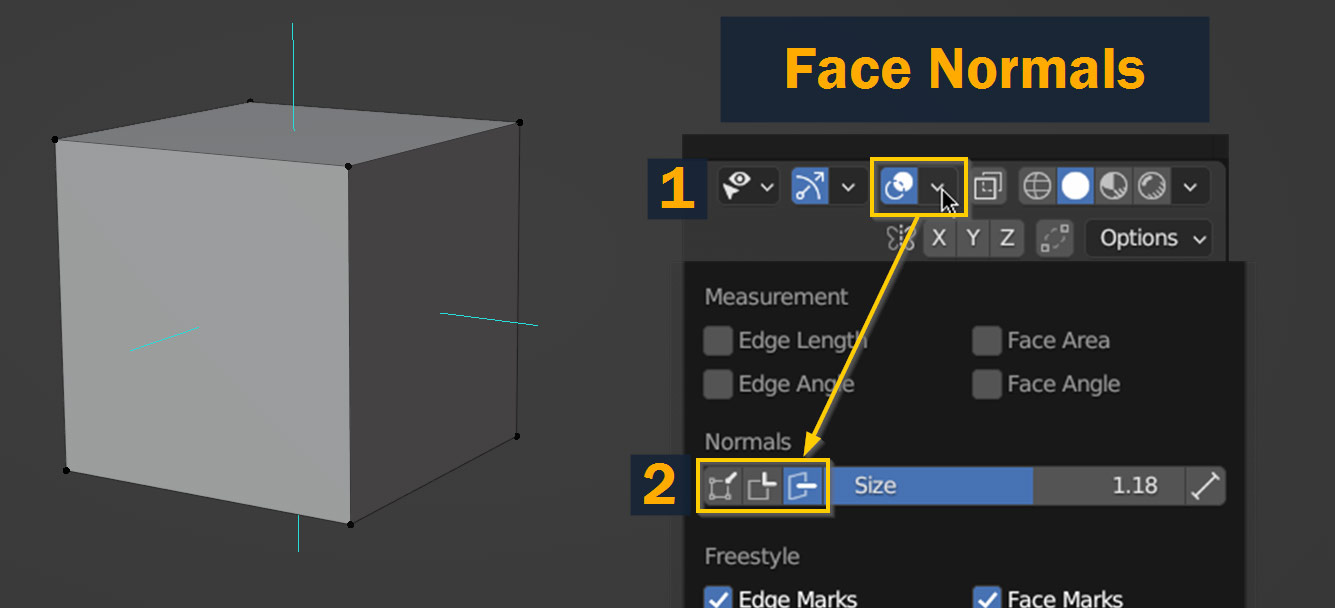
You can visualize normals by enabling one of the Normal overlays in the Overlays dropdown. In this example, I’ve enabled Face Normals again like in the previous screenshot:
Apart from face Normals and vertex normals, there are also Split Normals. These are a lot more confusing than face normals and vertex normals, and they’re very important beneath the hood for rendering and shading. But they’re probably not something you’ll be directly working with regularly, so I’m not going to cover them in this article!

Now that we have some idea of what normals are, how do we identify when they have issues?
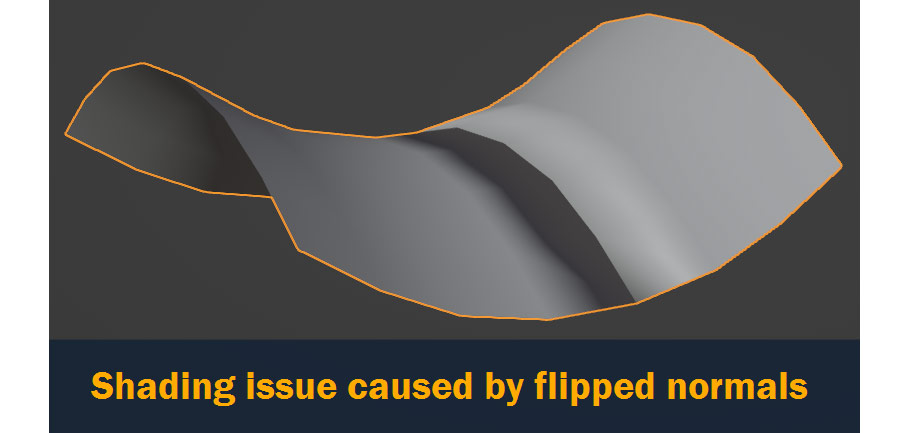
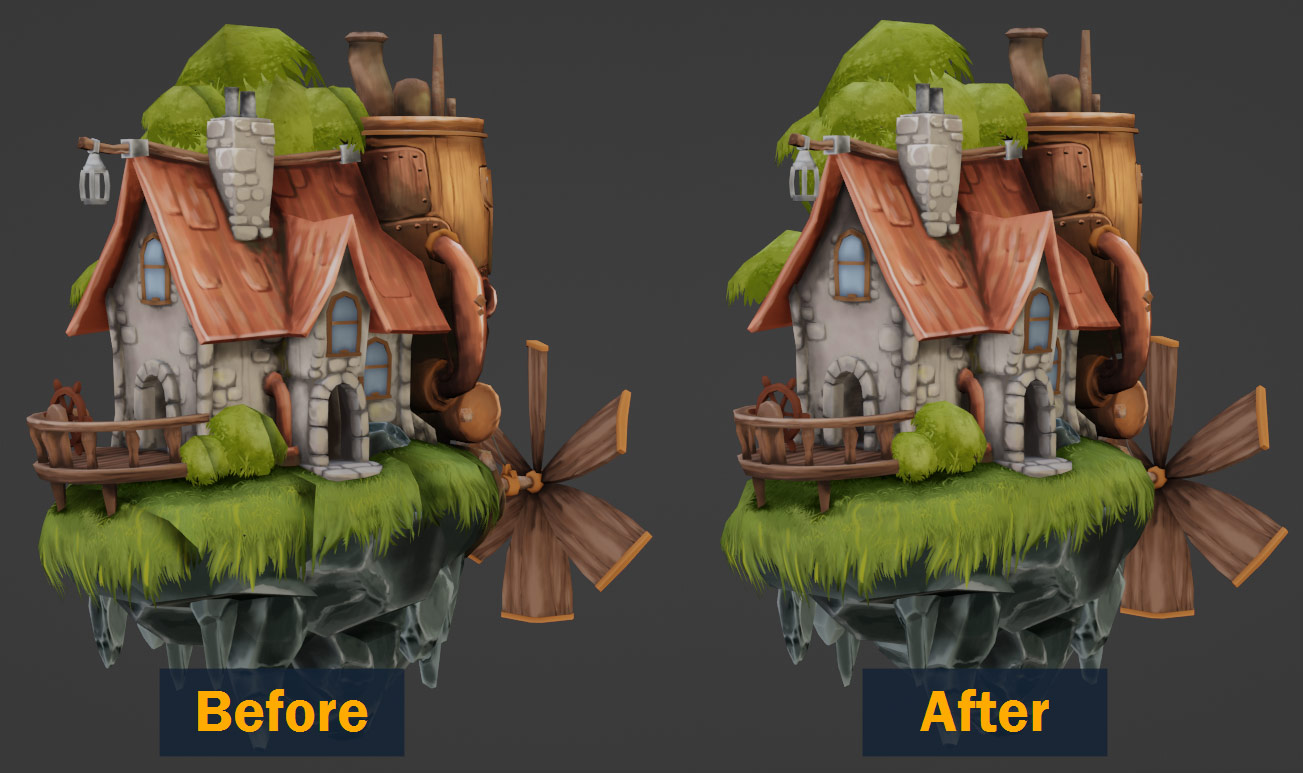
One major problem that you’ll encounter with normals in Blender is when they’ve been flipped or inverted. This can cause all sorts of issues later on in the 3D workflow, but right away you’ll often notice shading issues showing up, such as the unwanted dark shadow in this screenshot:
Inverted normals can also cause all sorts of odd problems with modeling operations – if you ever encounter a strange issue while modeling that you just can’t seem to solve, it’s always worth checking for flipped normals!
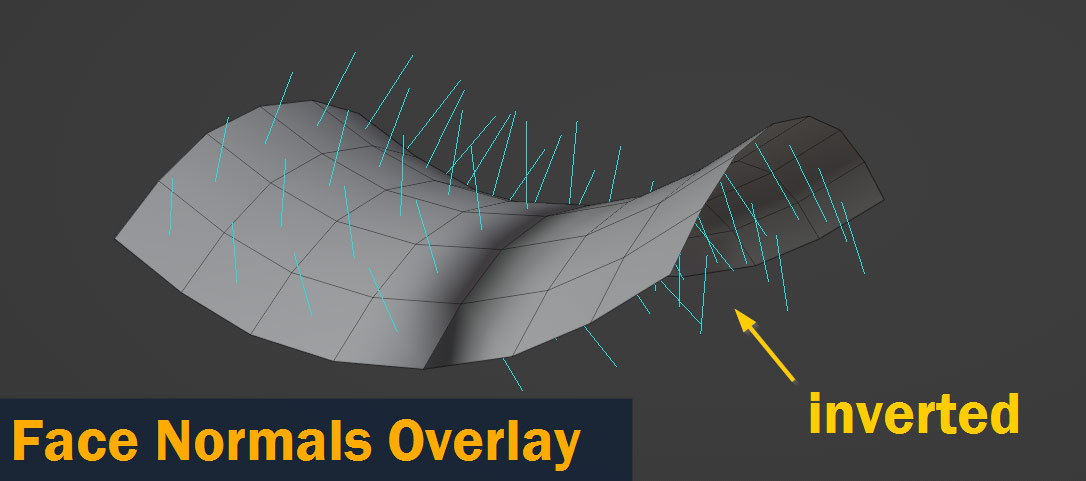
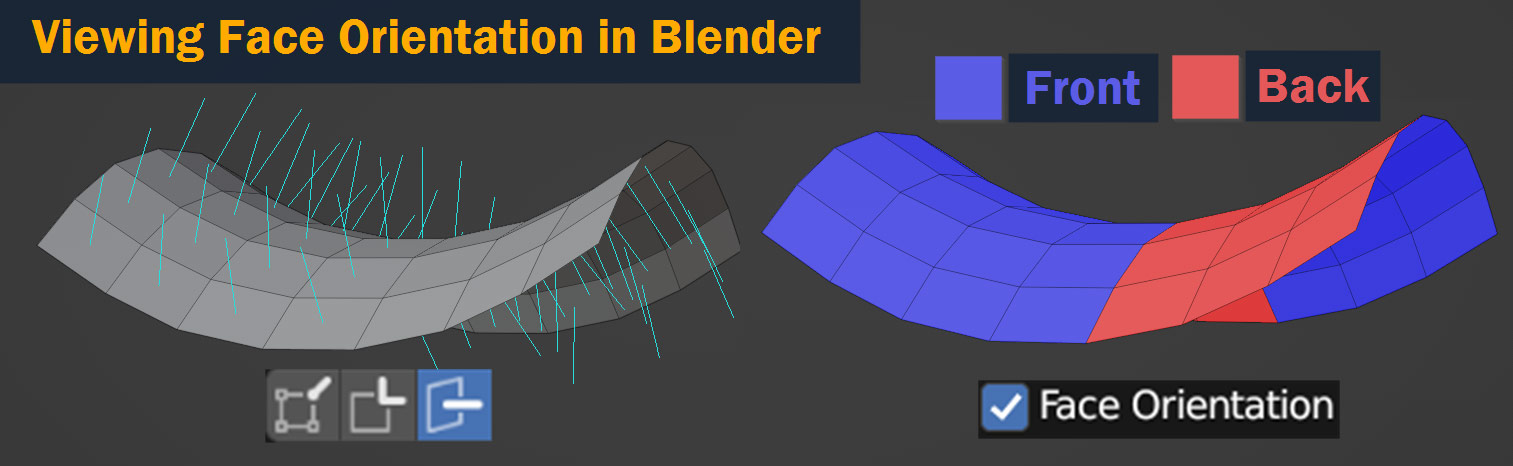
Speaking of which, how do we check for flipped normals? Well, one way is to enable the Face Normals overlay again as shown above – if the blue lines on faces point inward instead of outward, it means the normals on those faces are inverted.
But an even better way to visualize face orientation is to enable the Face Orientation overlay. To do this, go to the Overlays dropdown at the top right side of the viewport, and enable Face Orientation.
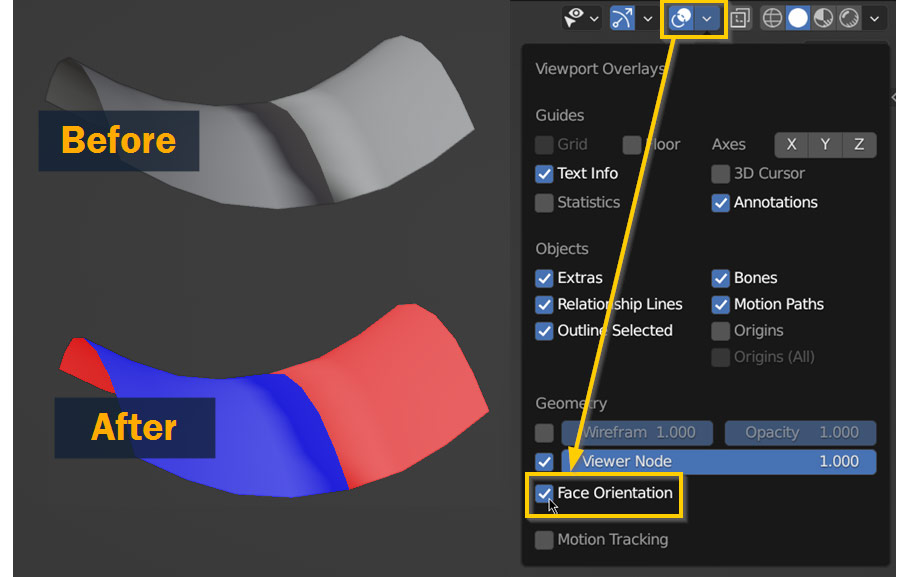
This shows essentially the same thing as the Face Normals overlay, but instead of blue lines indicating the normal directions, it colors the faces red and blue – the fronts of faces are Blue, and the backsides are Red. This allows you to very quickly check for inverted faces on your model – just look for any exterior faces that are showing up as red!
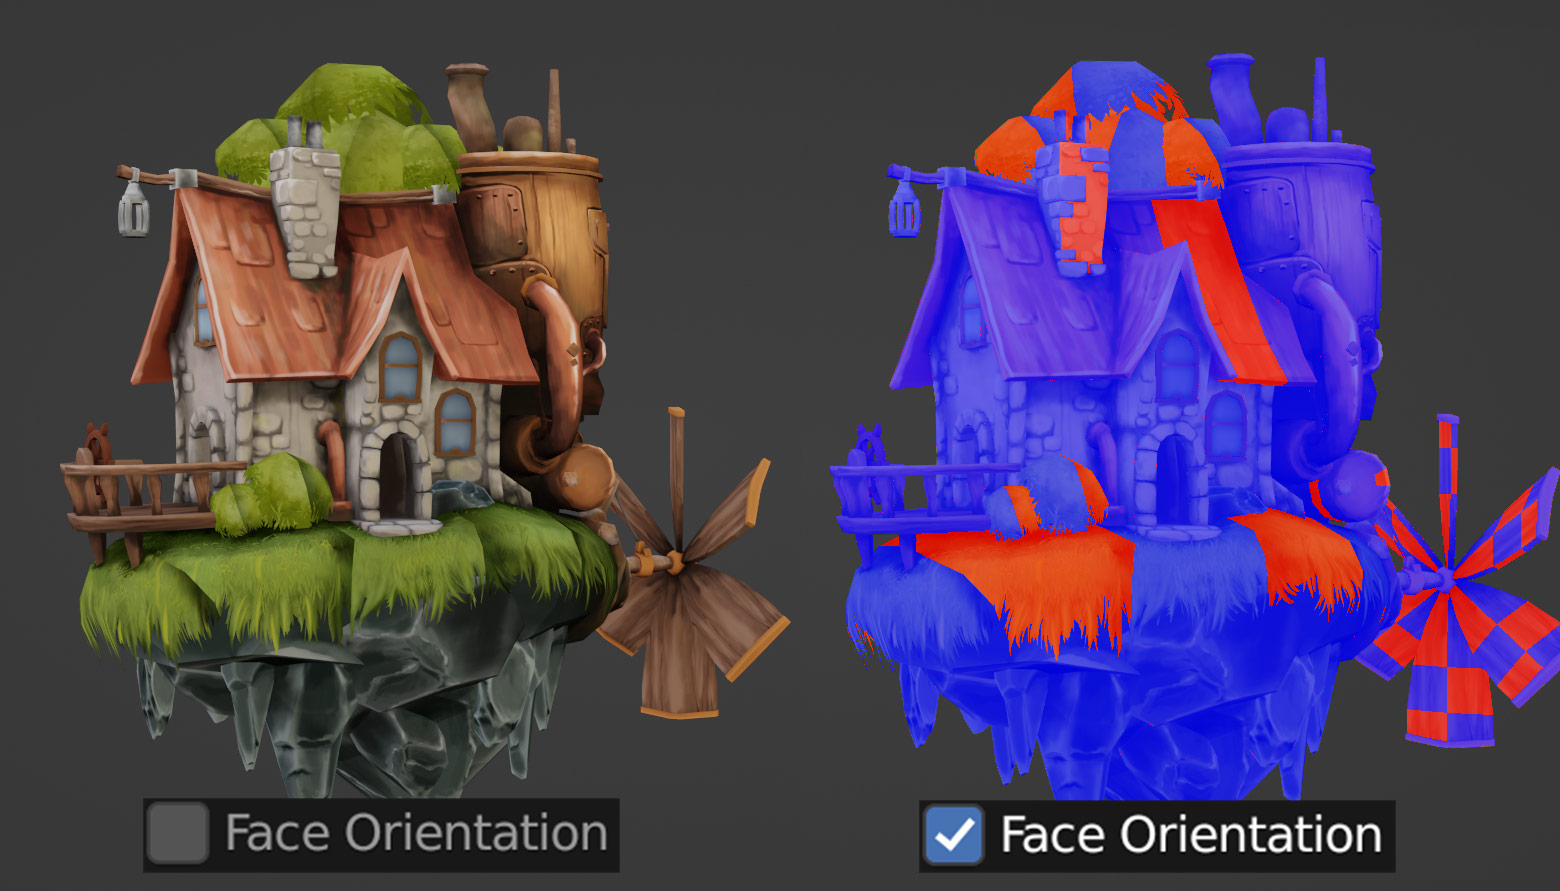
Looking at a slightly more complex model, we can see odd black shadowed areas on the model, but no clear cause – but when we enable the Face Orientation overlay, we can see that several faces are inverted!
So, now we know how to identify flipped normals – but how do we actually fix them?
Luckily, it’s actually very simple!
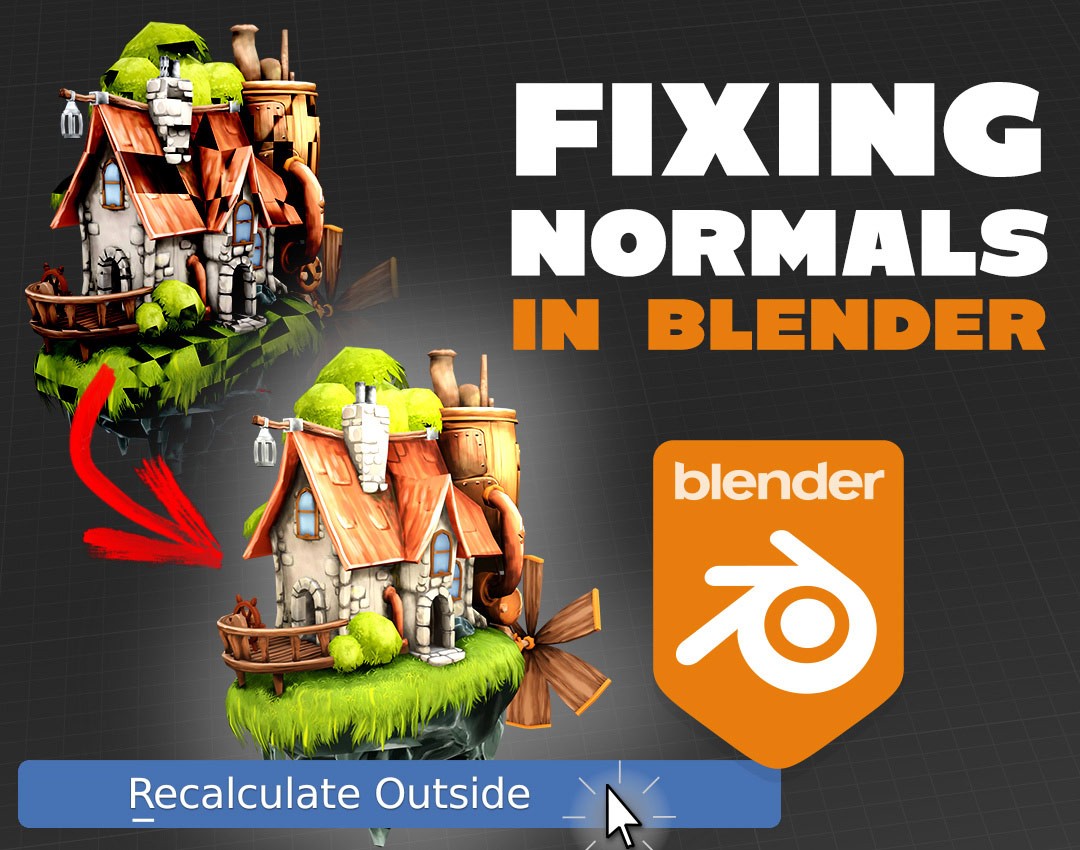
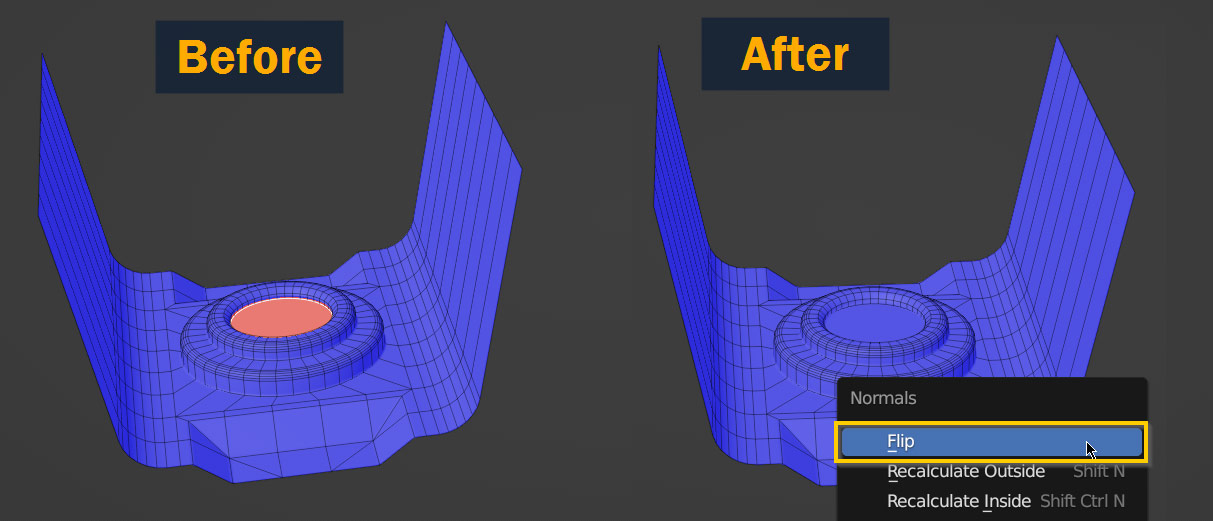
To fix reversed normals, first go into Edit Mode and Select All. Next, press Alt/Option – N to open the Normals menu. Finally, select Recalculate Outside.
Blender will automatically correct the normals on all selected faces.
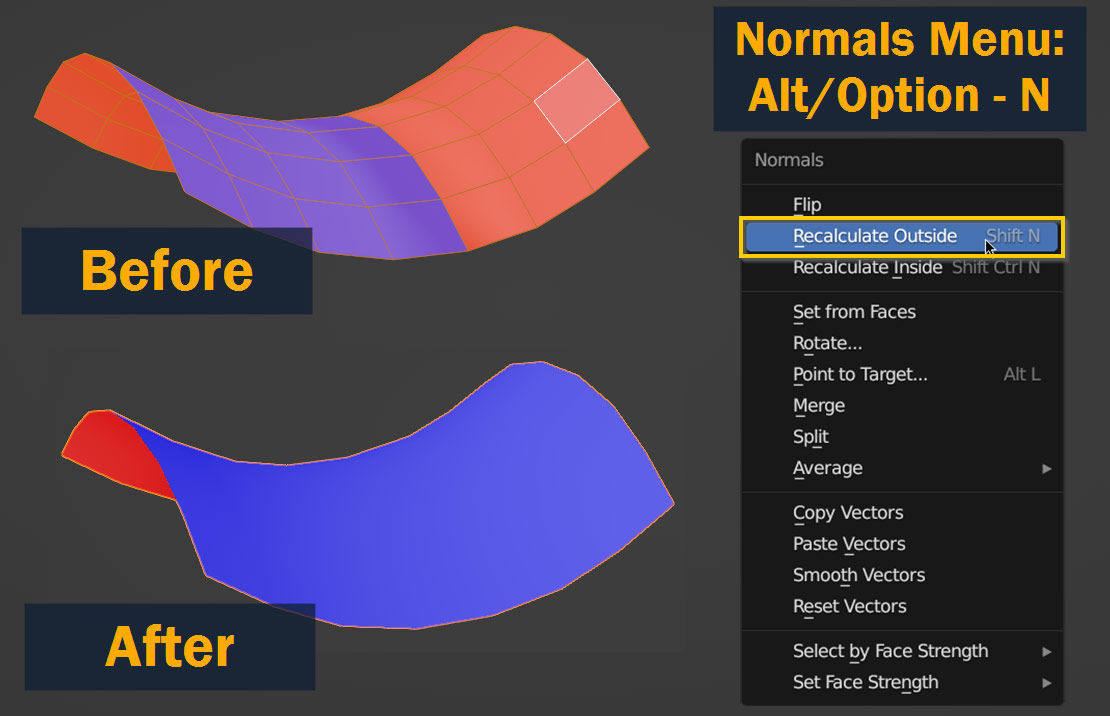
Here’s the example from earlier, before and after hitting Recalculate Outside:
This isn’t a very complicated model, but the same process works on higher-detail objects too – recalculating is generally very light on processing power!
Now, Recalculate Outside isn’t magic – it can only guess which part of the model is supposed to be the outer surface by taking into account how the model is created. For some models, such as concave parts or room interiors, you’ll have to select Recalculate Inside instead, once again using the Alt/Option – N shortcut key.

Recalculating outside and inside works pretty well, and usually it’s all you’ll need. But what if you want to manually change the directions of specific faces on your model, without recalculating everything?
In this case, simply select the area you want to reverse, use the Alt/Option – N hotkey, and select Flip.
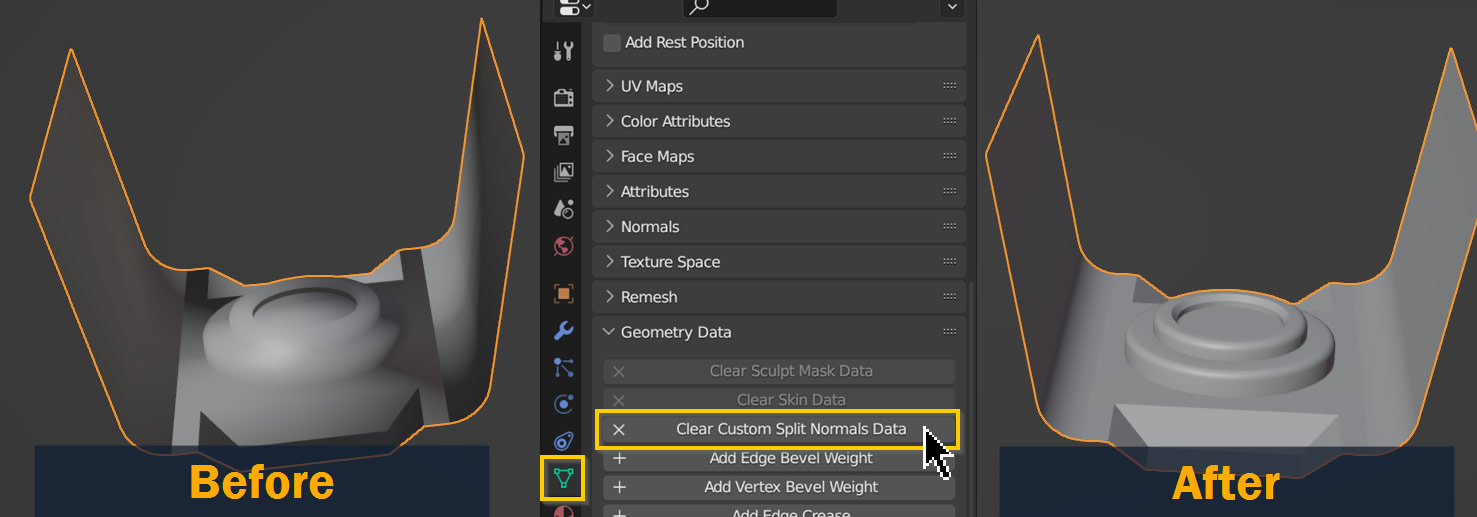
If your model has shading issues that aren’t solved by recalculating normals, it may be that Custom Split Normals Data has been baked onto your mesh somehow. This can happen when certain modifiers are applied, and can sometimes be present on models imported into Blender from different sources.
To get rid of this baked-in normal data, go to Object Data Properties > Geometry Data and select Clear Custom Split Normals Data.
This should reset any shading issues that were present!
If Blender flips faces on your model the wrong direction after pressing Alt/Option – N and selecting Recalculate Outside, try Recalculate Inside instead – sometimes Blender can’t tell which side of your mesh is supposed to be the outside.
If that still doesn’t solve the problem, try selecting the incorrect faces individually and pressing Flip!

If you’ve tried recalculating the normals on your model without any luck, and Clear Custom Split Normals Data doesn’t work either, you may be dealing with a different problem altogether.
One option to try is Merge by Distance – sometimes either due to mistakes while modeling, or just as a result of ordinary actions, you can end up with duplicate vertices sitting on top of each other which can cause similar-looking shading artifacts. To eliminate these, press M to open the Merge menu and select By Distance.
If Merge By Distance still doesn’t work, check if you’ve got any modifiers on your object that may be misbehaving – for example, often Bevel modifiers can cause unexpected issues if the Amount is set too high.
Looks like we’ve arrived at the end; hopefully you now have a better understanding of what normals are and how to work with them! Even though normals in 3D are a complex topic, the issues they cause can usually be fixed pretty easily.
Let’s go over the key points I covered here one last time:
That’s it!
I hope you found this article useful – if you have any thoughts or feedback, feel free to leave a comment below.
Thanks for reading, and best of luck with your future projects!

Hello! I’m a self-taught 3D modeler and texture artist with experience on a variety of projects, ranging from planet creation to game props, vehicles, and environments. Although I’ve tried out a bit of everything, my main software is Blender. I’m a big fan of sci-fi and fantasy shows and books like The Expanse and Lord of the Rings, so most of my personal work has a fantasy or sci-fi theme – but I also love to experiment and try new things!


Add a comment