
 Autos
Autos
 LKW
LKW
 Busse
Busse
 Motorräder
 Militär
 Elektronik
 Waffe
Waffe
 Gebäude
 Flugzeuge
 Möbel
Möbel
 Charaktere
 Tiere
Tiere
 Raumfahrzeug
 Lebensmittel
 Schiffe
ansehen
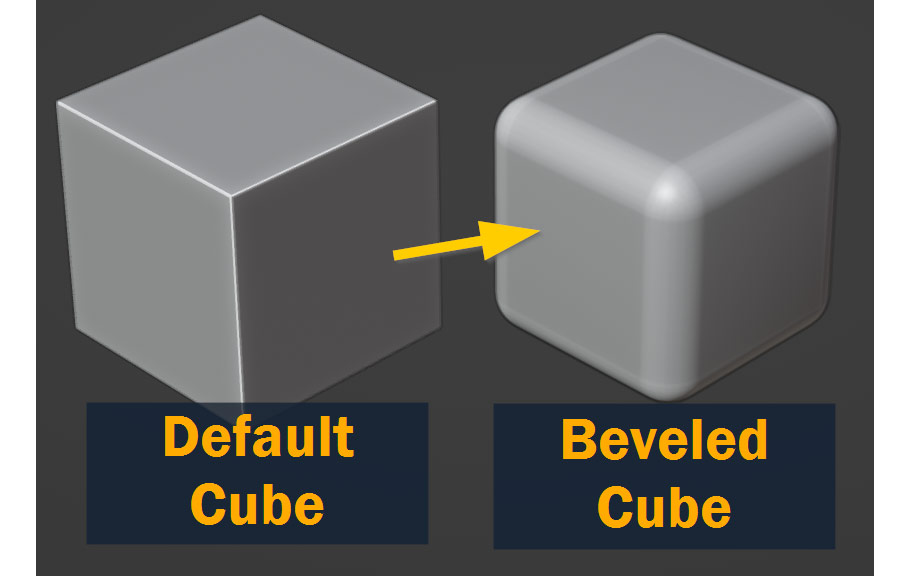
In 3D, making rounded edges on models is called Beveling – and for a lot of 3D modeling, it’s an indispensable tool. When used on a large scale, bevels can drastically alter the shape of your mesh; but when used on a small scale, beveling can be a great way to add a subtle touch of realism to your model!
However you use it though, beveling is undoubtedly an important tool to have in your 3D modeling toolkit – which is why in this article, I’ll cover everything you need to know about beveling. I’ll cover beveling edges, beveling vertices, and finally I’ll talk about how you can use the bevel modifier to automate the process!
Let’s start at the beginning – how do we use the bevel tool in Blender?
To start out, let’s cover the most common application of beveling in 3D: Beveling edges. Here’s the process for beveling an edge, step by step:
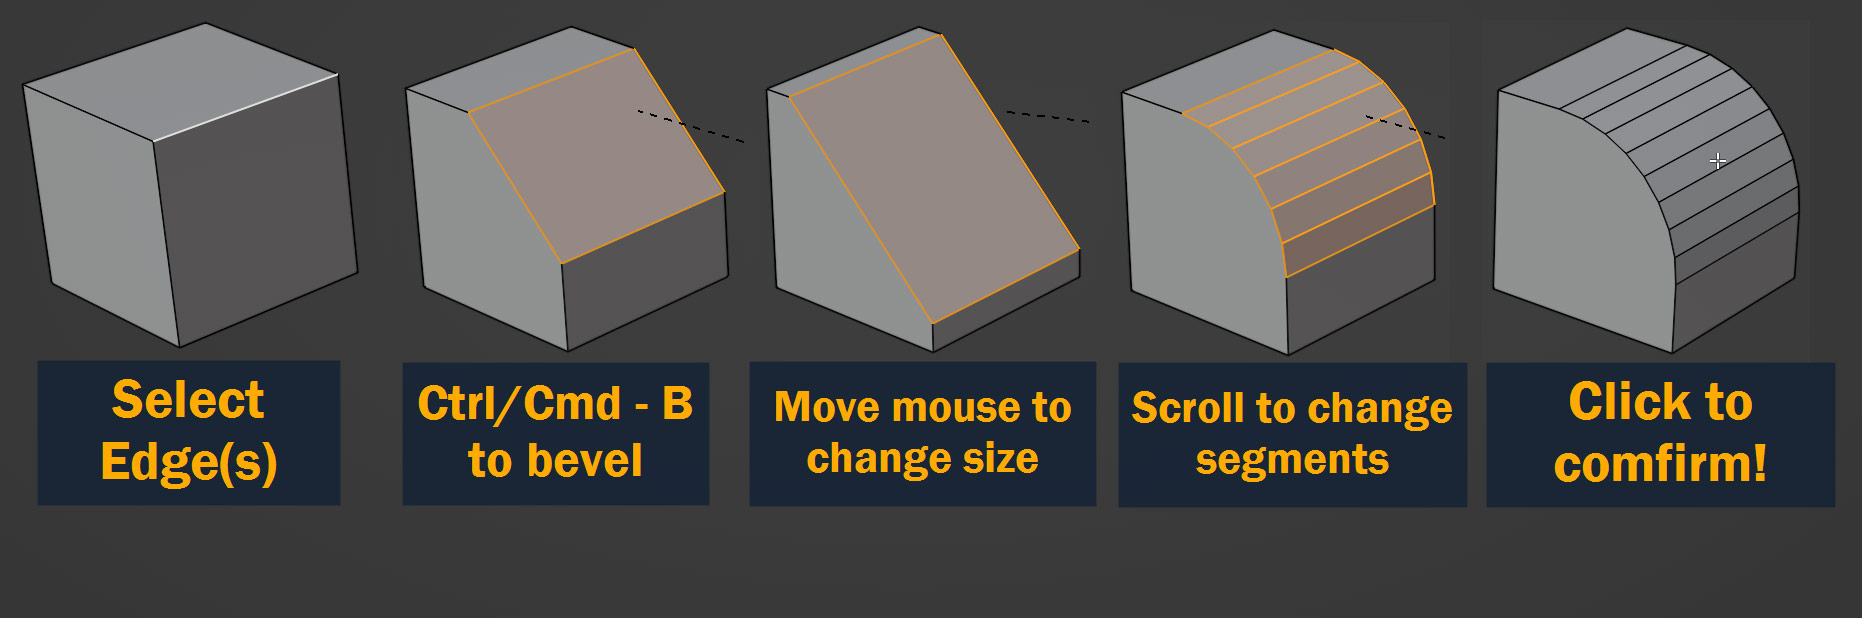
That’s it! Although it might sound a bit complicated at first, beveling becomes a very quick action once you get used to using it.
If you want some extra control over your bevels, you can adjust the bevel action with more advanced parameters after confirming, by opening the Bevel pop-up in the bottom left corner of the 3D view. Here, you can change width and segments, as well as adjusting the shape of the bevel and many other parameters!

Tip: If you’re noticing that the edges created by your bevels look angular and hard, try right-clicking on your model and pressing Shade Auto Smooth!
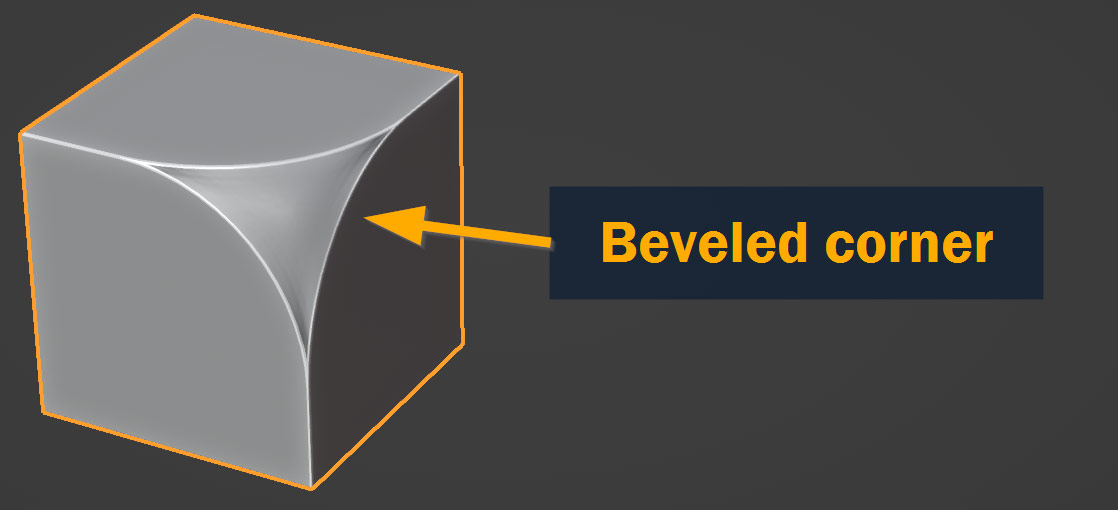
So, now we know how to bevel edges. But what if we want to make rounded corners instead of edges?
Well, you can actually use the same bevel tool for this. We just need to bevel the vertices instead of the edges. But if you select a vertex and press Ctrl/Cmd – B, you’ll notice nothing happens – to bevel vertices, you need to use a slightly different keyboard shortcut!
The steps to bevel vertices are the same as beveling edges – but instead of pressing Ctrl/Cmd – B, you’ll need to press Ctrl/Cmd – Shift – B.
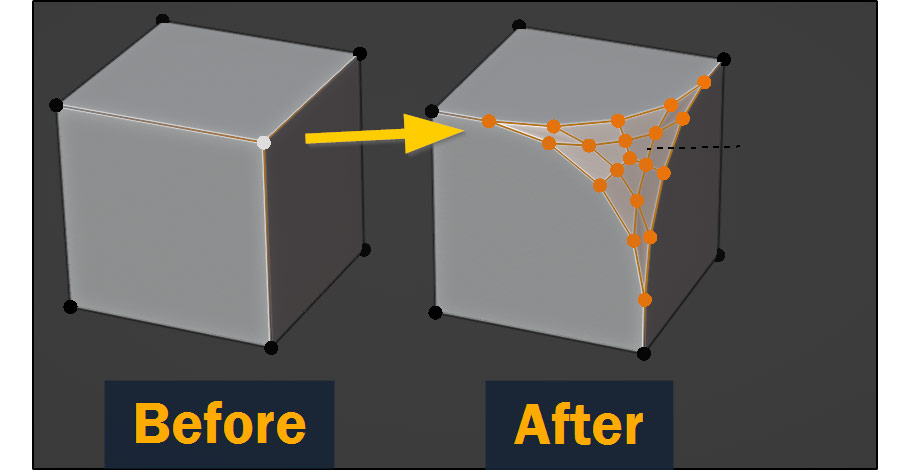
Just for clarity, let’s go over those steps:
Easy as that!
When you’re 3D modeling, the Bevel tool is a great asset for blocking out shapes and creating curved surfaces on your model.
But bevels have another use that’s equally important: in many kinds of 3D art, bevels are used throughout models to very slightly round off all the sharp edges of the mesh. This is important for realism, because no edge in reality is infinitely sharp – and adding a slight bevel to edges in 3D helps capture that.
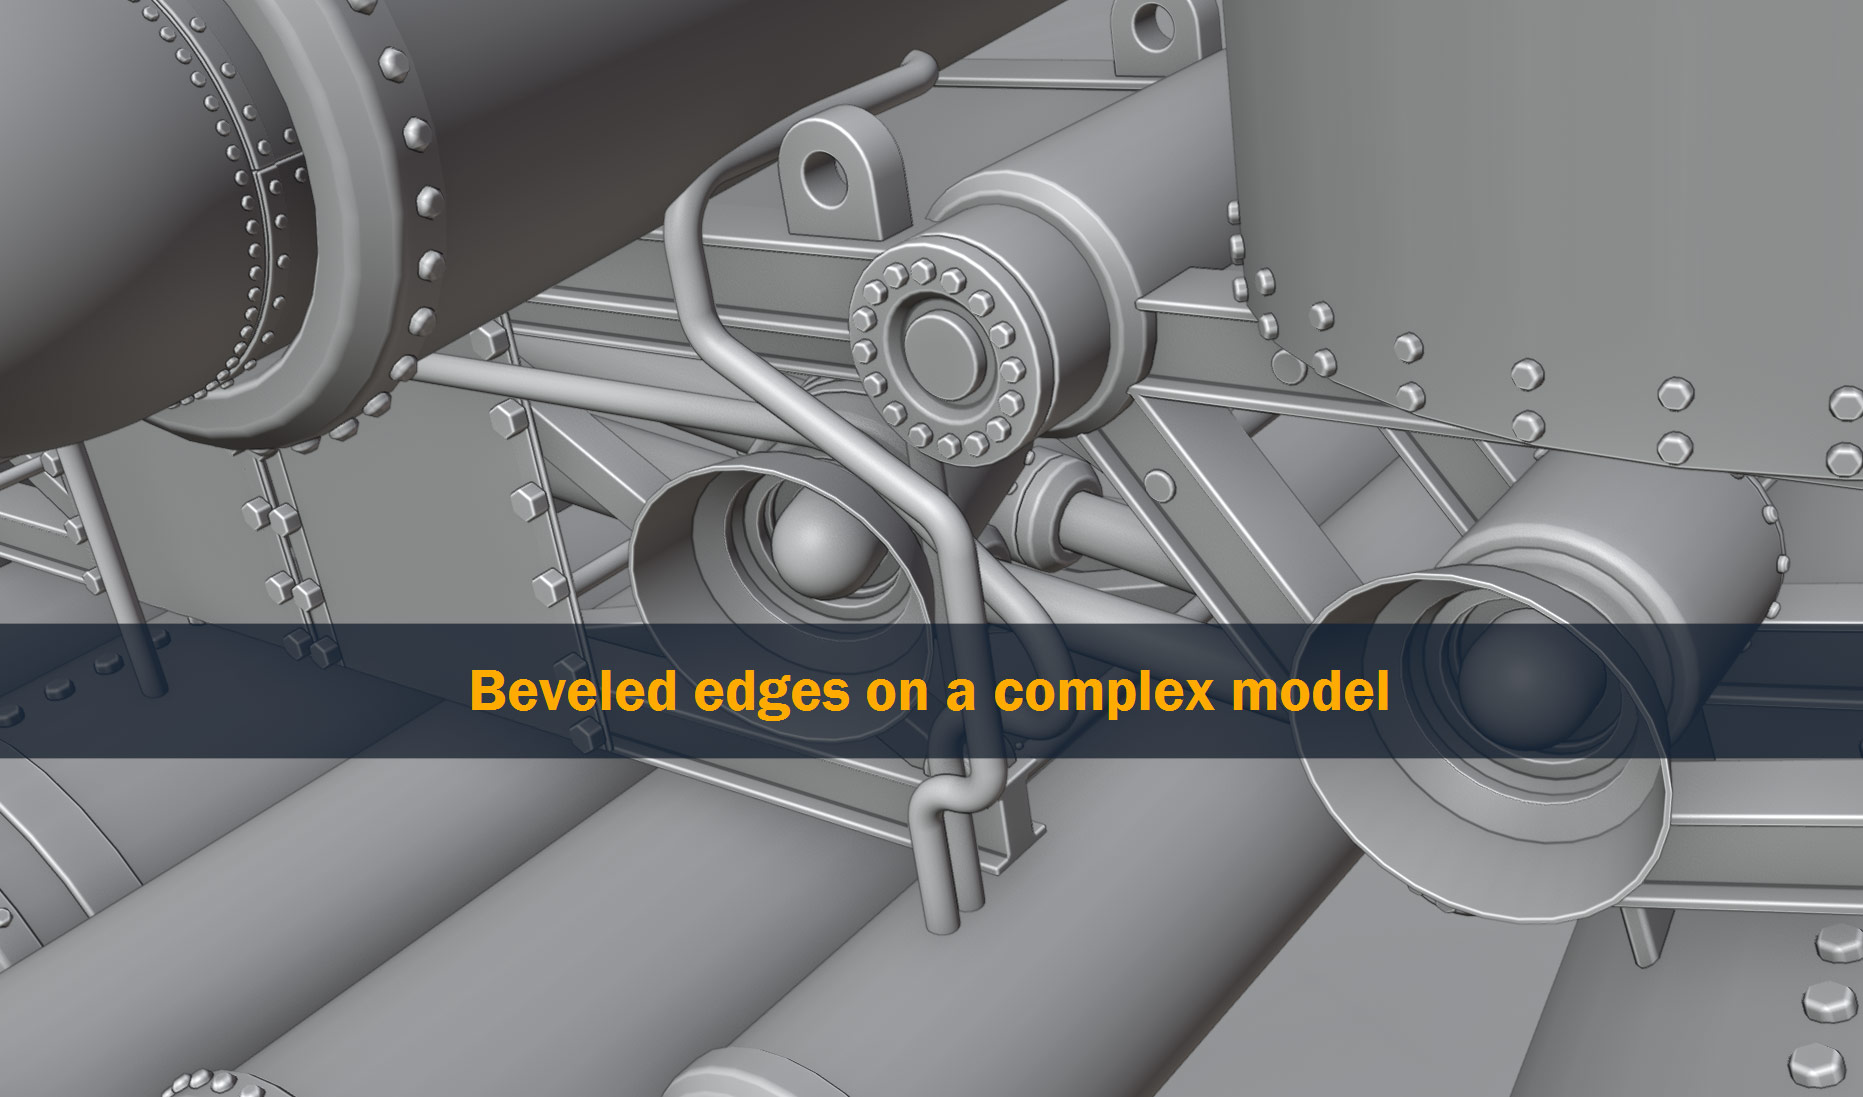
So, should you bring out the Bevel tool and start beveling every edge on your model? Probably not. While that might technically work to create the desired effect, you can do the same thing more quickly and non-destructively using the Bevel Modifier!
Let’s take a look at how to set up the Bevel Modifier on a simple cylinder object:
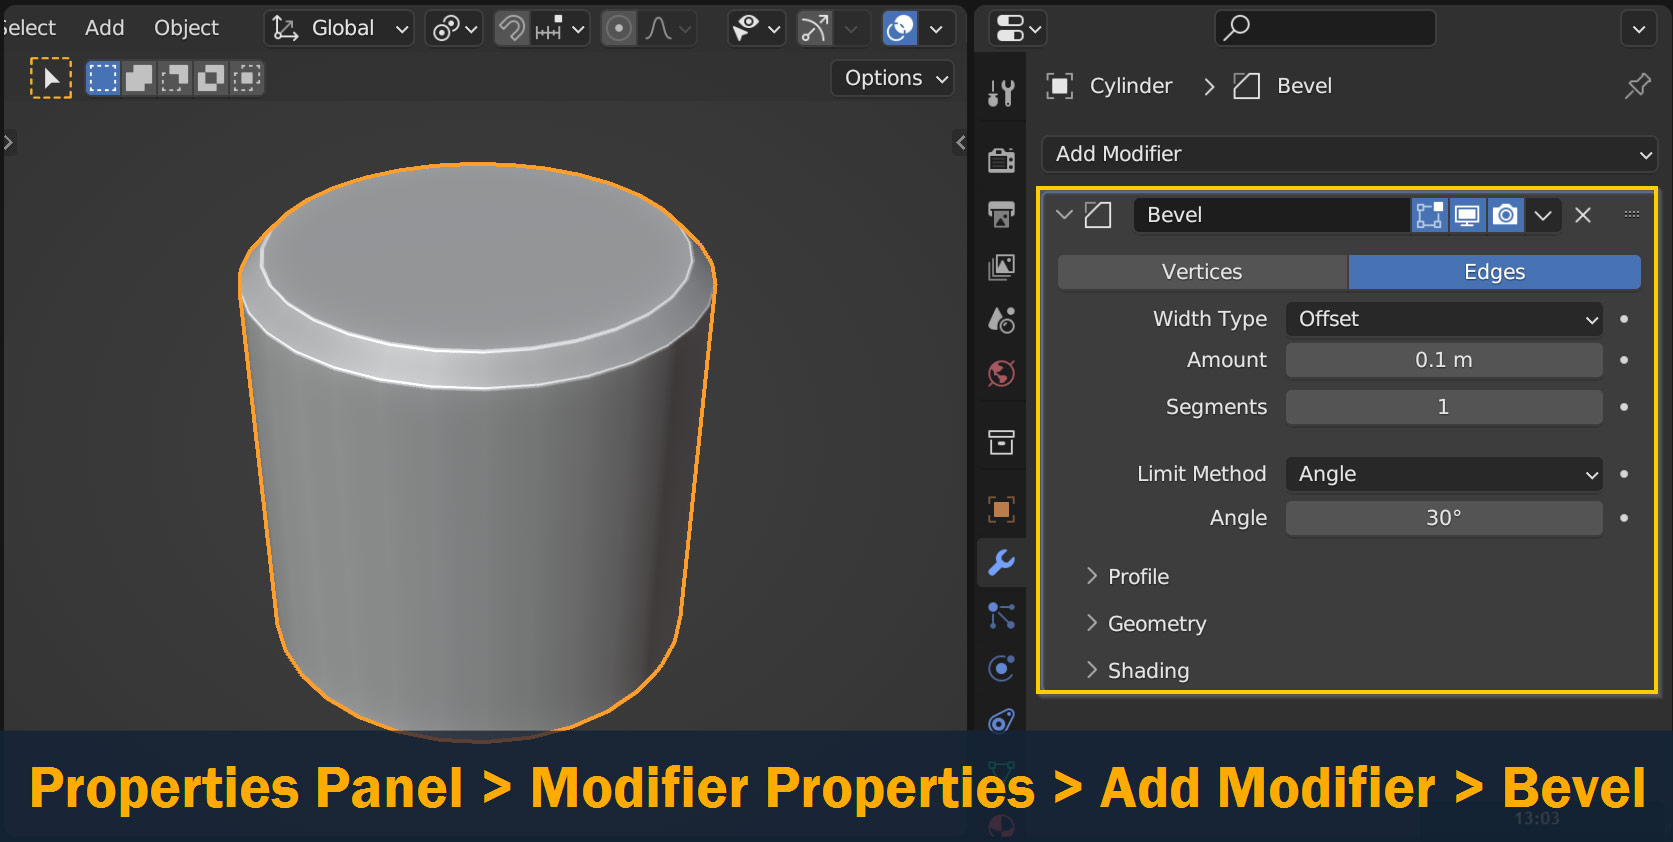
Success! But as with the Bevel tool, you’ll probably want to adjust some of the settings, which you can see on the Modifier that you added.
Just like with the bevel tool, you can adjust the size of the bevel effect using the Amount parameter, and you can change the number of edges by editing the Segments parameter.
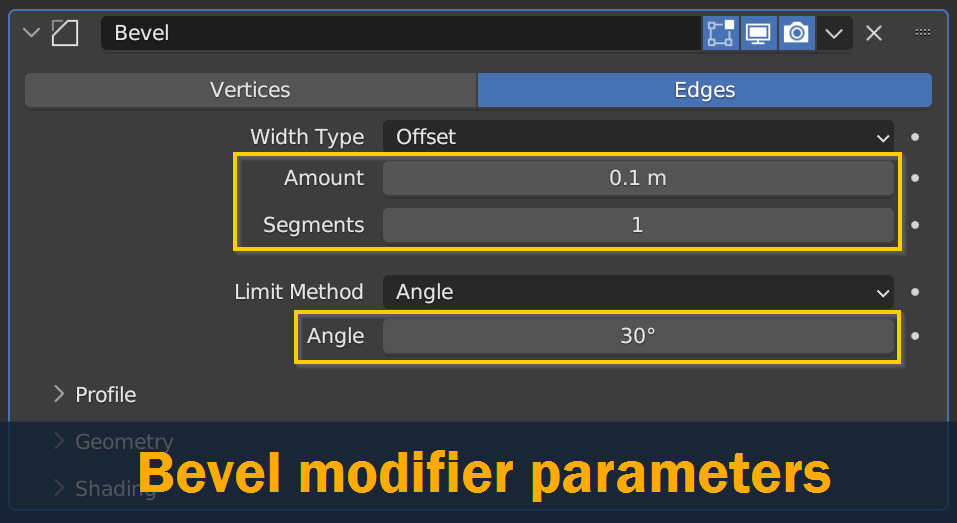
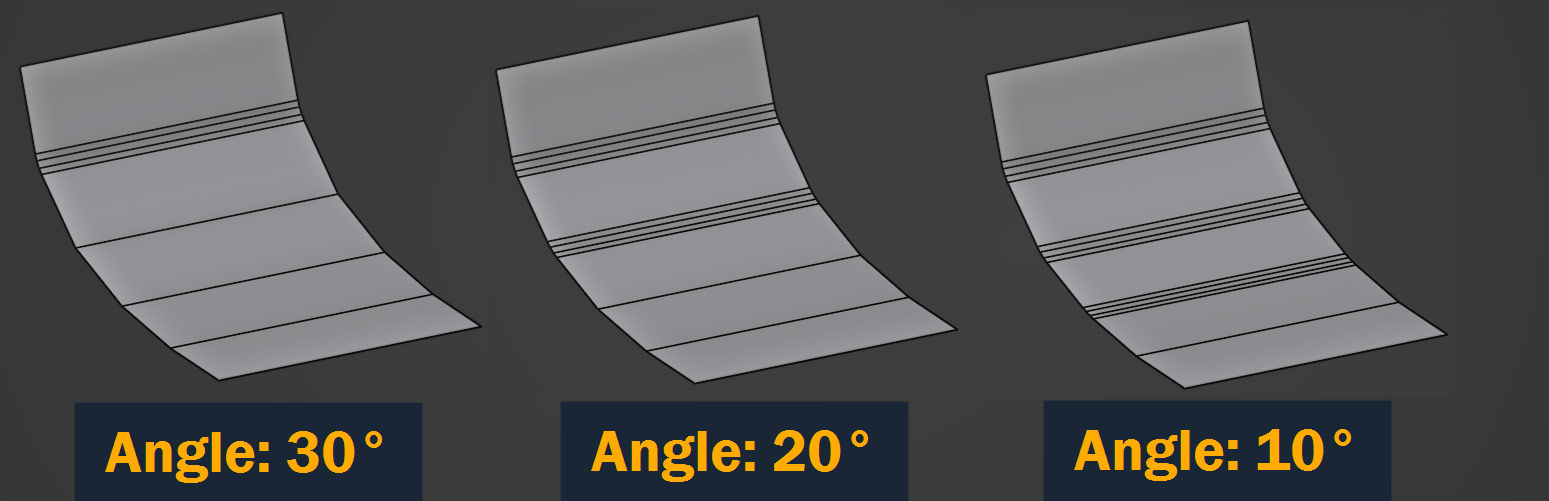
Now, these settings are obviously important – but one of the things that really makes the Bevel Modifier useful is that it automatically chooses which edges on your model to bevel, so you don’t have to select them one by one. It does this by limiting the minimum angle of edges that the bevel can be applied to – the default setting of 30° usually works well, but if you want you can change it by typing a different number in the Angle field.
Here’s how different Angle values can affect how your model is beveled:
Tip: to improve the shading on bevels created using the bevel modifier, go to the modifier, and enable Harden Normals in the Shading section!
So, now we know how to use the bevel modifier to improve the look of our 3D models.
But what if your bevel modifier is not working as it should be, or making smaller bevels than you want? Often this can be the case on more complex models, and it can be confusing to figure out what’s going wrong if you’re new to using bevels.
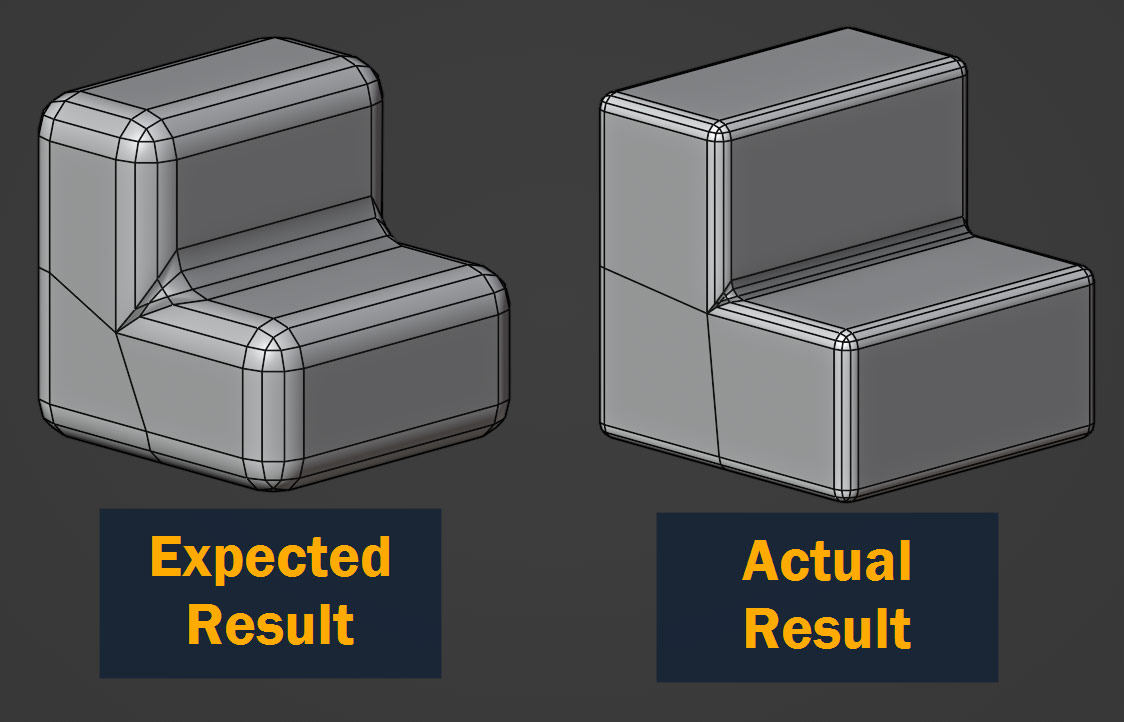
The important thing to understand about the bevel modifier is that it’s automatically constrained to only create bevels that don’t conflict with the original geometry on your model – so for example, if a hard edge of your model has another edge or vertex right next to it, the bevel modifier will keep all the bevels on your model small to avoid overlapping with that edge/vertex.
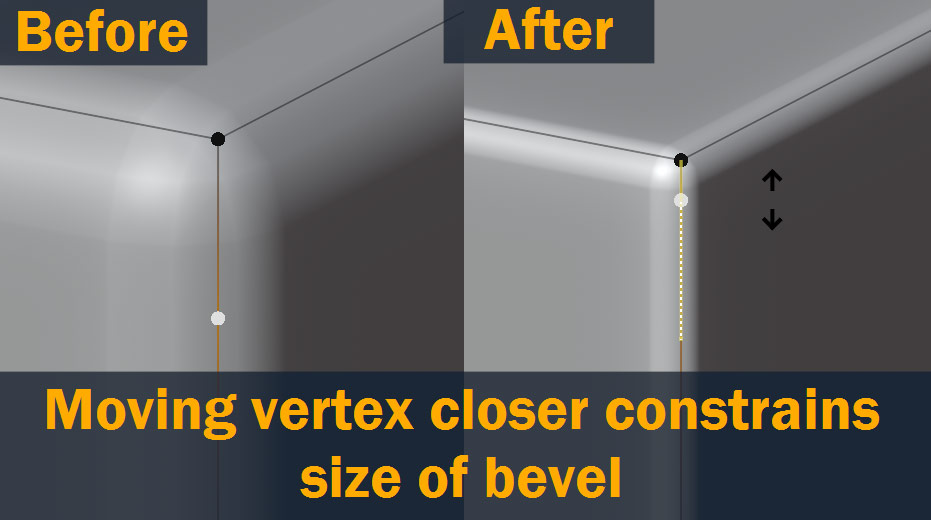
This is usually a good thing, because when a bevel overlaps with a nearby edge it can seriously mess up the geometry on your model – and if you want to change it, generally all you have to do is make sure the hard edges on your model have enough space around them to support the size of bevel you want!
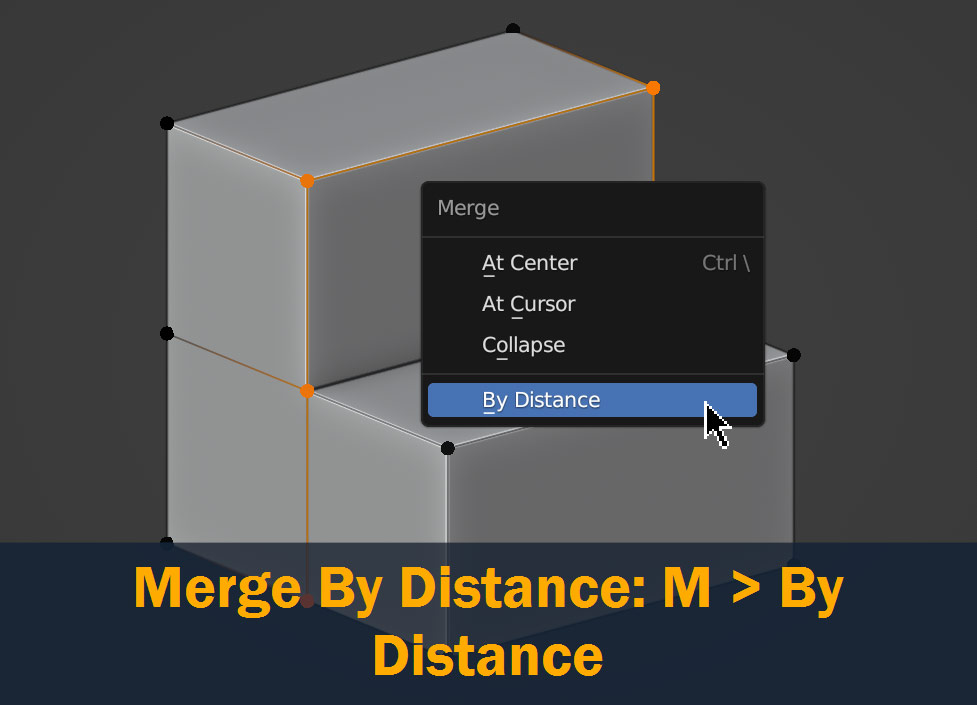
Sometimes though, double vertices can cause the bevel modifier to stop working altogether, and this can be a problem. But luckily, these double vertices are easy to remove. To get rid of them, go into edit mode and press M to open the Merge menu and select By Distance – this should automatically remove any double vertices from your model!
That’s beveling in Blender!
With these tools in your toolbelt and a bit of practice, beveling will become second nature for your 3D modeling tasks.
Before we finish up, let’s go over the steps I’ve covered here one last time:
With that, I hope you found this article helpful! If you have any thoughts on this topic, feel free to leave them in the comments section below.
Best of luck on all your 3D projects, and thanks for reading!

Hello! I’m a self-taught 3D modeler and texture artist with experience on a variety of projects, ranging from planet creation to game props, vehicles, and environments. Although I’ve tried out a bit of everything, my main software is Blender. I’m a big fan of sci-fi and fantasy shows and books like The Expanse and Lord of the Rings, so most of my personal work has a fantasy or sci-fi theme – but I also love to experiment and try new things!


Add a comment