
 Autos
Autos
 LKW
LKW
 Busse
Busse
 Motorräder
 Militär
 Elektronik
 Waffe
Waffe
 Gebäude
 Flugzeuge
 Möbel
Möbel
 Charaktere
 Tiere
Tiere
 Raumfahrzeug
 Lebensmittel
 Schiffe
ansehen
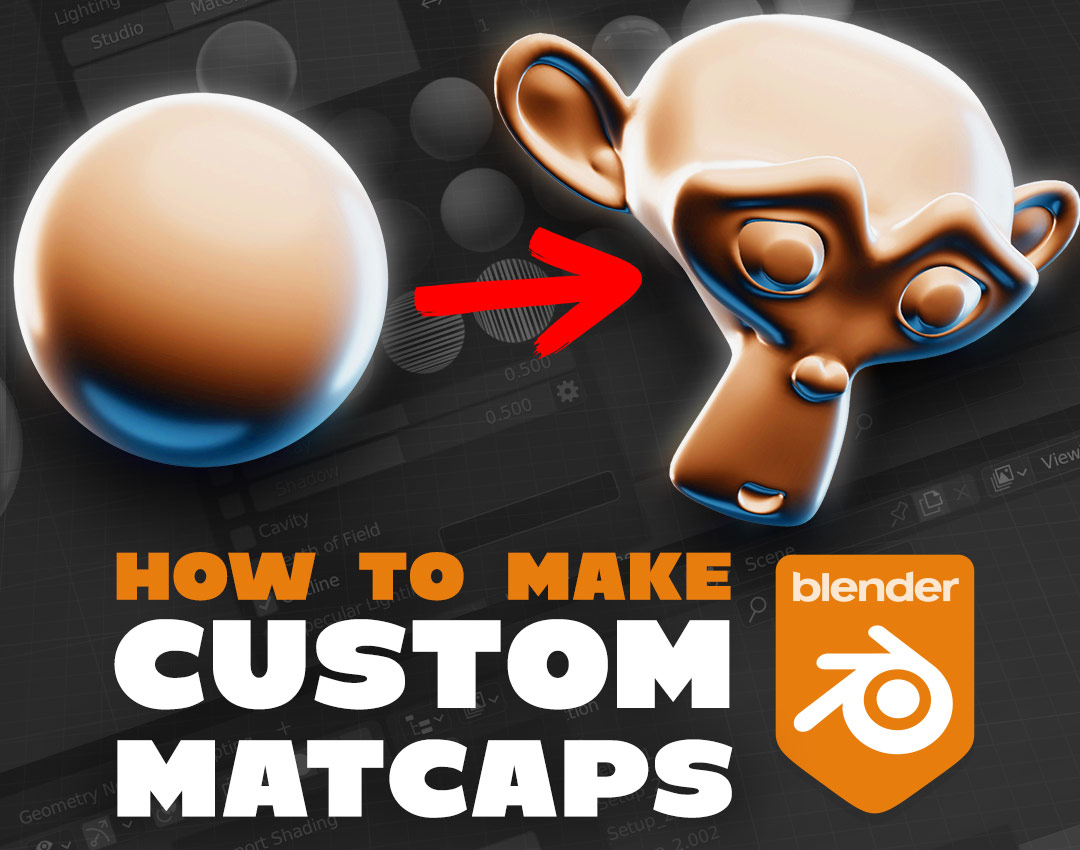
In 3D, MatCaps are a great way to quickly visualize lighting on your models without needing to render anything. They make it easy to see the shape of your creations with different lights and materials – and if you’re feeling creative, you can easily create custom MatCaps to use in your Blender scenes!
In this article, we’re going to cover everything you need to know about MatCaps in Blender; we’ll go over what they are, how to use them, and how they work; and we’ll also go over all the steps you need to create your own matcaps.
If that sounds useful, read on!
In the world of 3D art, MatCap stands for Material Capture. A MatCap shader is essentially a simplified pre-set material and lighting setup which you can quickly apply to your scene to change how it looks.
MatCaps primary use in 3D art is for previewing and visualizing models and scenes in 3D while working – Matcaps are great for this purpose, because they don’t take any time to render and allow you to rapidly change the lighting and material. For example, you can quickly switch between viewing your project with a glossy material and a rough material just by selecting a different MatCap!
In Blender, it’s easy to use MatCaps in your scene – in the 3D Viewport, first make sure you’re in Solid shading mode (press Z to change it if you’re not). Next, go to the top right corner of the 3D viewport and click the Shading dropdown arrow; select MatCap, and click the preview image below to change the MatCap that’s being used.
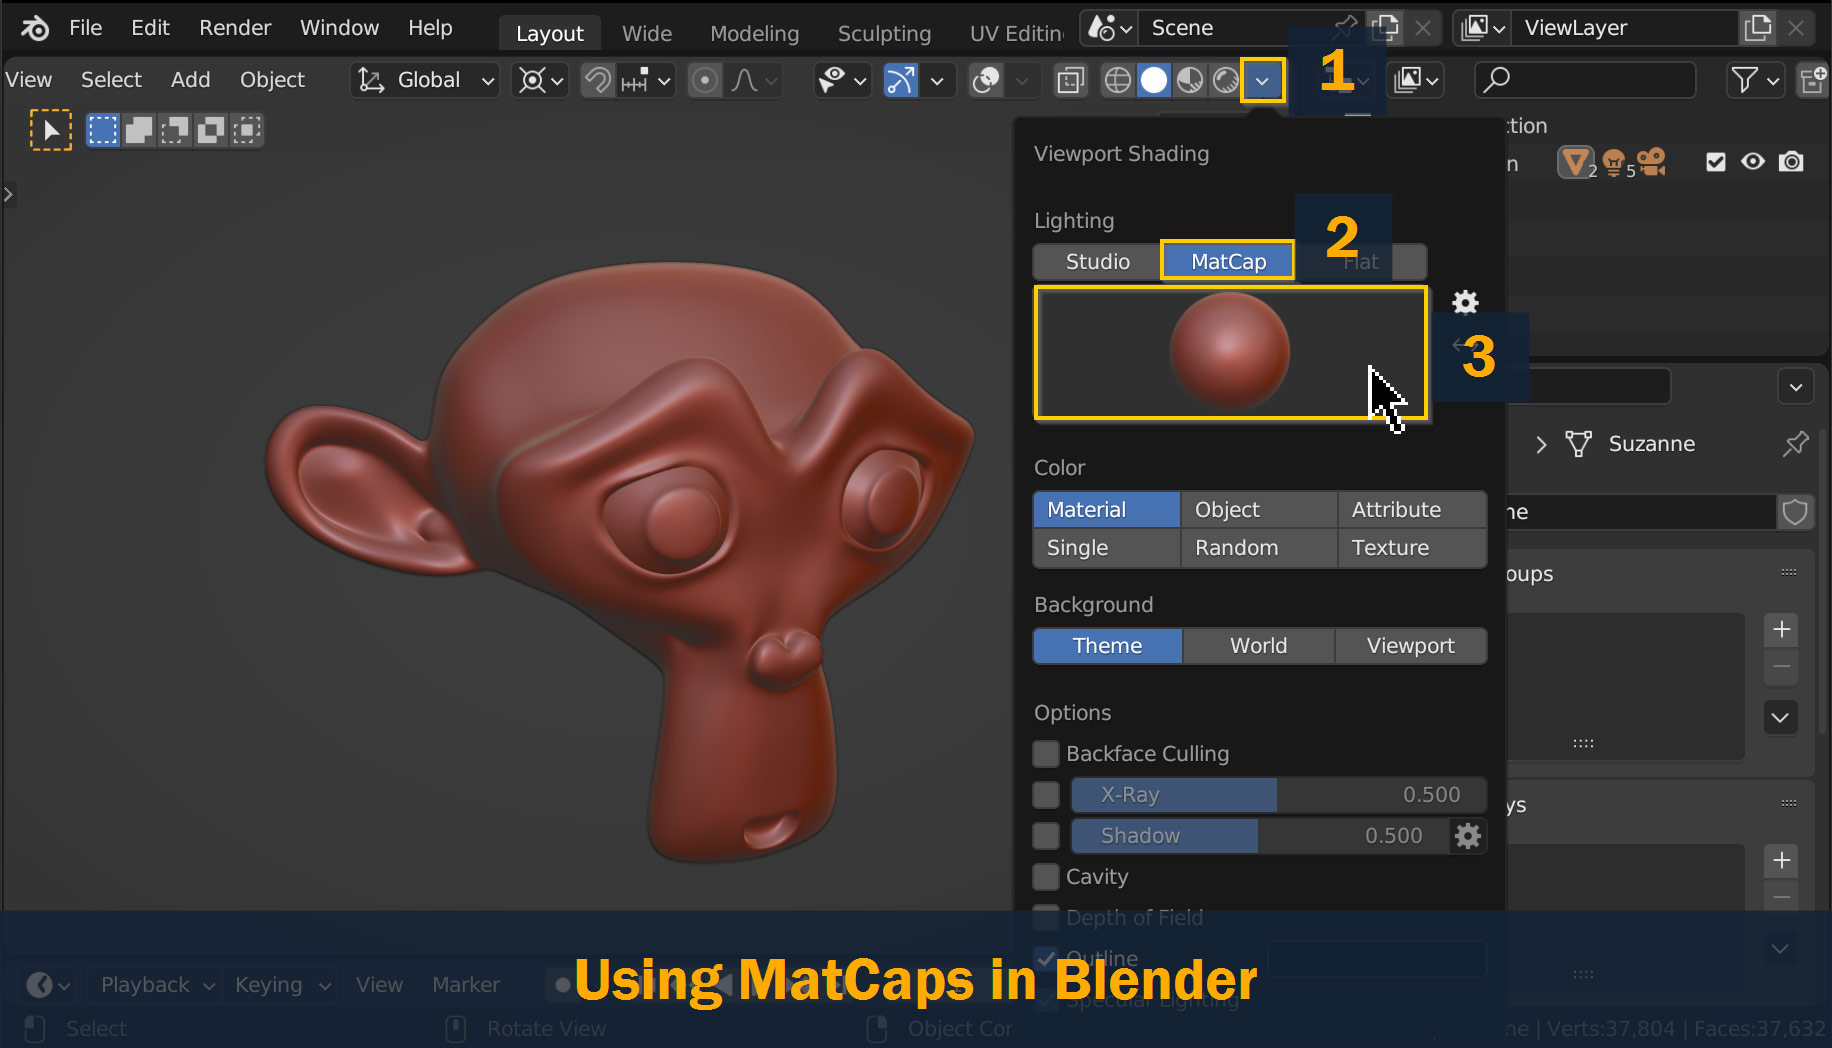
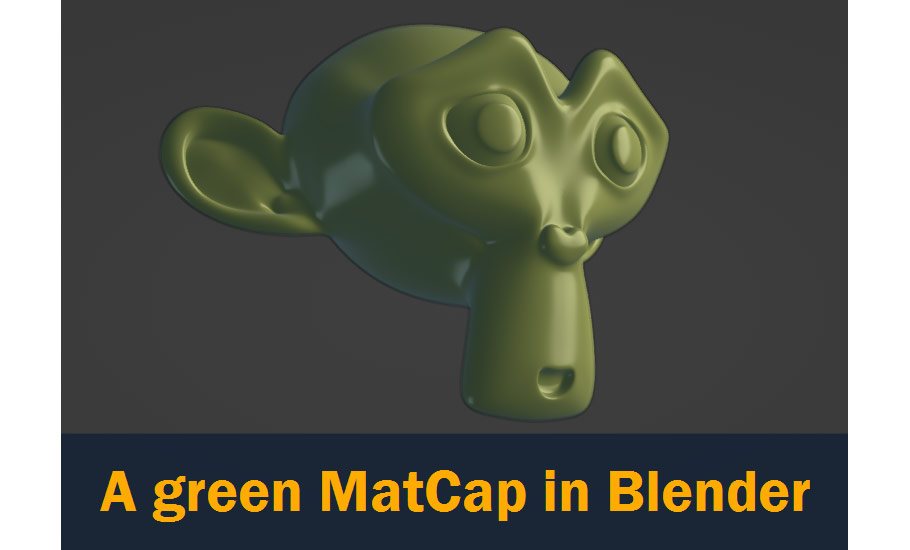
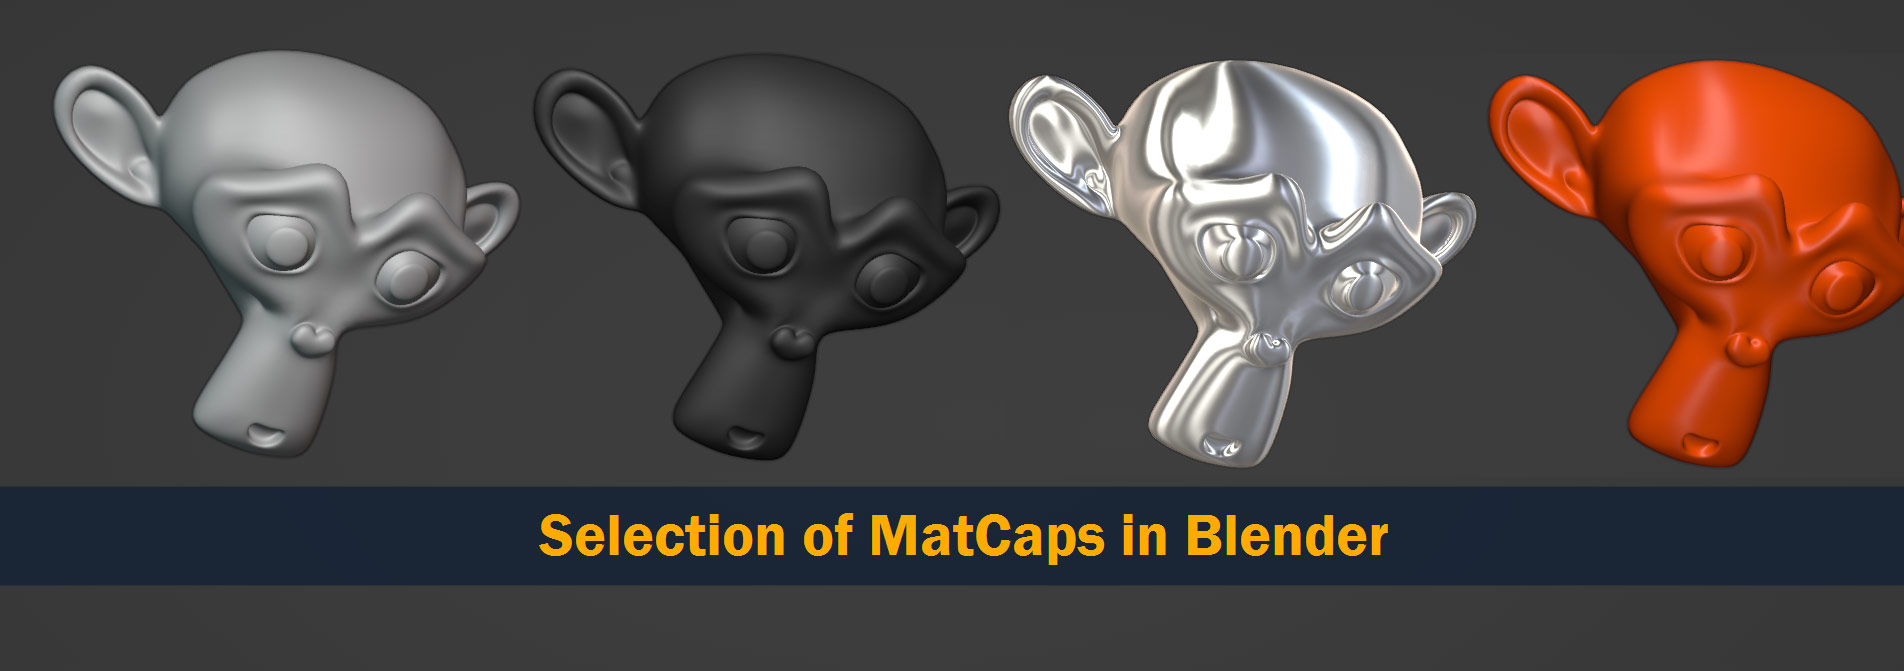
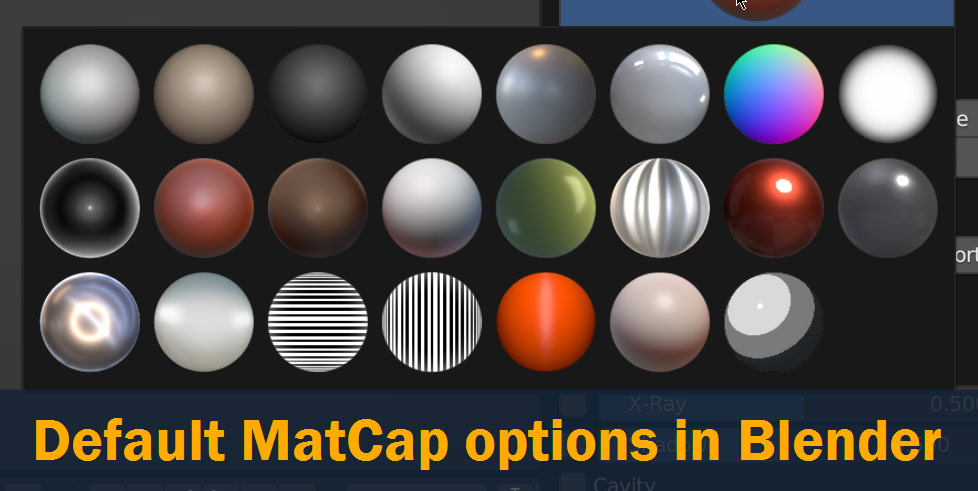
Blender comes with a wide selection of MatCap shaders by default; try clicking a few of them to see how they change your scene! The MatCap you use for your scene depends mostly on personal preference, but there are a few aspects that can be helpful in different situations – for example, glossy MatCaps can be helpful for spotting issues and artifacts on smooth surfaces, and matte MatCaps are great for seeing the shape of your mesh while modeling and sculpting.
Blender also makes it very easy to install new MatCaps, whether they’re downloaded from online or custom made. Simply click the gear wheel icon to the right of the MatCap Preview to open the Lights preferences window, and click the Install button for MatCaps – navigate to the location of the MatCap image on your computer and click Install Light to add it to Blender.
So, now we know how to use MatCaps – but how do they actually work?
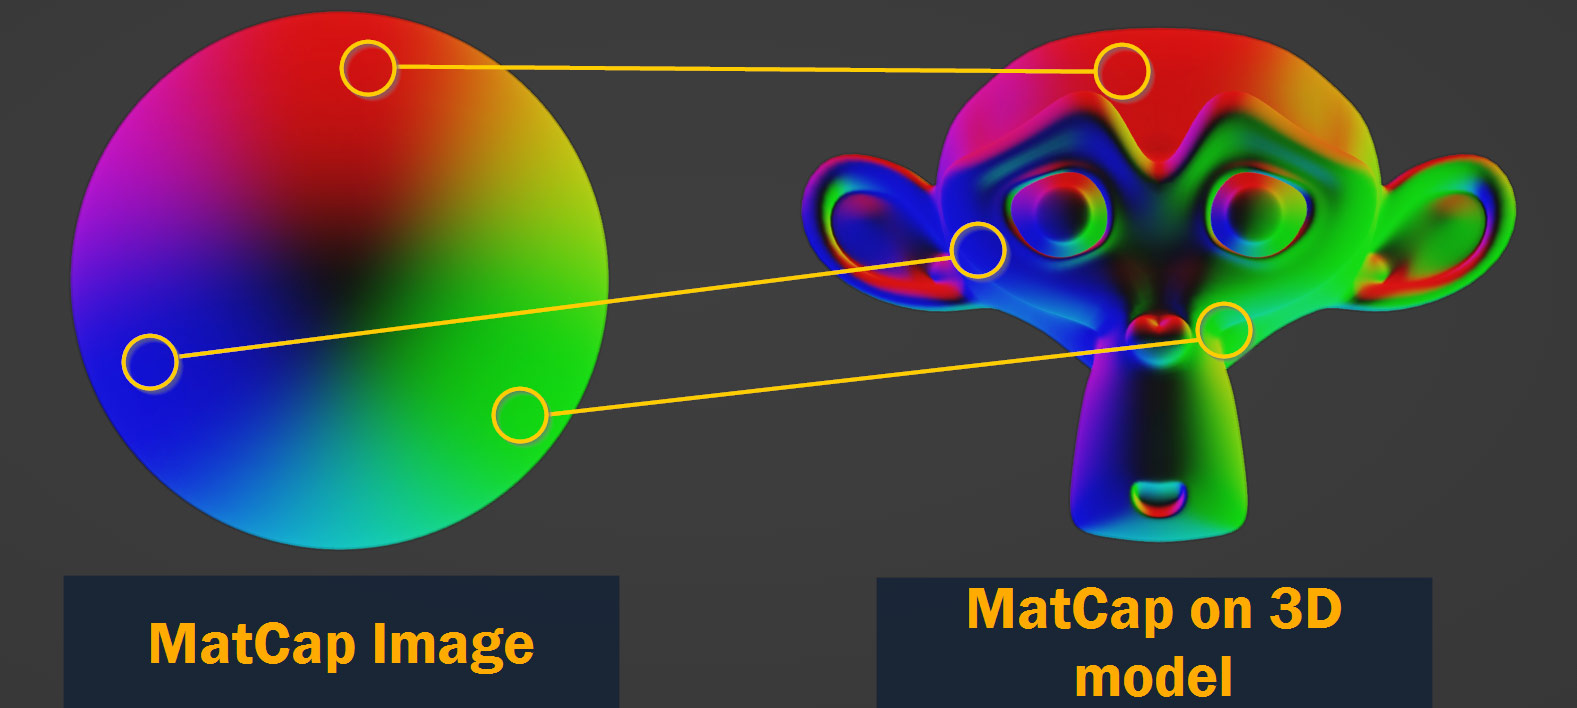
MatCaps are actually very simple in how they function. A MatCap uses a pre-rendered image of a sphere with a lighting setup and material, and essentially takes the color values from different points of the sphere and applies them to corresponding angles (or normals) in your scene. So, for example, if the top side of the sphere in the MatCap image is red, then parts of your model that face upwards in your viewport will also be red.
So, now we know what MatCaps are, how to use them, and how they work – now let’s see how we can make our own custom MatCaps to use in future 3D projects!
Since MatCaps are just regular images, they’re actually very easy to create. No need for special software or file formats. In fact, any JPG or PNG image can be used as a MatCap and will show up in your 3D scene. But to get the best results, it’s best to follow a specific format – and that’s what we’re going to cover here!
To start with, let’s give ourselves a blank canvas – clear the default objects from your project by selecting all using A, and hitting the Delete key.
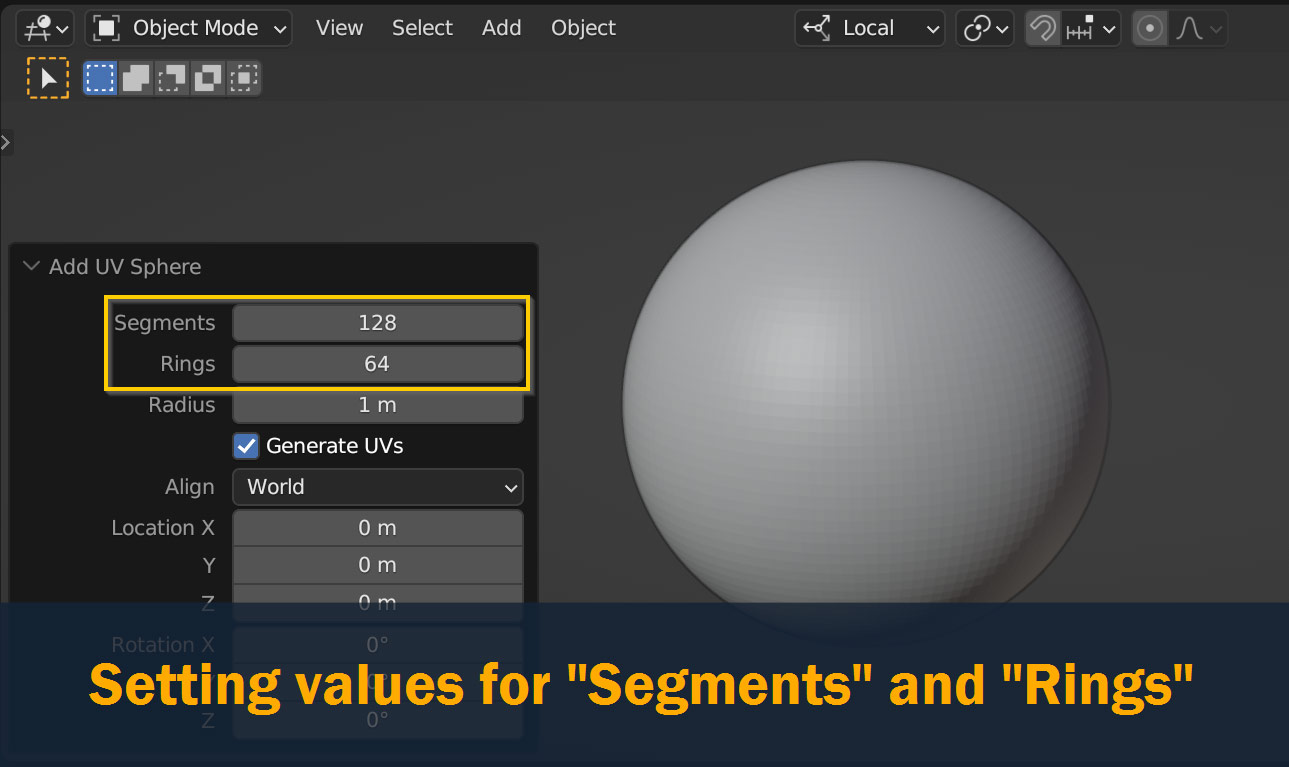
Next, add a UV Sphere to your scene (Shift – A). The default radius and location are good, but you’ll need to increase the Segments and Rings values – I used 128 for Segments and 64 for Rings. You’ll also need to enable smooth shading on your sphere by right clicking and selecting Shade Smooth.
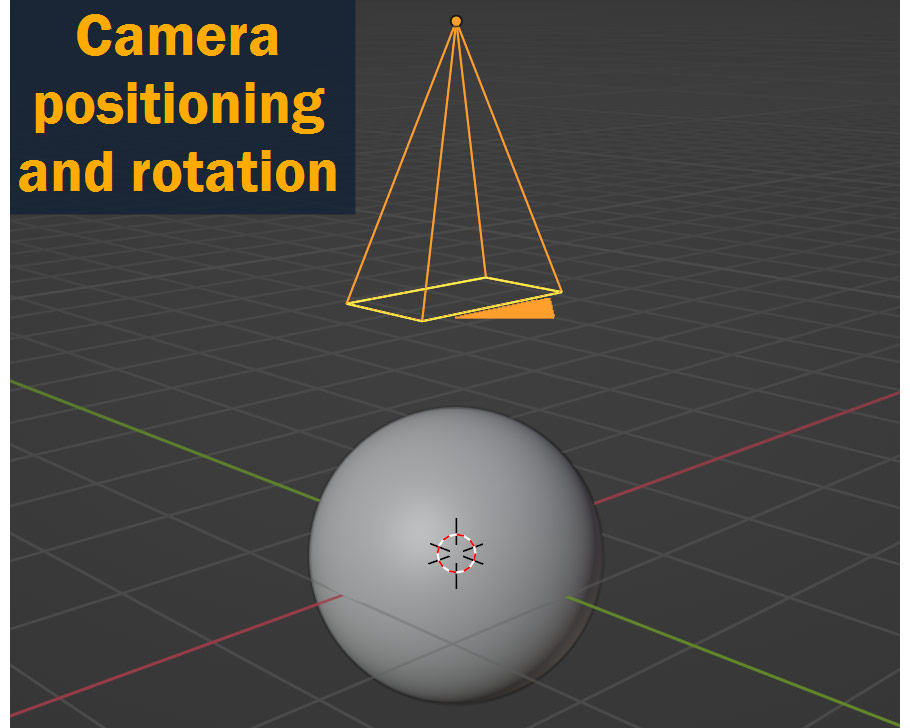
Now, let’s set up the camera to render from. Press Shift – A again to add a camera to your scene, and move it on the Z axis so that it’s above your sphere – clear the rotation on the camera with Alt – R so that it’s pointing downward at the sphere, as shown.
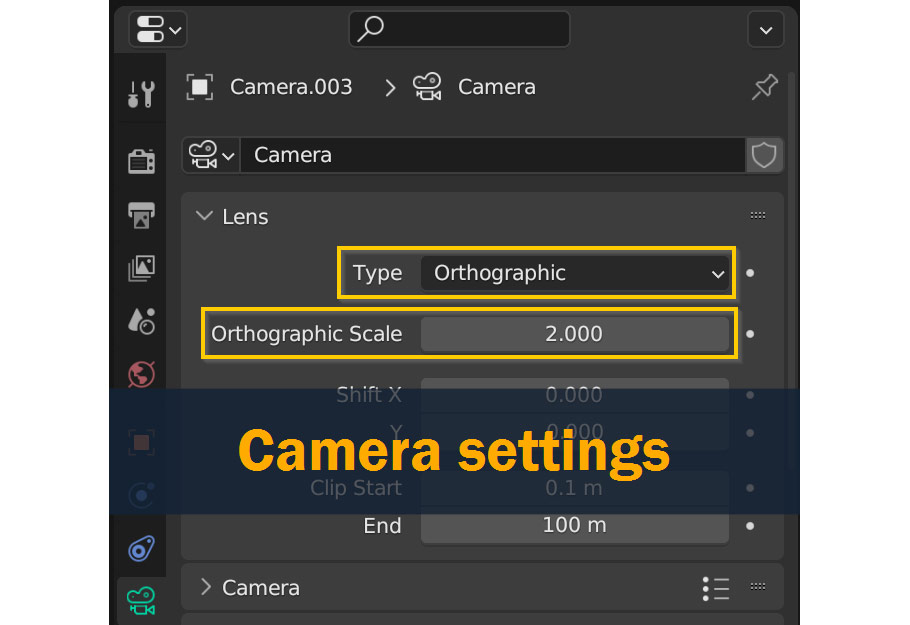
Next, we’ll need to adjust the camera settings a little bit. With the camera still selected, go to the Properties Panel, and click on the Data tab with the green camera icon. Change Type to Orthographic, and change Orthographic Scale to 2.
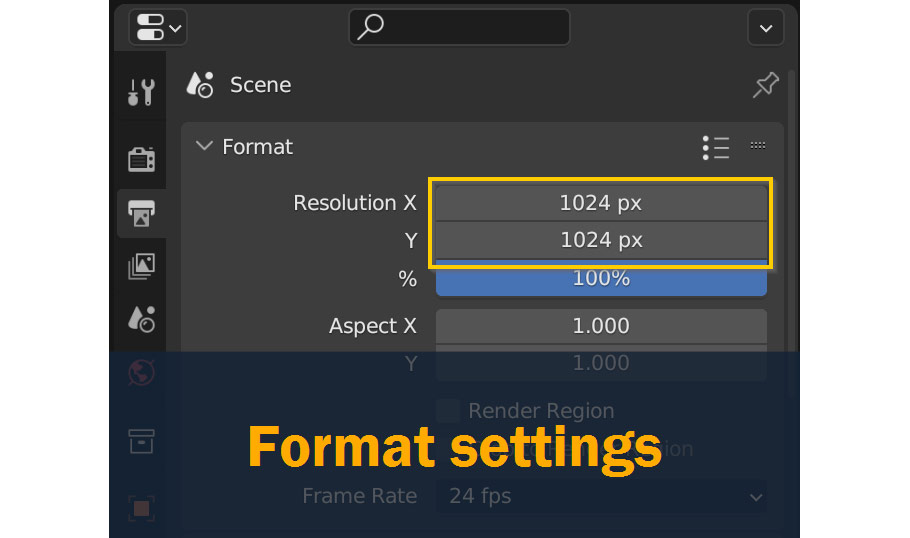
Finally, we’ll need to adjust the render resolution in the Output Properties. Still in the Properties Panel, go to the Output Properties tab and look at the Resolution values – the final image needs to be square, so the X and Y values for resolution should be the same as each other. For most MatCaps, 1024*1024 is plenty!
In the end, your 3D scene should look something like this:

Now comes the fun part – let’s set up some lighting on our sphere!
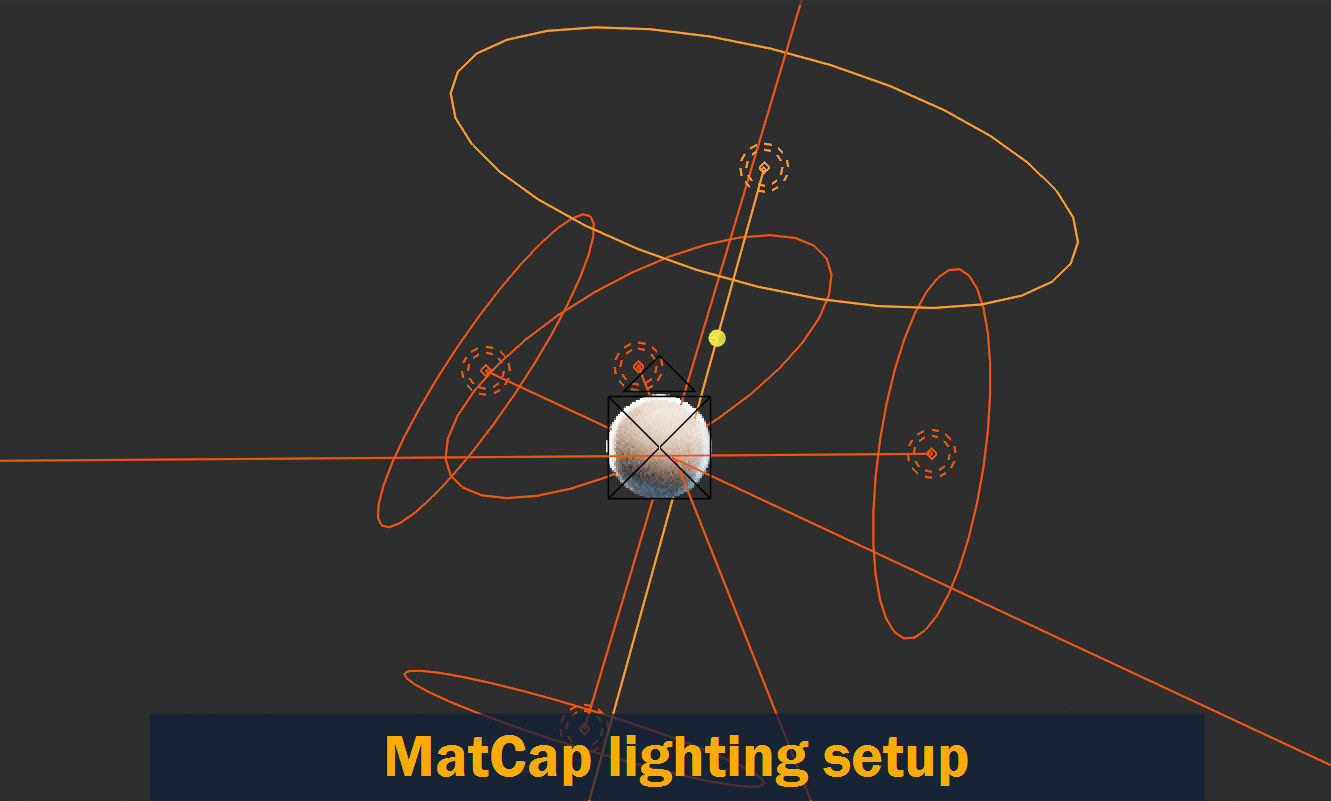
Press Z to go into Rendered view, and press Shift – A to start adding some lights to your scene. What you do at this stage is up to you – feel free to adjust light colors, power, and sizes to get the lighting on the sphere looking how you want it.
For my setup, I used area lights to get a soft light on my sphere – one main light illuminates the top of the sphere, and four smaller lights add illumination to the edges and bottom.
I didn’t do this for my example, but if you feel so inclined you can also set up an HDRI background image to contribute lighting to your sphere – go to World Properties > Surface and click the yellow circle next to Color; select Environment Texture, and click Open to load in a custom HDRI from your computer.
Once you’ve got some lights in your scene, you can start setting up the material on your sphere – this is where your MatCap really starts to pop!
As a general rule, it’s a good idea to stick to the Principled BSDF node for MatCap materials – try adjusting things like color, roughness, and metallic values; you can also add things like sheen, clearcoat, or even create a glass material using Transmission.
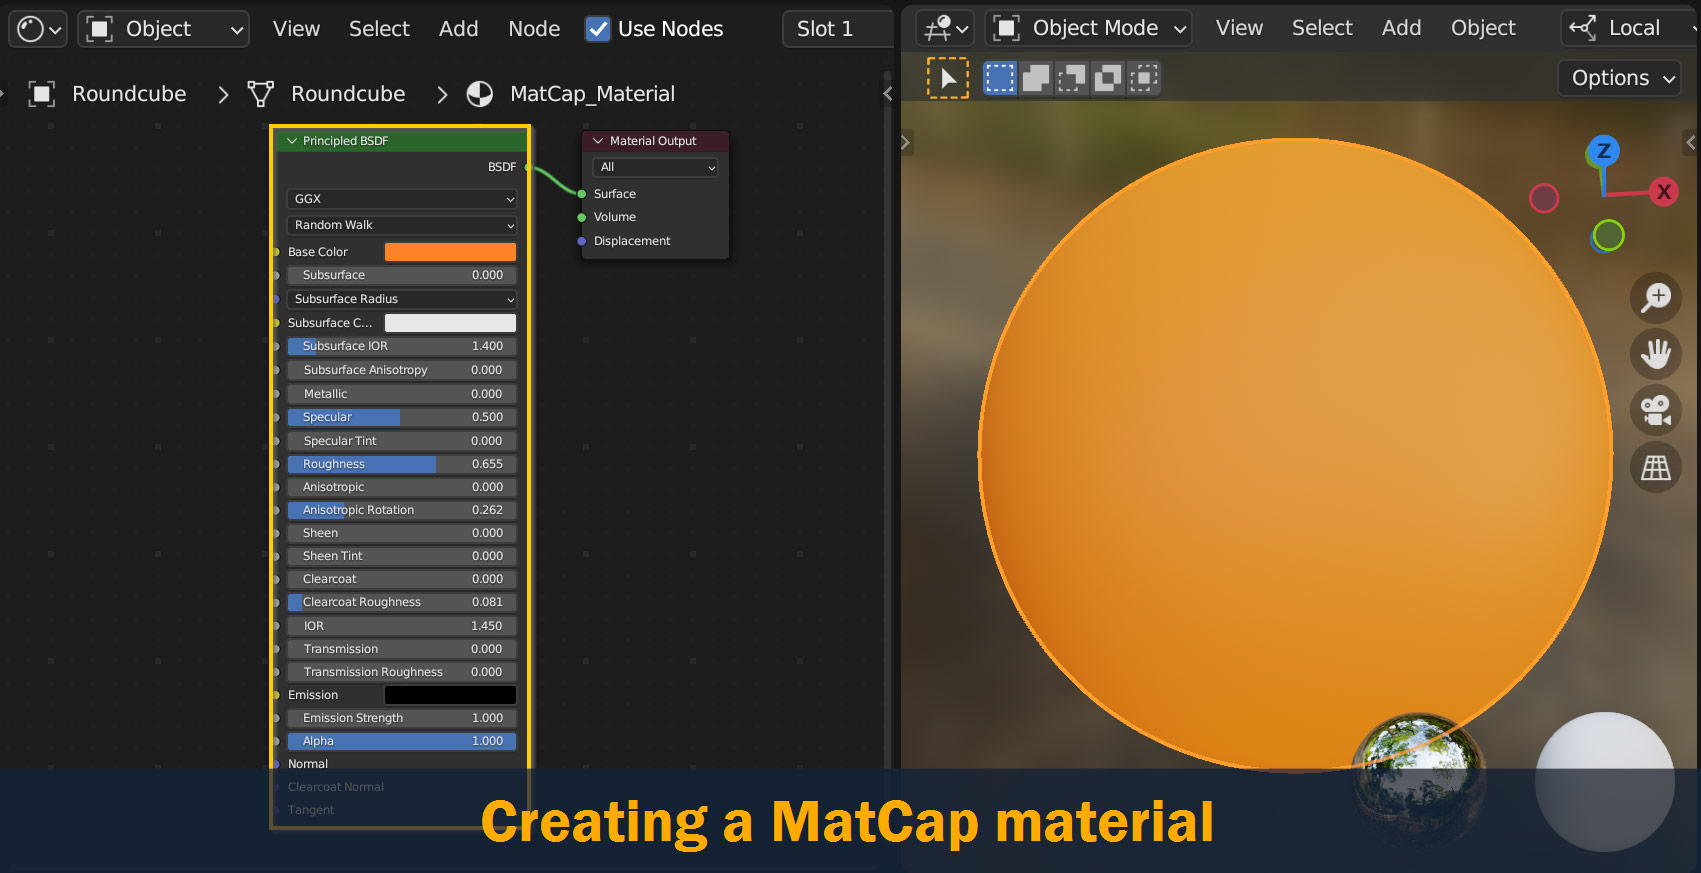
The one thing that you probably don’t want to do for MatCap materials is to add any kind of texture to the material. Remember, the MatCap material is based on the surface angle of your mesh and the location of your camera; so if you add textures to your MatCap, they will act more like reflections, distorting and shifting as you view the model from different angles. Not exactly what you want from a texture!
After setting up the MatCap material and lighting, here’s how my result is looking in the viewport:
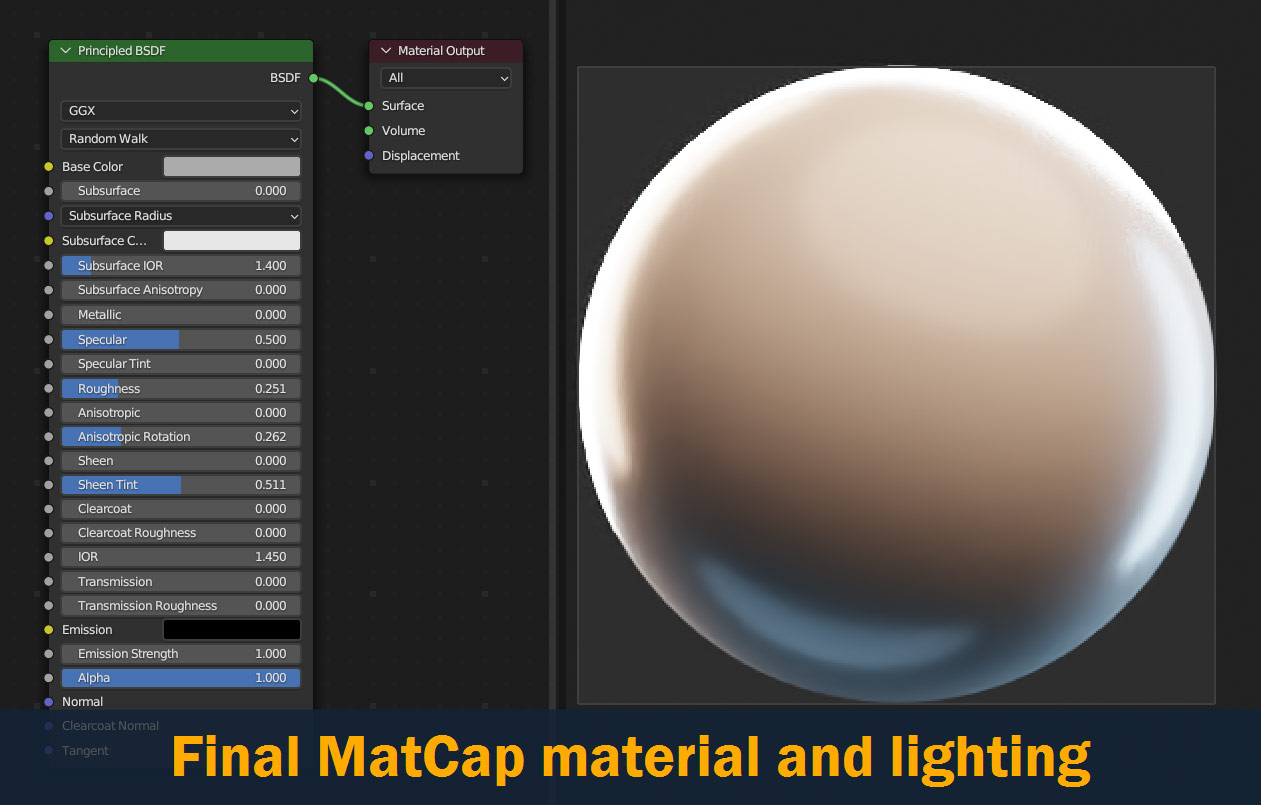
This is looking good to me – so let’s move on to Rendering!
For MatCaps, the render settings you use aren’t that important – as long as the result is smooth and not noisy, it should work fine. You can use Cycles or Eevee; when it’s just a simple picture of a sphere like this, the differences between the two aren’t noticeable. With either one, the default render settings should work fine.
When you’re ready to render, hit F12 on your keyboard to begin.
Once it’s done rendering, press Image > Save As, and export it as either a PNG or JPG image.
With that, you’ve successfully created your first MatCap!

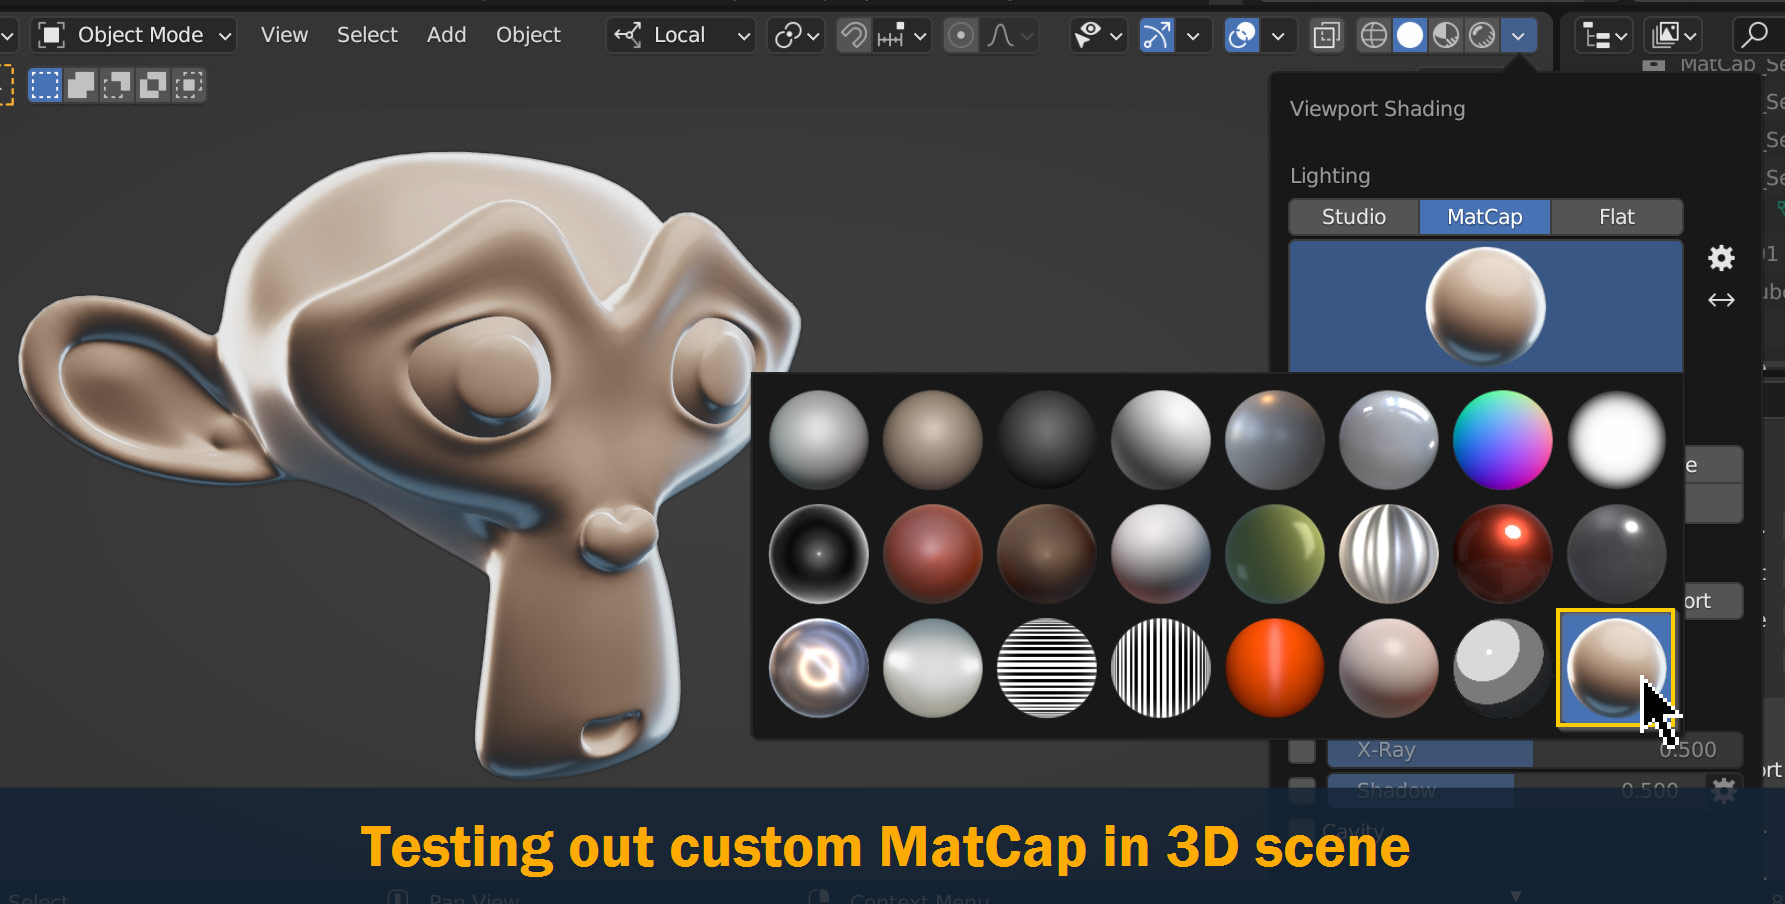
Now that you’ve created your MatCap, let’s take a look at how we can import it back into Blender to use in our scenes – I covered this briefly in the How to Use MatCaps section above, but let’s go over it again in a bit more detail.
To import MatCaps into Blender, navigate to the Shading options at the top of the 3D view and click the arrow dropdown. Make sure Lighting is set to MatCap, and click the Settings icon on the right to open viewport lighting settings. Finally, next to MatCaps, click Install. Navigate to the location of the MatCap image on your computer and click Install Light to add it to Blender.

Your new MatCap should now appear in the list of MatCaps when you click the preview icon – select it, and take a look at how it’s showing up on the objects in your scene!
Whether you’re using the default options to view your models, or creating your own custom setups for your scenes, MatCaps are a great way to view models, preview curvature, and find issues.
Hopefully this tutorial gave you an idea of how you can implement MatCaps into your workflow – even if you don’t plan on creating your own MatCaps, having the knowledge of how they’re created and how they work will be valuable as a 3D artist!
If you have any thoughts or ideas relating to MatCaps, feel free to leave them in the comments section below.
Best of luck on all your 3D projects, and thanks for reading!

Hello! I’m a self-taught 3D modeler and texture artist with experience on a variety of projects, ranging from planet creation to game props, vehicles, and environments. Although I’ve tried out a bit of everything, my main software is Blender. I’m a big fan of sci-fi and fantasy shows and books like The Expanse and Lord of the Rings, so most of my personal work has a fantasy or sci-fi theme – but I also love to experiment and try new things!


it help rally great article