

 자동차
자동차
 트럭
트럭
 버스
버스
 모터사이클
모터사이클
 군용 차량
군용 차량
 전자 기기
전자 기기
 무기
무기
 건축물
건축물
 항공기
항공기
 가구
가구
 캐릭터
캐릭터
 동물
동물
 우주선
우주선
 음식
음식
 선박
선박
보기
In 3D modeling, vertices are a fundamental part of any workflow – and inevitably, you’ll end up needing to connect, join, and merge them together in various ways. But to the beginner 3D artist, the way to do this isn’t obvious at first glance.
In this article, I’ll cover three different ways that vertices can be connected in Blender, as well as a few common issues that can occur as a result!
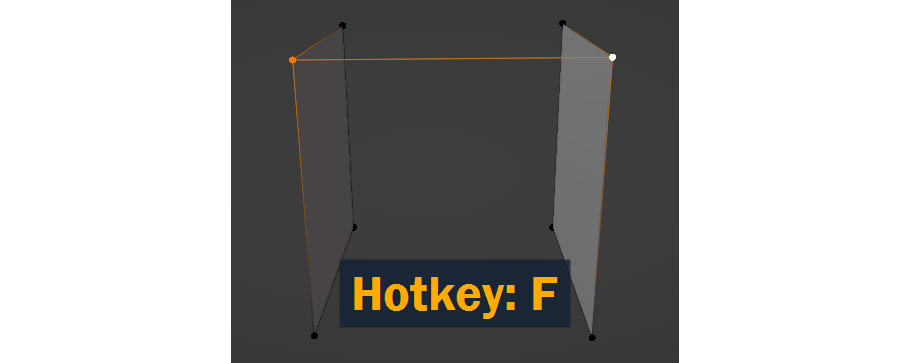
To start with, let’s go over the method for connecting two vertices that aren’t already connected with edges or faces, such as the ones in this example:

To connect two vertices in this way, simply hit F on your keyboard; this will create an edge extending from one vertex to the other, connecting them together. It doesn’t get much simpler than that!
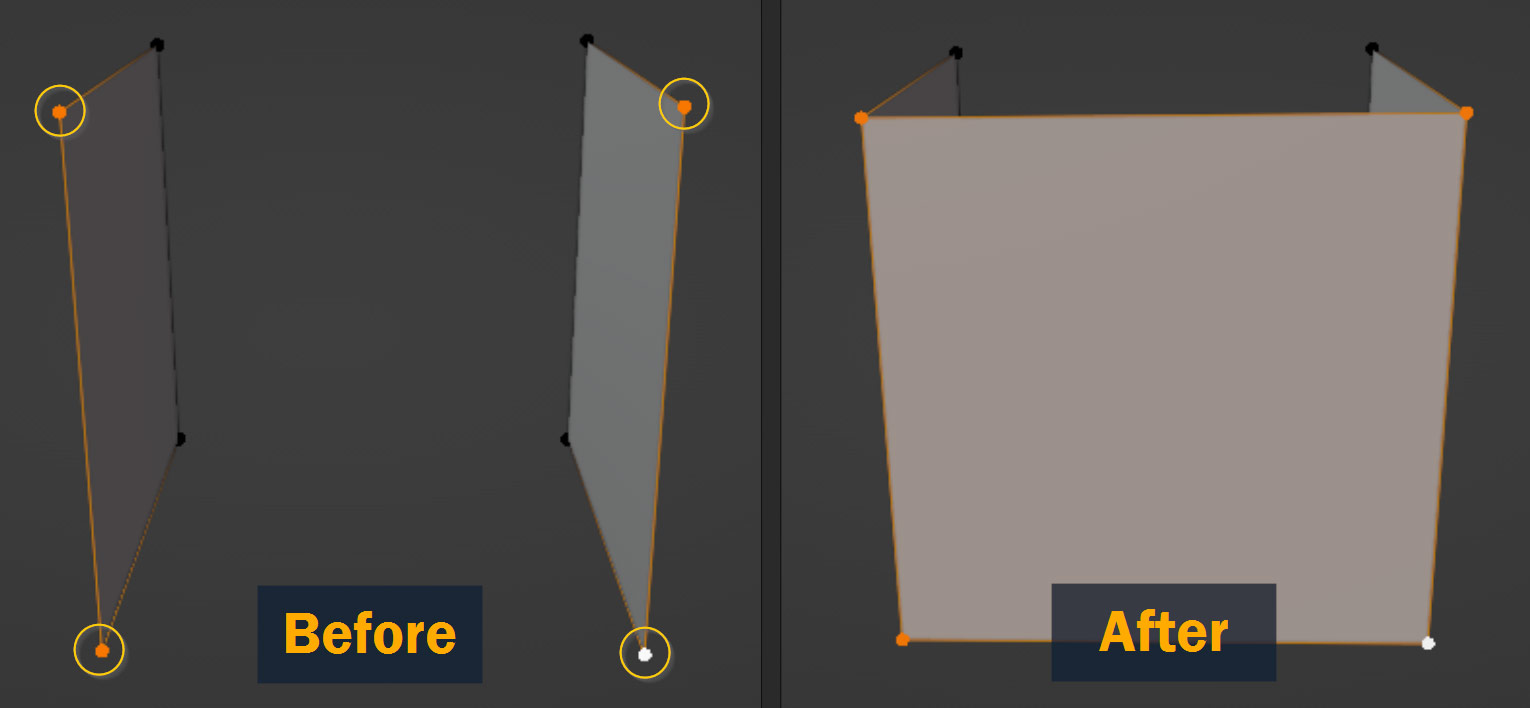
If you want to connect three or more vertices using a face instead of an edge, the shortcut is the same – simply select a number of vertices surrounding the area you want the face to appear, and once again press F!
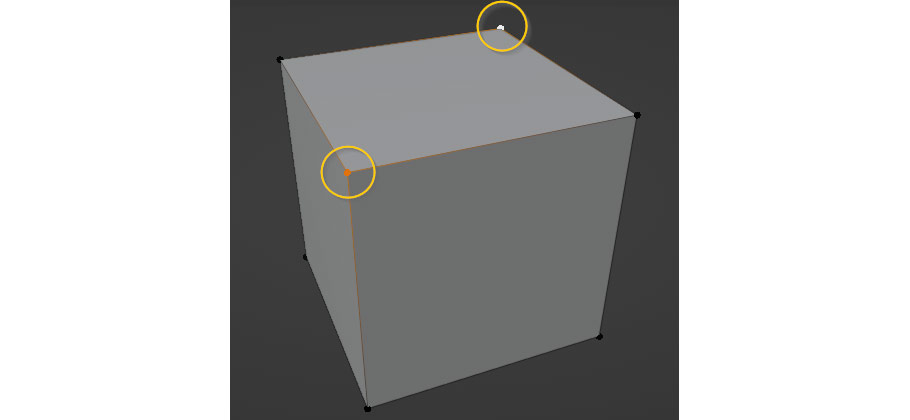
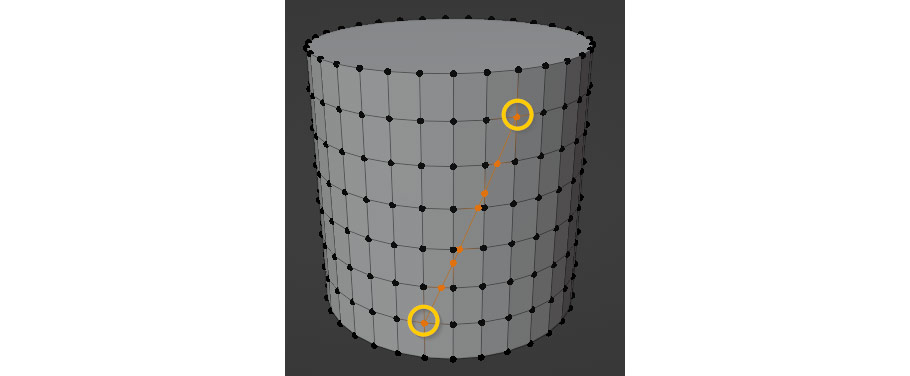
So, connecting two vertices with an edge or face is easy – but sometimes, a 3D modeling project requires connecting vertices across pre-existing geometry – for example, what if we wanted to connect these two opposite vertices on the top of a cube, using an edge that cuts across the face?
If we press F as we did in the previous section, it appears to work at first – but if we move the new edge upward, we can see that it isn’t actually connected to the face below it!
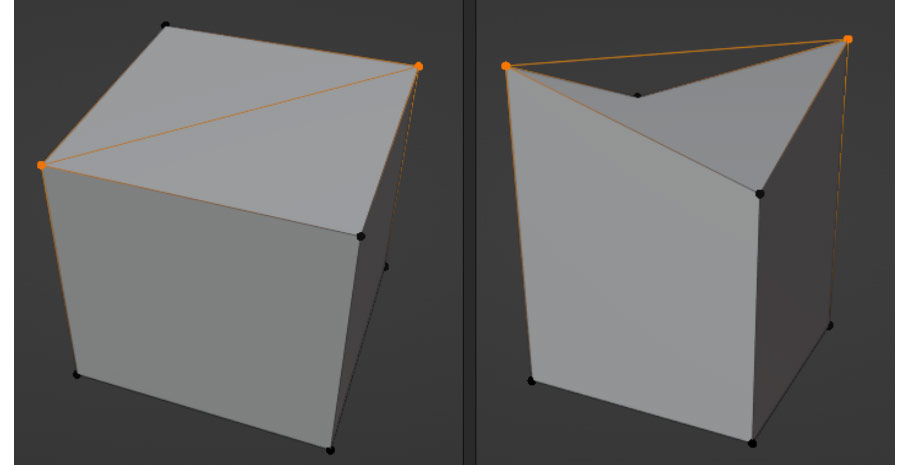
That’s why in this situation, we use the Join shortcut instead by pressing the J key. In edit mode, pressing the J key with two vertices connected will automatically cut an edge from one to the other, spanning through any faces that are in between them.
If we repeat the same experiment as before and move the edge upward, it now works a little bit more like how you’d expect it to!

This Join tool is powerful – you’re not only limited to connecting vertices that have a face in common! As long as they’re connected with some kind of geometry, you can use the J key to create a new edge between any two vertices on your model.
Connecting vertices with faces and edges is all very well, but what if we needed to Merge two or more vertices together instead?
As an example, take this cube that’s been split through the middle. How can we merge these two vertices together into one, and reconnect the two parts of the cube?
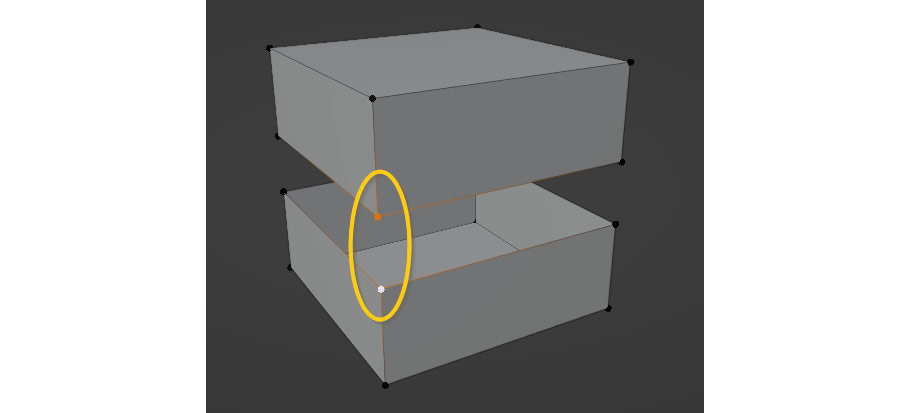
Well, you actually have a few different options; and they’re all accessed through the Merge menu. To bring up the Merge menu in edit mode, simply press M on your keyboard:
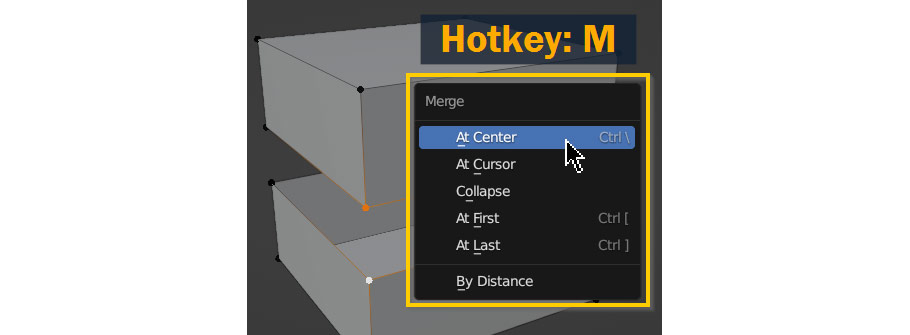
There are six different options in this menu, and they all do different things; At Center, At First, and At Last are probably the most commonly used, but I’ll go over all the options here!
At Center merges selected vertices to their collective centerpoint.

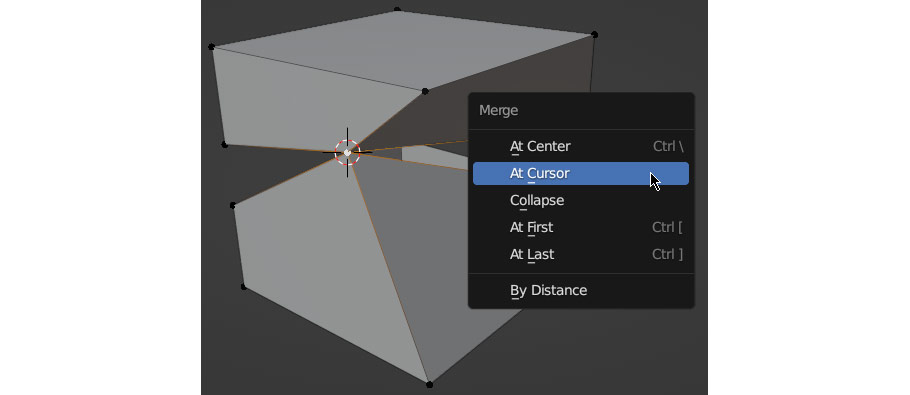
At Cursor merges multiple selected vertices to the location of the 3D Cursor.
Collapse merges selected vertices to the centerpoints of whatever islands of geometry are selected on your model (for the example I had the entire model selected).

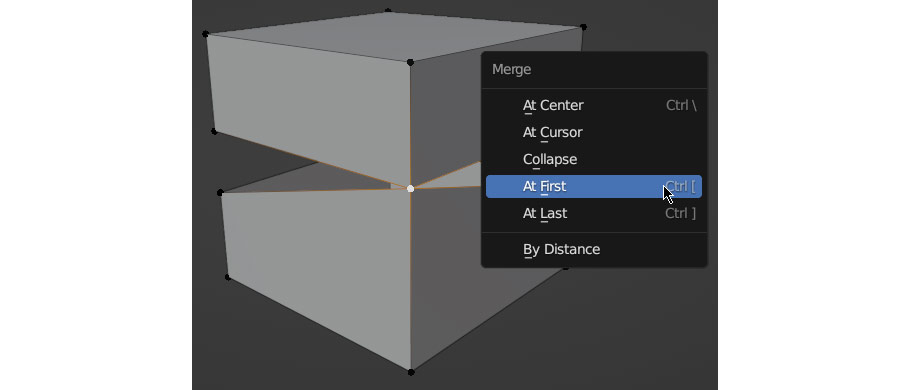
At First merges all selected vertices to the location of the First vertex that was selected.
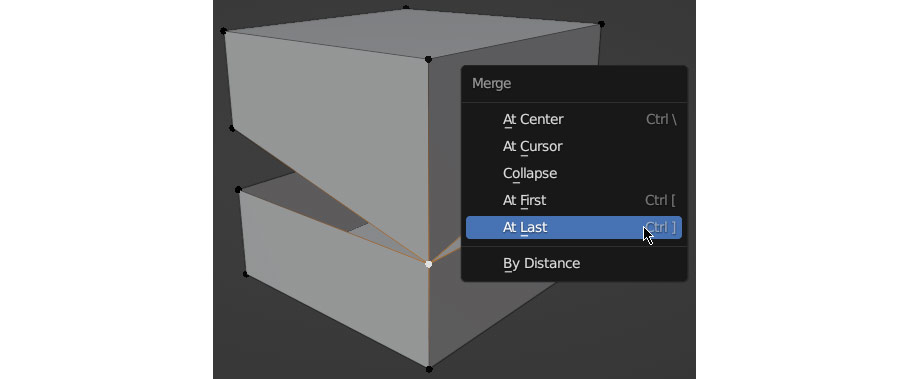
At Last merges selected vertices to the location of the Last vertex that was selected.
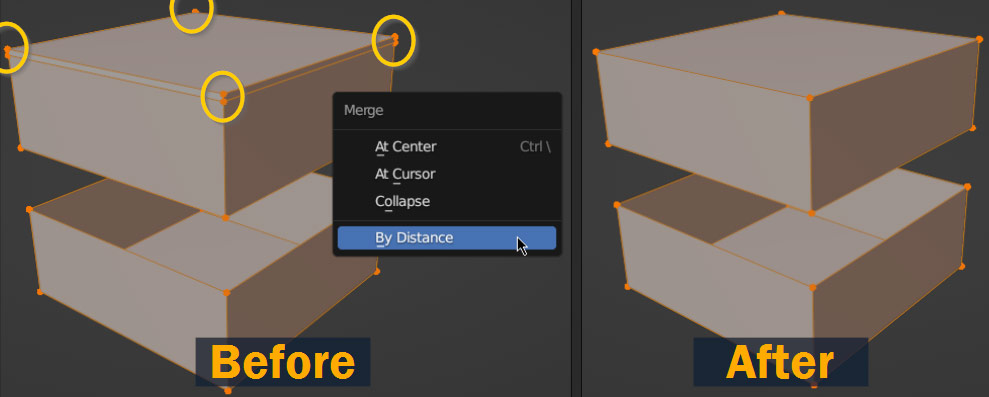
By Distance automatically merges vertices that are within a certain distance of each other (once again, for this example I selected the entire model). Also called Auto Merge or Merge Duplicates.
Depending on what you’re doing, you’d choose a different merge type – but for my example, I’m going to go with At Center. That way, after merging all the vertices around the side of the cube, the resulting line will be in the center.

If you find you can’t merge, connect, or join vertices, make sure they’re located in the same object as each other – in Blender it’s possible to have two objects in edit mode at the same time, but you won’t be able to connect vertices together unless they’re part of the same object!
So, to fix this, press Tab to exit edit mode, select both objects, and press Ctrl/Cmd – J to join them together into a single object.
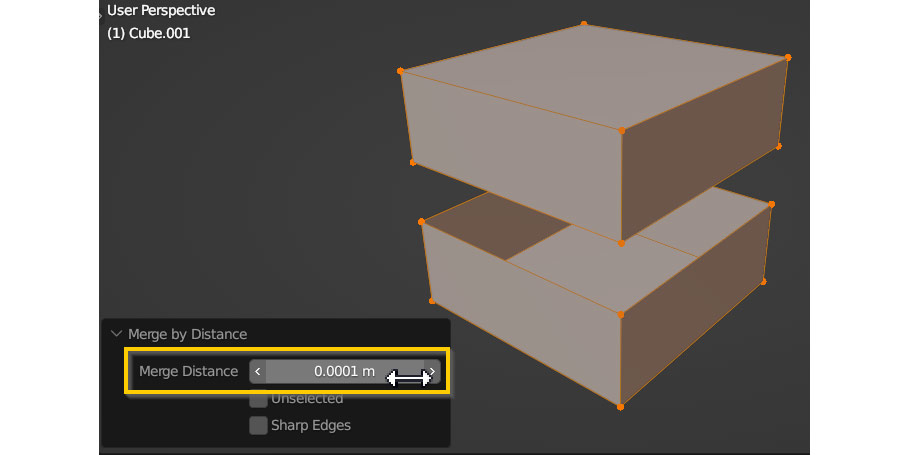
If the By Distance merge option is removing too many vertices from your model, it may be that your Merge Distance is set too high. To adjust it, open the Merge by Distance popup that appears after merging and adjust the Merge Distance number to something lower.
Conversely to the previous item, if the By Distance merge option isn’t working to merge vertices that are close to each other, the Merge Distance may be set too low. To adjust this, follow the same steps from the item above, but raise the Merge Distance instead of lowering it!
Also, make sure that all the vertices on your model are selected before merging by distance – by default, By Distance only works on selected vertices!
If the At first and At Last items aren’t appearing in the Merge menu, it may be because you used box/marquee select – in order for the At First and At Last options to appear, vertices must be selected by clicking them individually.
If you’ve already selected a portion of your mesh and don’t want to re-select each vertex one by one, you can simply click one of the vertices on your model twice to de-select and select it again – now, this vertex will be considered both “first” and “last”, and will allow you to use At First and At Last like normal.
To conclude, I want to summarize what I’ve covered here! Although it might seem confusing at first, all of this really comes down to three important functions:
That’s it! Whether you’re merging, joining, or connecting vertices, Blender makes it pretty simple – and with a bit of practice, these three hotkeys will become second nature while modeling.
Thanks for reading, and best of luck with all your 3D projects!

Hello! I’m a self-taught 3D modeler and texture artist with experience on a variety of projects, ranging from planet creation to game props, vehicles, and environments. Although I’ve tried out a bit of everything, my main software is Blender. I’m a big fan of sci-fi and fantasy shows and books like The Expanse and Lord of the Rings, so most of my personal work has a fantasy or sci-fi theme – but I also love to experiment and try new things!


Add a comment