

 자동차
자동차
 트럭
트럭
 버스
버스
 모터사이클
모터사이클
 군용 차량
군용 차량
 전자 기기
전자 기기
 무기
무기
 건축물
건축물
 항공기
항공기
 가구
가구
 캐릭터
캐릭터
 동물
동물
 우주선
우주선
 음식
음식
 선박
선박
보기
If you’ve tried out Blender and poked around a bit, you’ve probably noticed that in addition to the ordinary modeling tools, there’s also an option for sculpting. Sculpting is a fantastic tool for many different tasks in 3D – it allows you to create models in a much more free-form, natural way than modeling, which is ideal for organic subjects such as animals, humans, and nature!
In this article, I’ll introduce you to everything you need to know to start sculpting in Blender – I’ll cover the sculpting interface in Blender, go over all the essential tools of the trade, and finally go over a few key techniques I used for a simple sculpting project!
Before you begin, you’ll need to create a new Sculpting project in Blender. Go to File, hover over New, and select Sculpting – while it’s possible to start sculpting in any Blender file, creating a dedicated Sculpting project in this way will automatically set you up with everything you need to get started!

You can also enter Sculpt Mode at any time by pressing Ctrl/Cmd – Tab and selecting Sculpt Mode.
Once you’ve created a new file, let’s take a moment to get familiar with the UI.
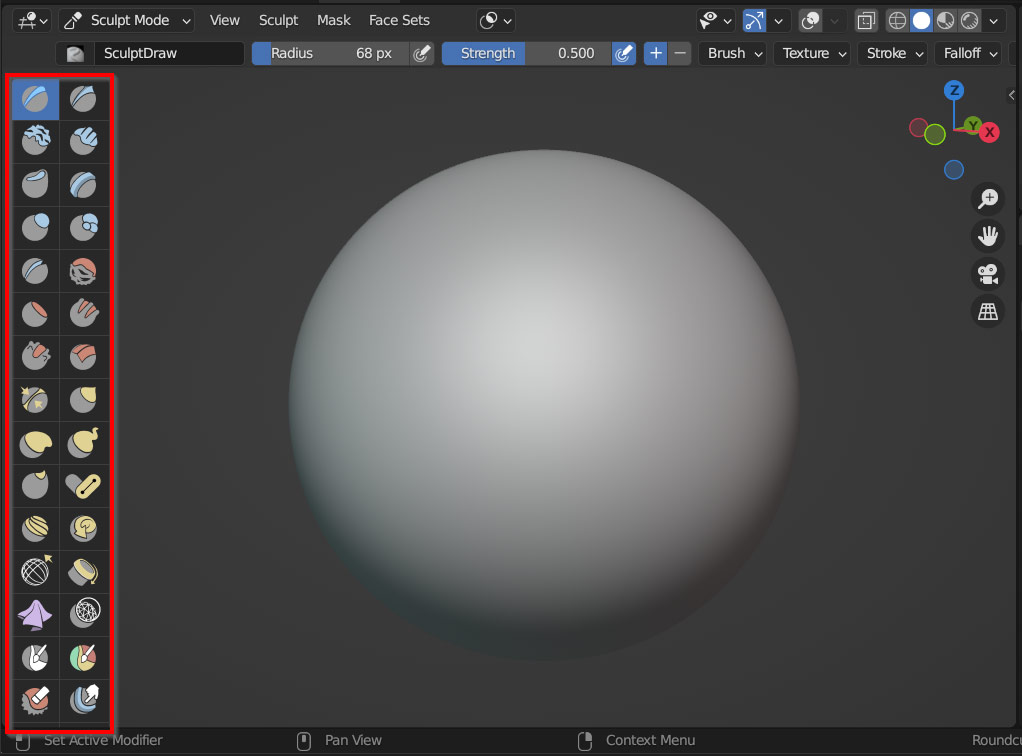
The user interface for sculpting in Blender consists of three key elements: the Toolbar, the Tool Options Topbar, and the Tool and Workspace Settings. I’ll cover each of these one by one.
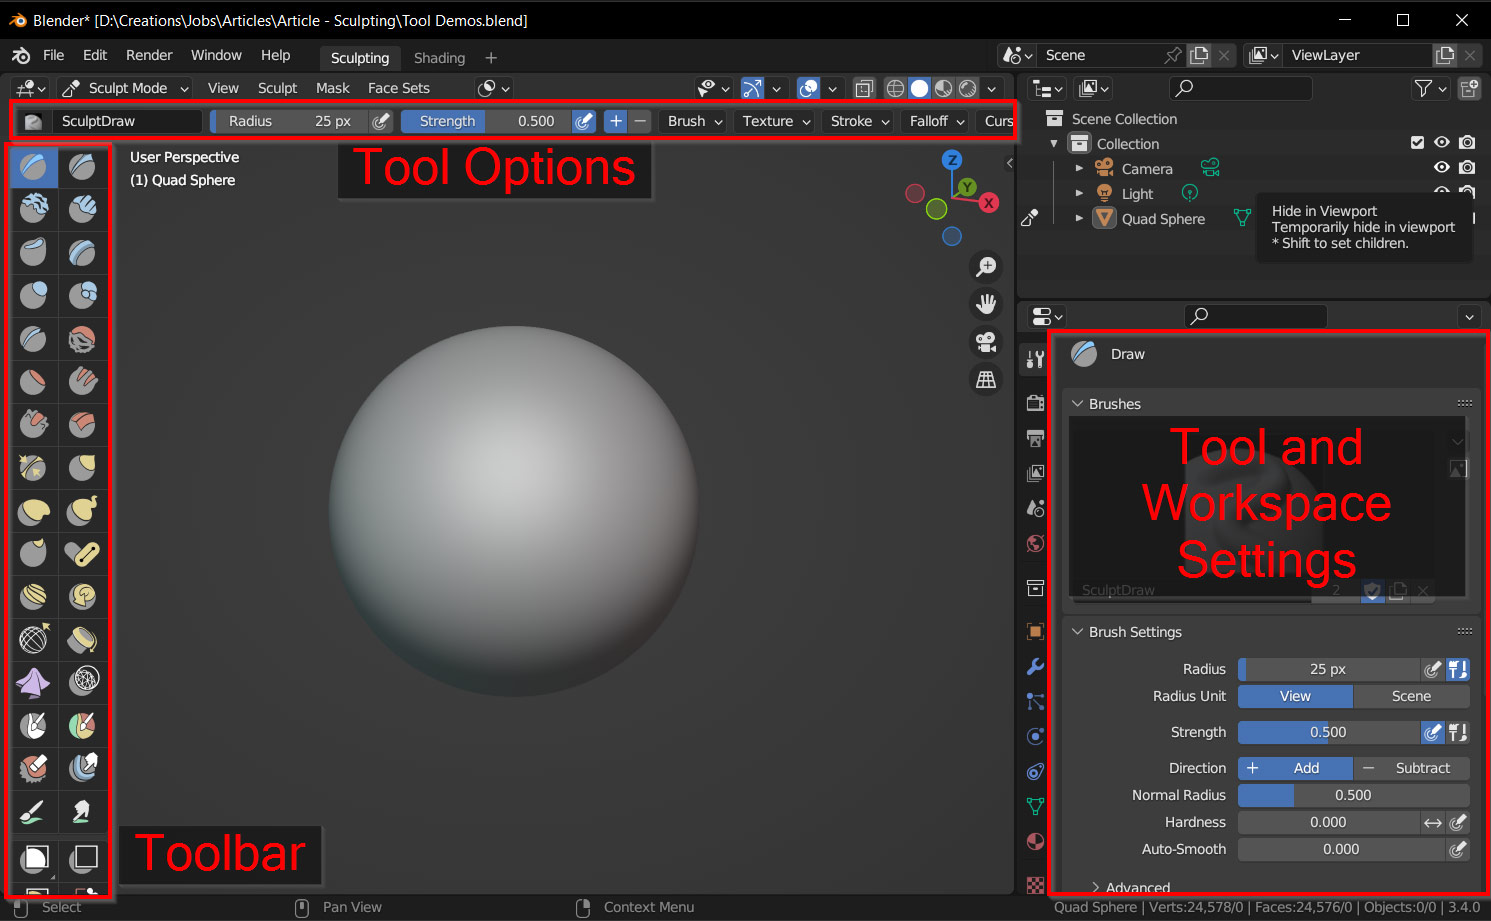
The toolbar is probably the most important part of the sculpting interface; this is where you select your sculpting tools, which range from the ordinary Draw and Smooth brushes to more complex tools such as Pose and Cloth. Try selecting a tool and drawing on the default sphere!
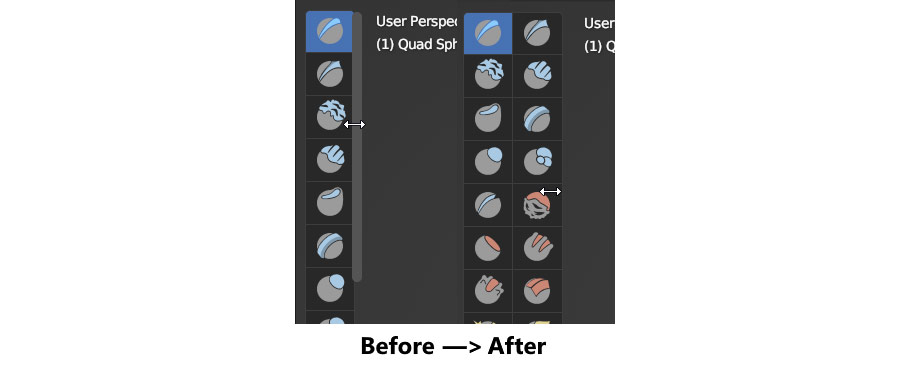
You might notice that by default, the toolbar only shows one column of tools – but when I’m working in Blender, I like to be able to see more at once. To see two columns instead of one, simply click and drag the edge of the toolbar to the right as shown in the screenshot!
In the Tool Options bar, you’ll find many different options for your selected tool, as well as a few common functions that are often used for sculpting projects.
Here, you can change the Radius and Strength of tools, as well as change various properties about the brush and brushstrokes. You’re also able to enable Symmetry for your selected tool, as well as accessing the Dynatopo and Remesh functions.
I’ll cover most of these options in more detail later on!
In many ways, this menu is just a more complex version of the Tool Options bar – it has most of the same options, just laid out in a more list-like format with more settings to choose from. For most beginner projects, the tool options bar will be enough!
So, that just about covers the sculpting interface – but before we get into tools and sculpting techniques, it’s important to get to know the basic shortcuts and actions you’ll be doing while you work!

Although Blender has hundreds of hotkeys, there are only five main actions you’ll need to get familiar with for sculpting:
As you sculpt, Shift to smooth and Ctrl/Cmd to invert should become second nature; and F and Shift – F to change brush likely will as well! Although it may feel awkward at first, keep practicing these shortcuts. Eventually you’ll be using them without thinking.
I also want to highlight the usefulness of having a good graphics tablet for sculpting – if you plan on sculpting regularly, having a tablet such as a Wacom or Huion is indispensable. While it’s possible to sculpt with a mouse, you lose a lot of the control that a tablet gives you; using a tablet gives you much more accuracy, and is generally a lot easier and faster! But of course, don’t feel discouraged if all you have is a mouse – you’ll still be able to create some great art.
Now that you’re familiar with the interface and basic controls for sculpting, let’s look at some of the most important tools that sculptors use on a regular basis. With 47 tools available in total, there are a lot of options to choose from – but for most basic sculpting tasks, the twelve I’m including here will be more than enough. As I mentioned before, all of these are accessed via the Toolbar on the left side of the sculpting viewport!
As you read through the list, feel free to open up Blender and try them out!
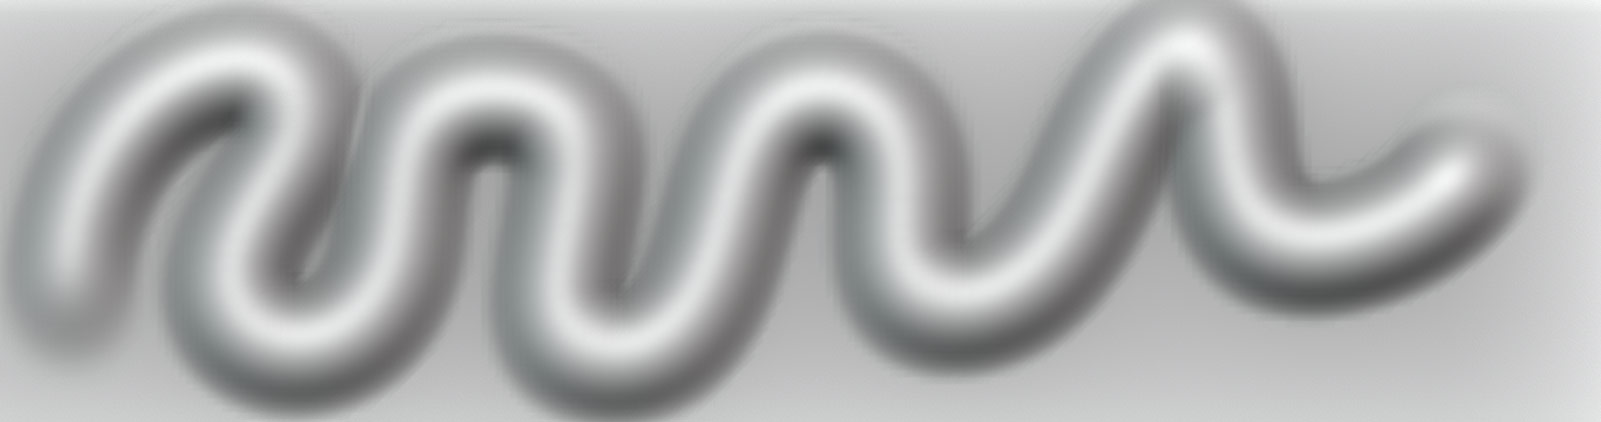
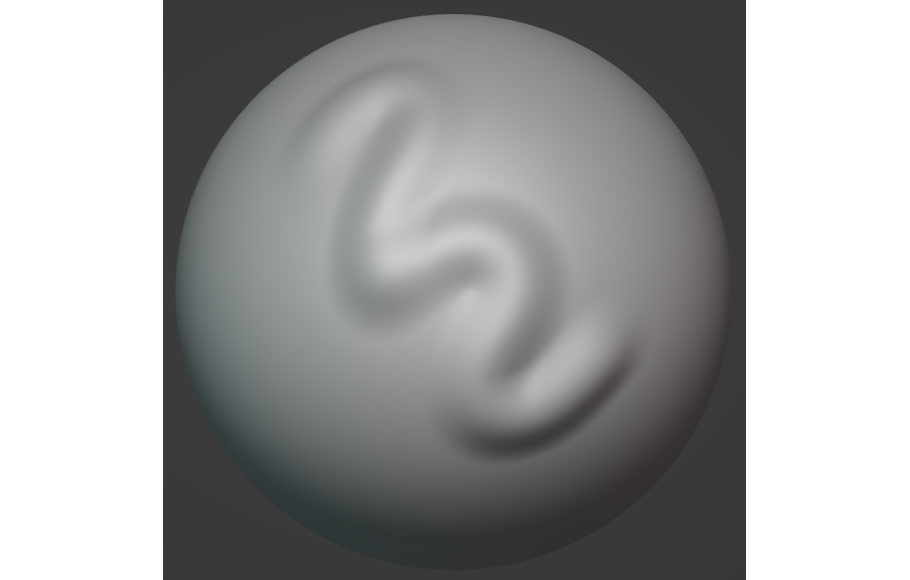
The Draw tool is the most basic tool for sculpting in Blender – when used, it creates a soft, rounded line on your model. This tool is useful for many different sculptings tasks!
The Draw Sharp brush creates a sharp groove or ridge on your model. By default it makes a hole, but it can be inverted by holding Ctrl/Cmd. Useful for creating creases and sharp edges!
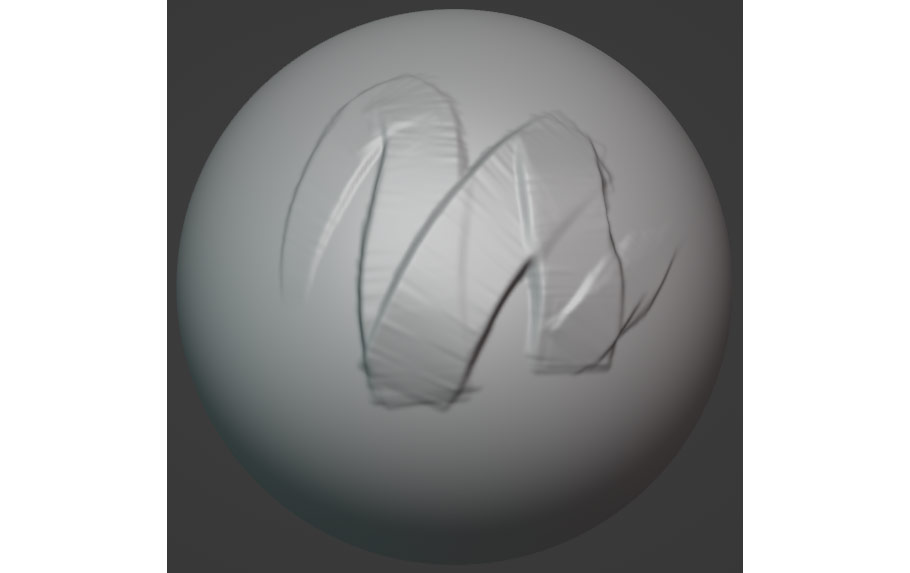
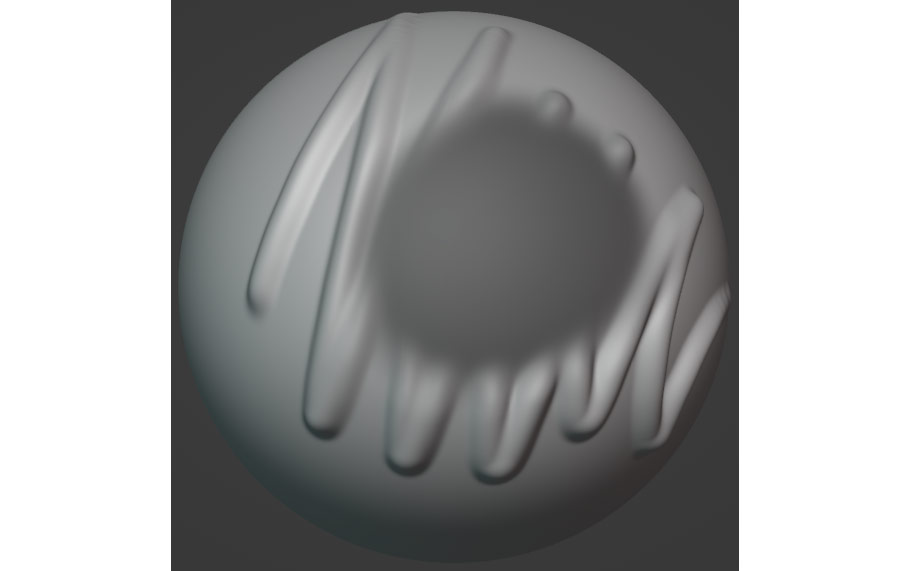
Clay Strips creates rough, blocky lines on your sculpt. This brush is really great for blocking out large shapes on your model before smoothing them out and refining.
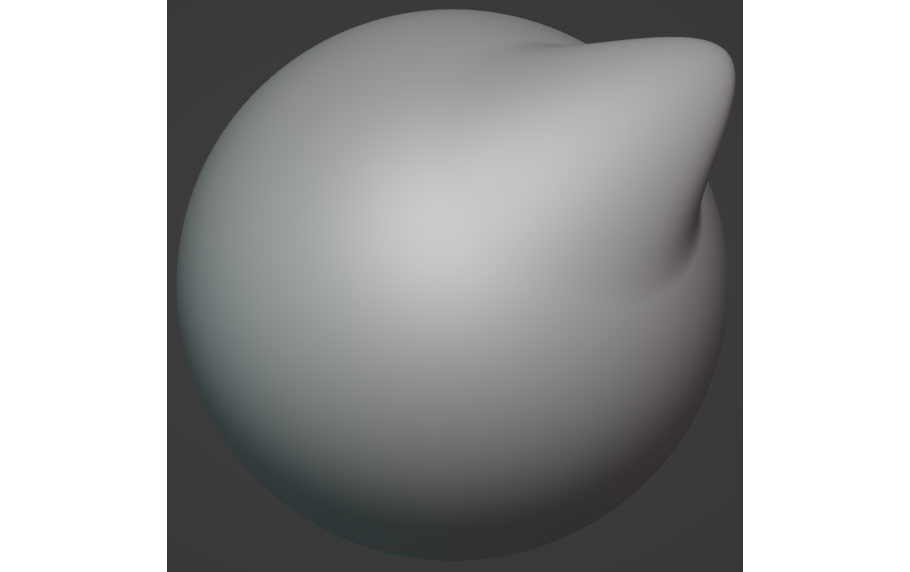
The Inflate brush takes faces and pushes them outwards or inwards. This is a soft brush, but it can be useful for subtly altering the shape of your model or making thin things thicker!
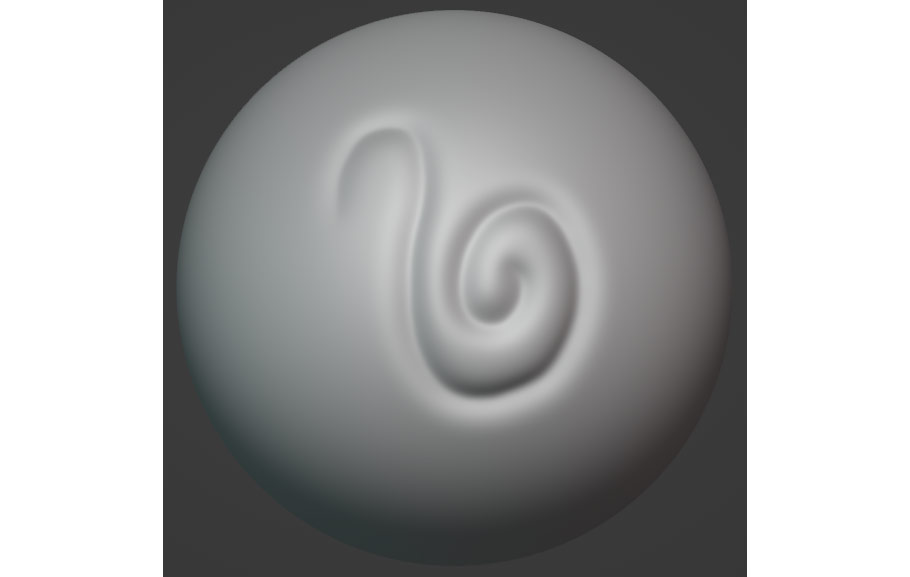
Blob acts a lot like a more defined, sharp version of Draw. Good for quickly adding bumps or holes to models.

Crease pushes faces together, sharpening pre-existing grooves and ridges. Useful for tightening up and refining elements of your model!
The Smooth brush averages out faces and softens detail in sculpts. Used all the time in sculpting – usually accessed by holding Shift.
Flatten is similar to Smooth, but instead of simply softening details, it flattens them out. Useful for creating flatter areas on models!
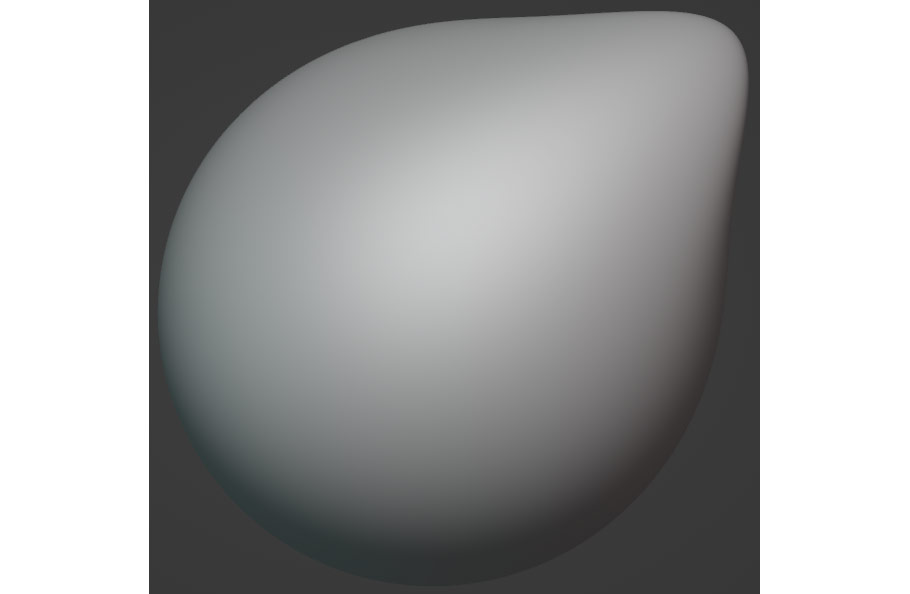
Grab allows you to push parts of your model around. Useful for adjusting the overall shape of sculpts.
Elastic Deform is similar to Grab, but will also stretch nearby geometry, creating a smoother effect. Used in a similar way to Grab.
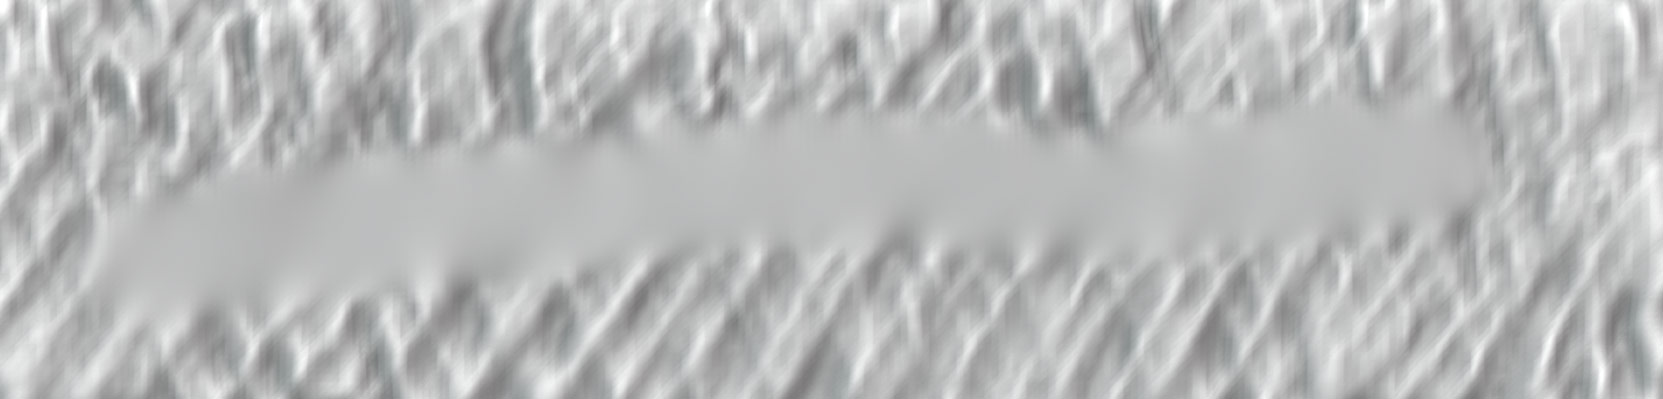
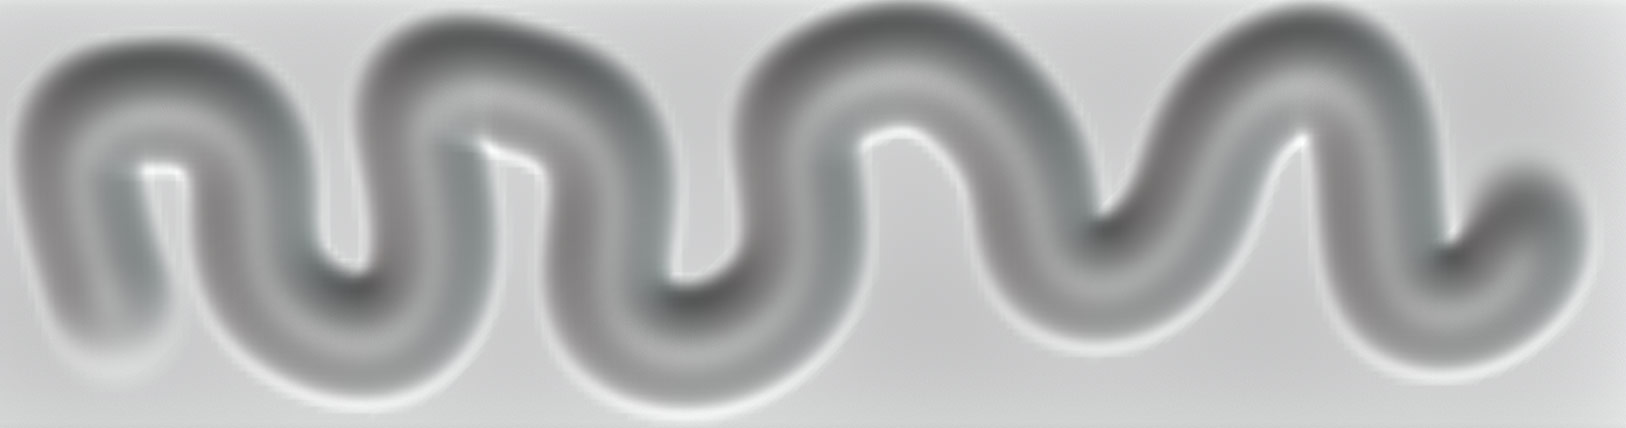
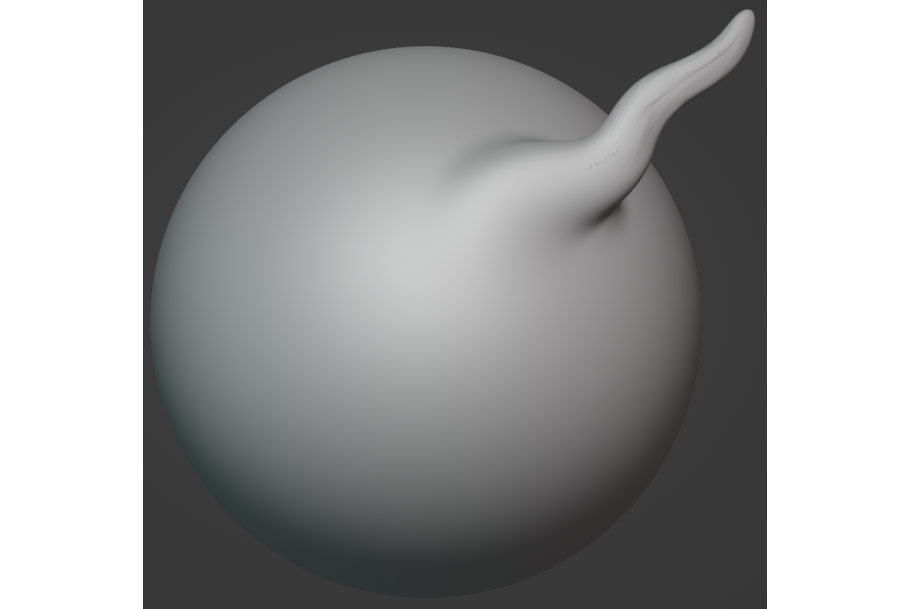
Snake Hook allows you to create long tendrils on your mesh. Useful for blocking out parts of your sculpt.
Mask isn’t a sculpting brush, but it’s useful all the same – it allows you to mask areas of your model, which will then not be affected by other sculpting operations. Use Ctrl/Cmd – I to invert the mask.
If you’ve done a bit of experimenting with what I’ve mentioned so far, you might have noticed an issue that seems to keep occurring. If you sculpt too much in one part of your model, or stretch your sculpt too far, your model starts to get messed up – faces become large and stretched, and sculpting additional detail is impossible.
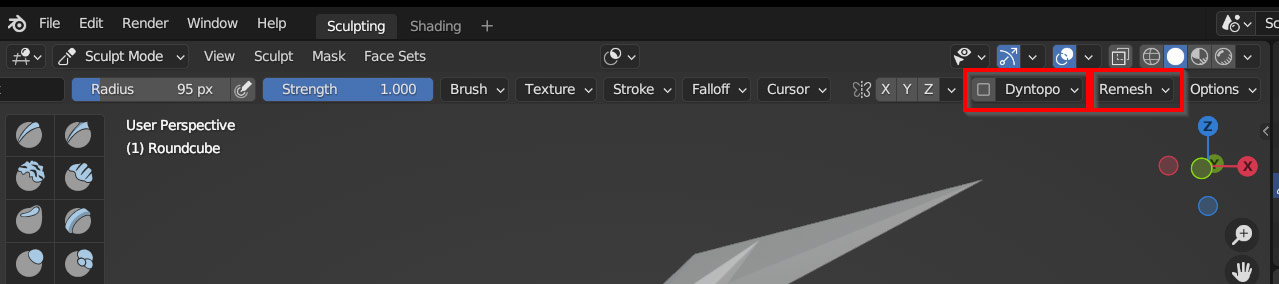
This is because, by default, there’s a set amount of faces per model; and when you stretch them too far, eventually there just aren’t enough faces to form the shapes you’re trying to make. But luckily, Blender comes with two very handy solutions for this issue! They’re called Remesh and Dyntopo, and they’re both easily accessible as dropdowns in the Tool Options Bar at the top of the 3D view.
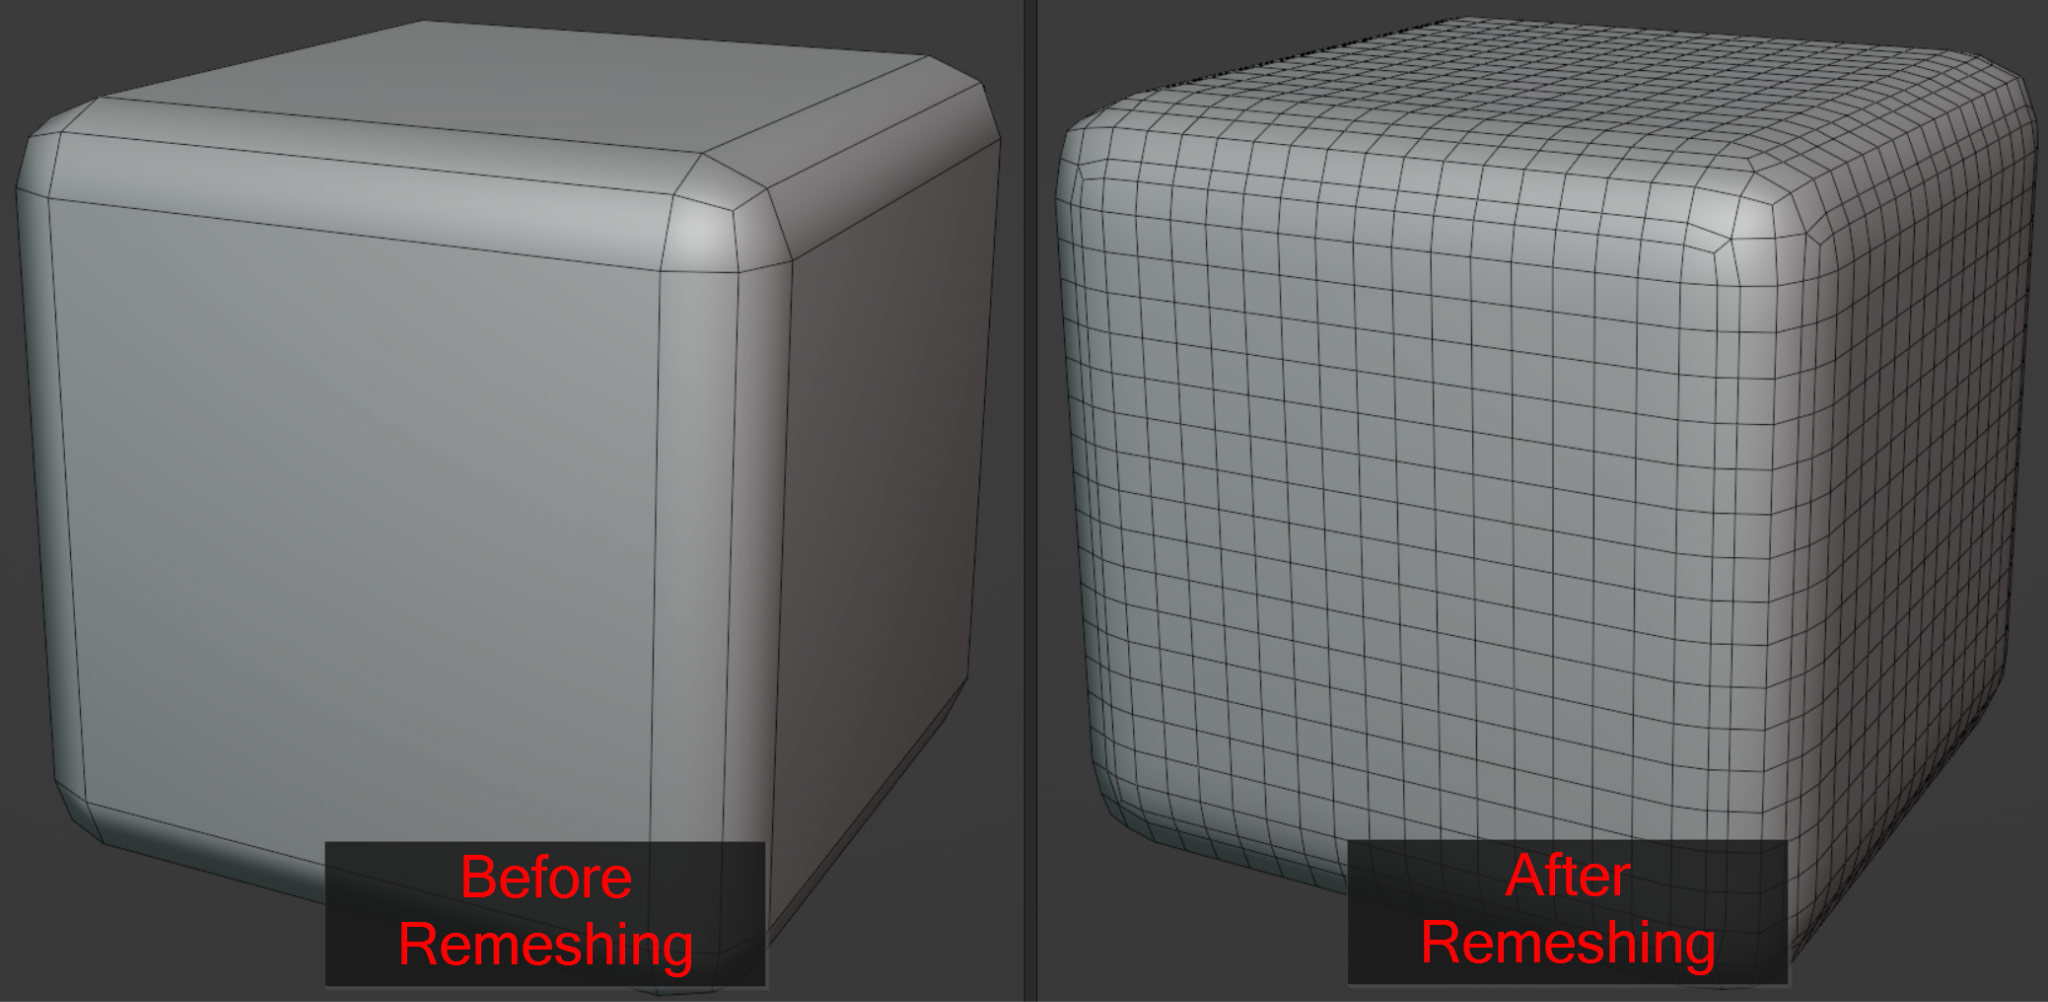
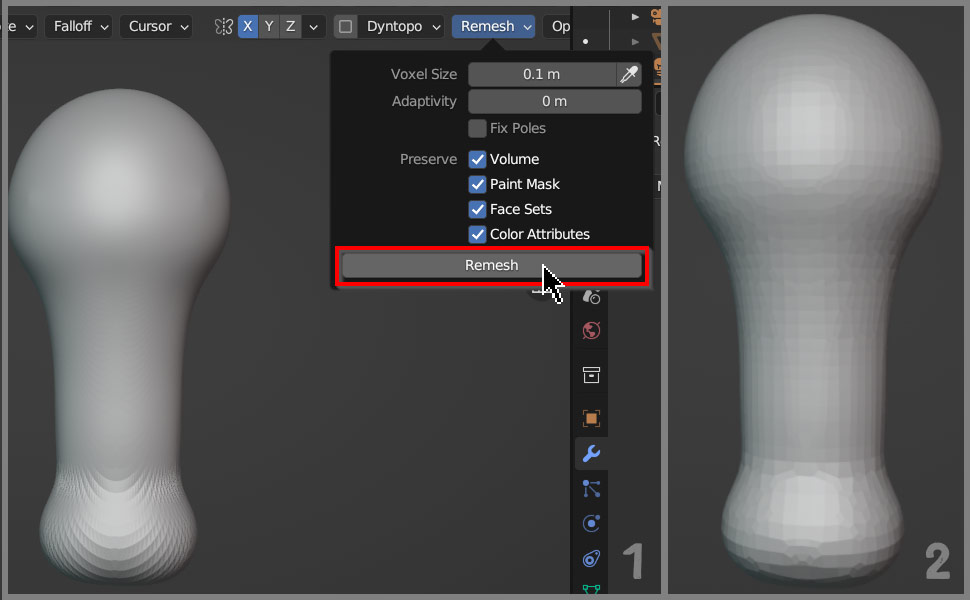
In Blender, and 3D art in general, Remeshing refers to the automatic process of replacing existing geometry with new geometry in the same shape. When remeshing, you can choose how small or large the generated faces will be, which allows you to control how detailed your sculpt becomes.
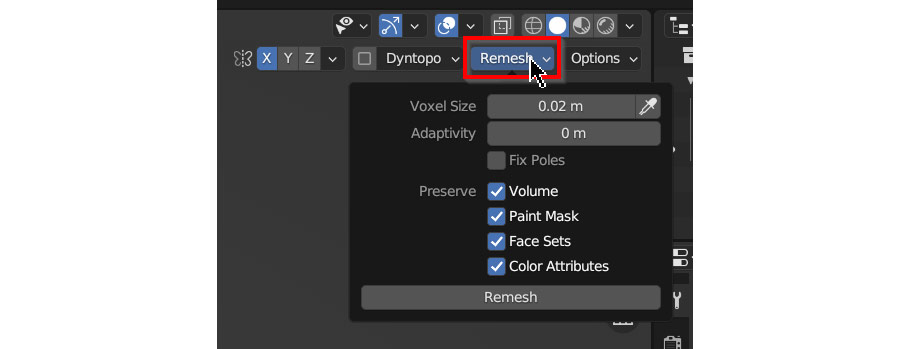
To remesh in Blender, start by opening up the Remesh dropdown. Here you will see a number of options. The main one you’ll want to edit is Voxel Size; this changes the size of the new faces created, and also allows you to pick face resolutions from your model using the Eyedropper tool. While sculpting, it’s important to consider the resolution, or face sizes, on your model – if faces are too large, you won’t be able to create tiny details, but if faces are too small, sculpting larger shapes will be difficult.
When you’re ready to remesh your model, simply press the Remesh button, and pay attention to what happens to your model!
It is a common workflow to regularly remesh your model while sculpting – this keeps face resolution even throughout your model, and keeps sculpting operations working smoothly!
Dyntopo, short for Dynamic Topology, is a very useful alternative to remeshing in sculpting. Instead of regenerating the faces at the push of a button, Dyntopo generates new faces real-time as you sculpt – meaning you can drastically change the shape of your model and add small details without worrying about running out of topology!
To enable Dyntopo, simply check the Dyntopo box in the Tool Options Bar. You can also open the dropdown next to it to see various settings. By default, the geometry resolution is set based on a pixel size on your screen, meaning that if you’re zoomed in close to your model, any sculpting you do will be higher resolution than if you’re zoomed out. But if you like, you can set it to create the same resolution of details all the time – simply set Detailing to Constant Detail instead of Relative Detail.

Now that we’ve covered the sculpting interface, controls, tools, and mesh management options, you should have all the essential info you need to begin sculpting – but before you go off into the wide world of horrifying monsters, adorable creatures, and slightly-terrifying portraits of Andrew Price, let’s go over a few key techniques to get you started!
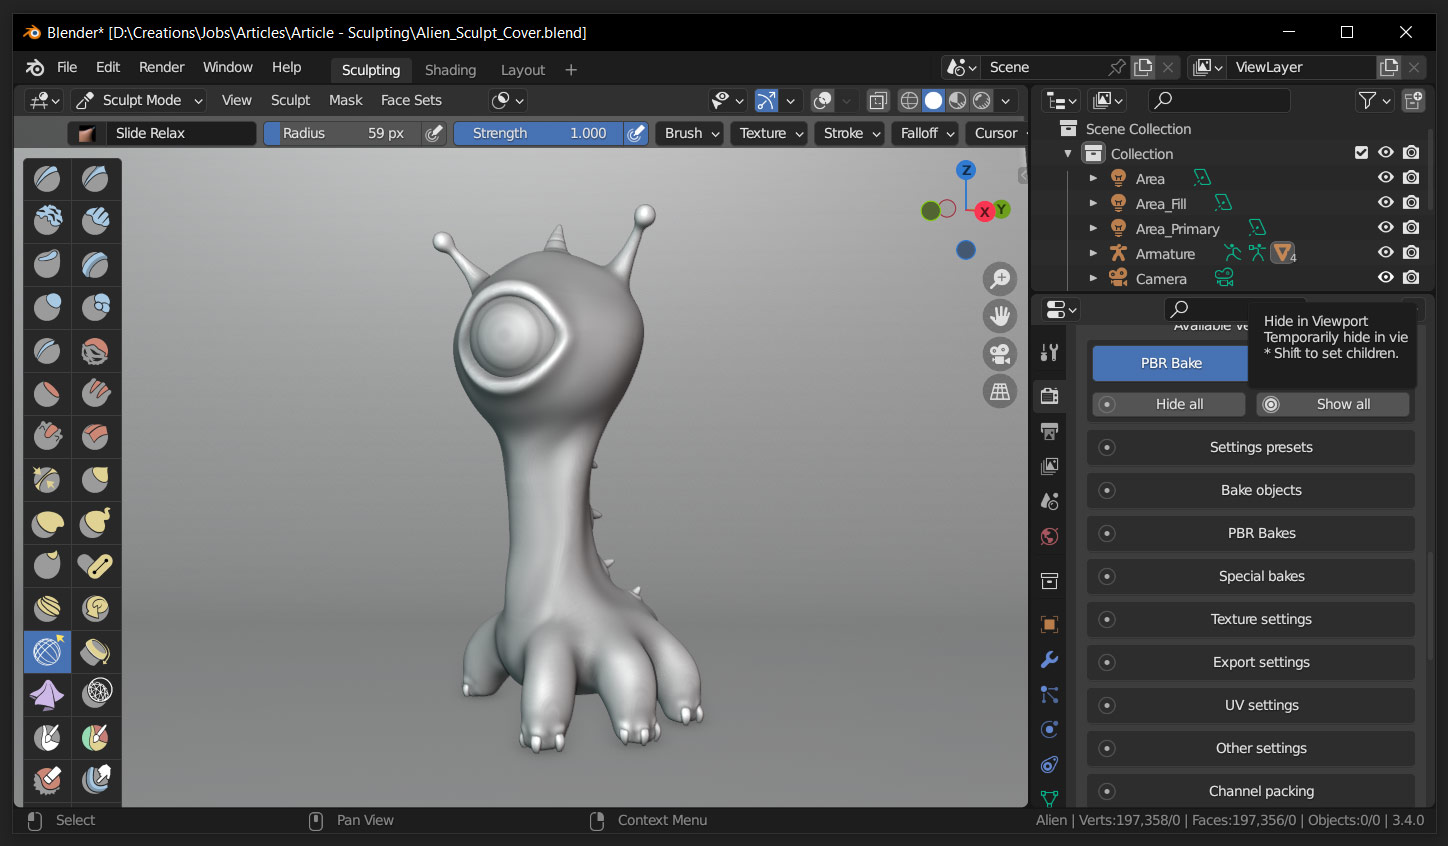
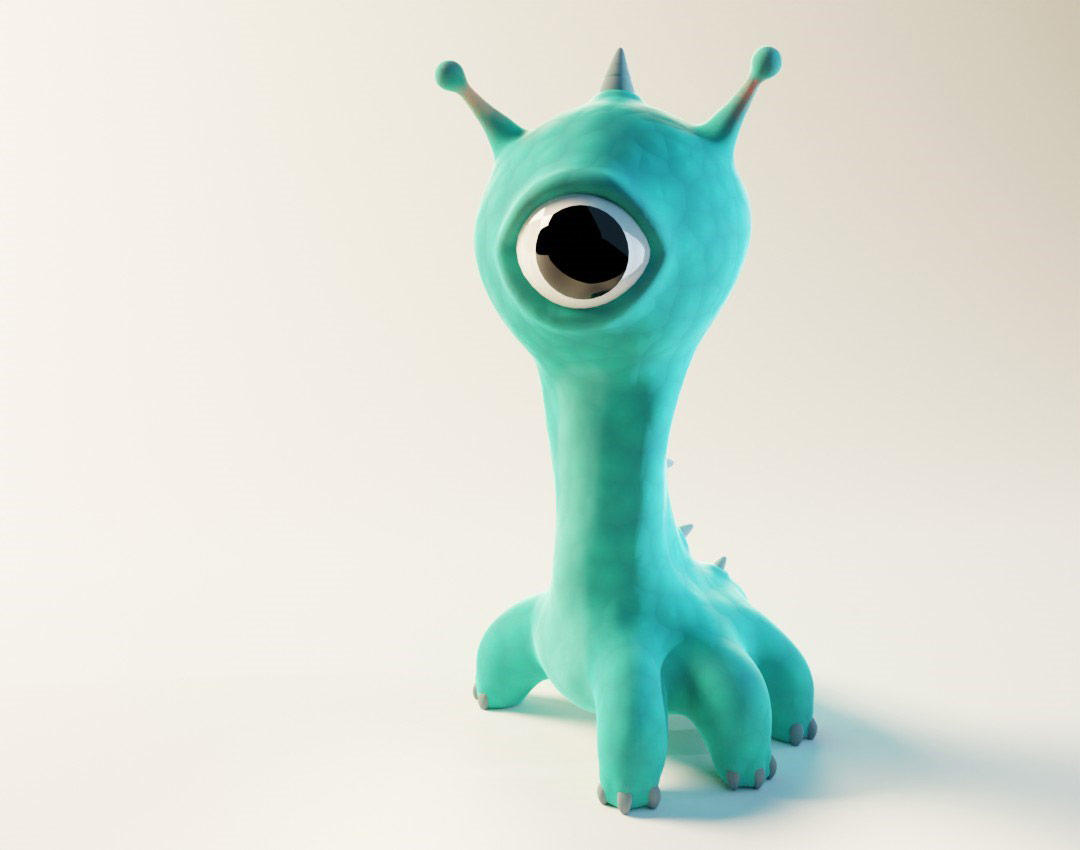
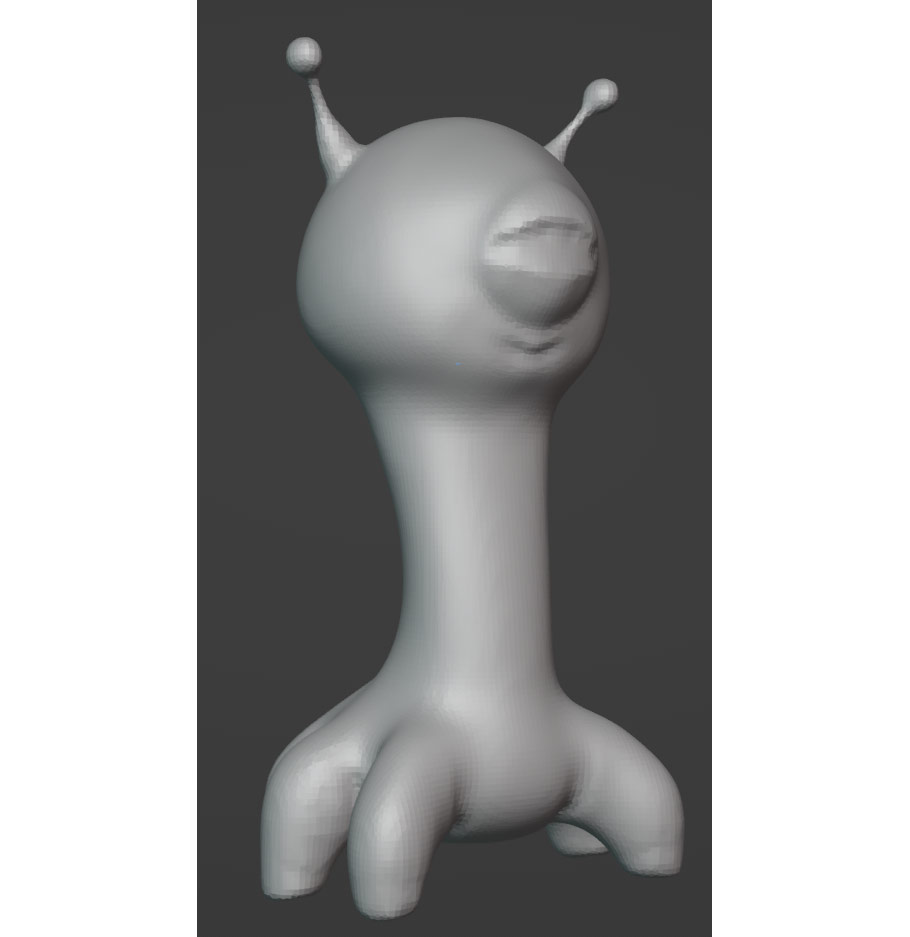
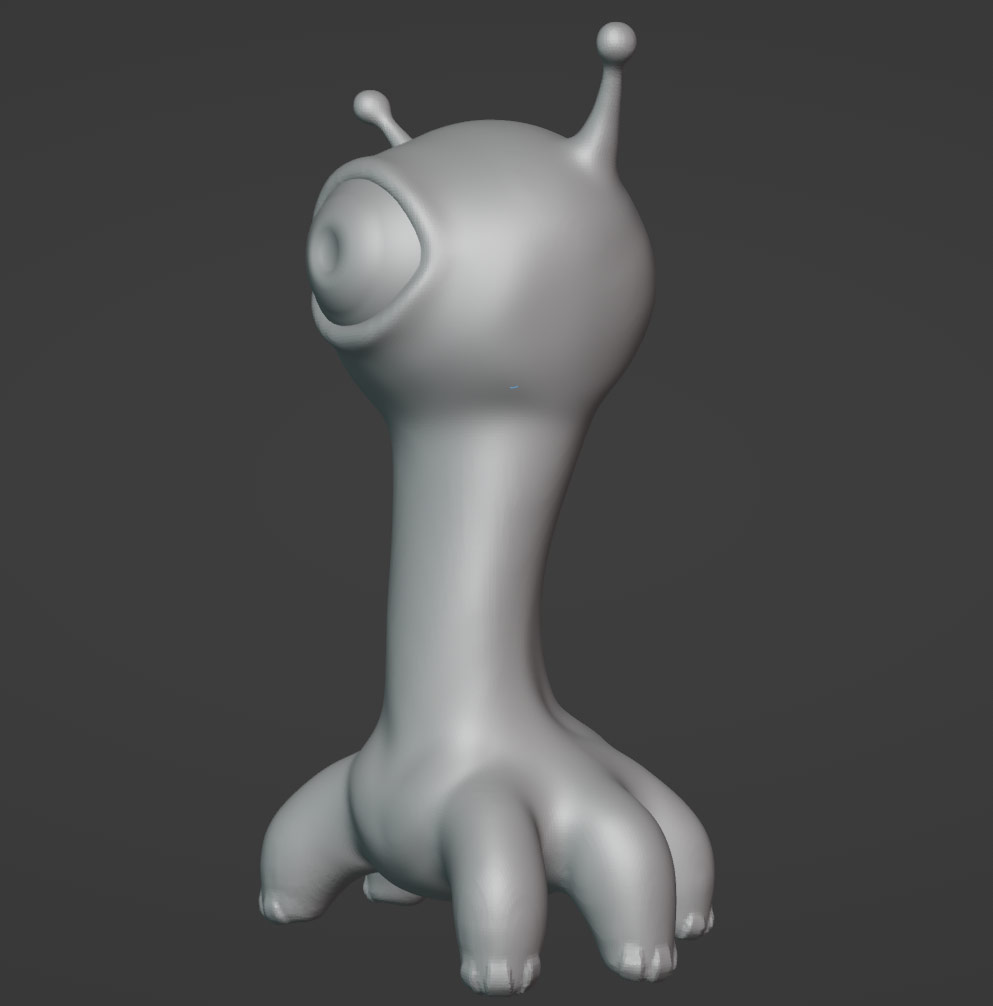
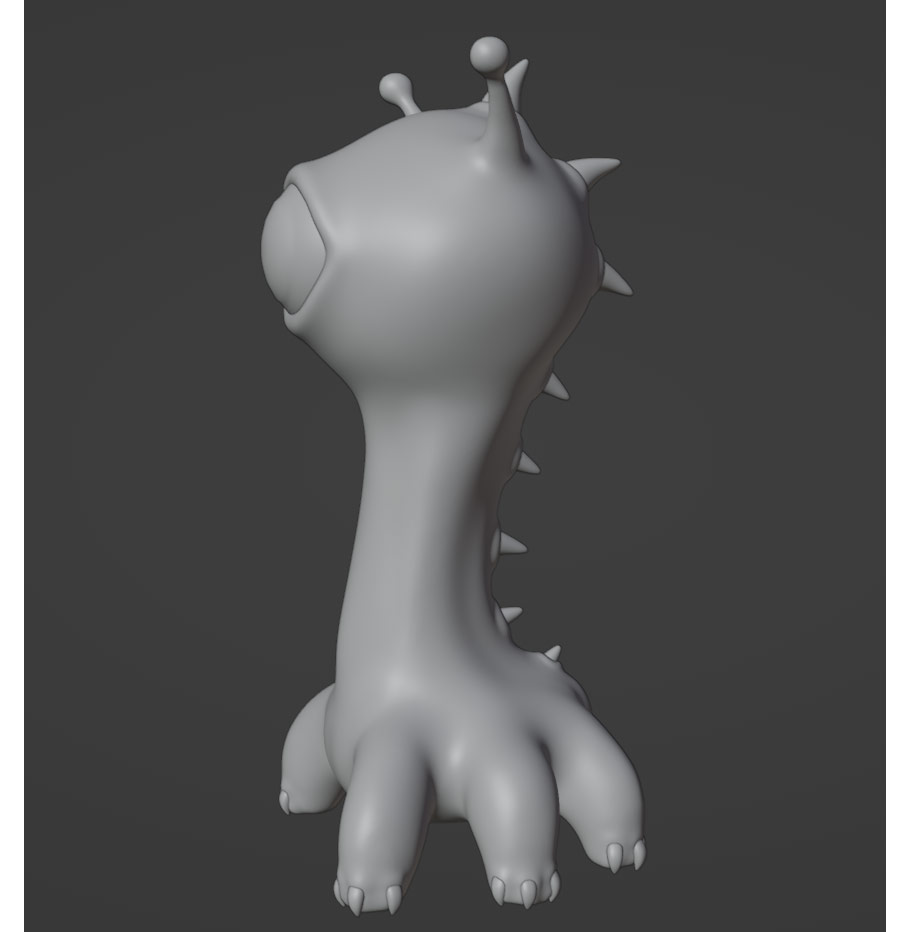
As a simple example project, I’ll be sculpting this cartoon style alien-dinosaur.
Before anything else, if you’re working on any kind of animal or human subject it’s almost always a good idea to start with Symmetry turned on, via the symmetry selector in the Tool Options bar at the top of the 3D view. This allows you to enable both X, Y, and Z symmetry, but for most things you only need X.

Once symmetry is enabled, any sculpting action you do on one side of the model will mirror to the other side as well, cutting down the work you have to do on symmetrical models!
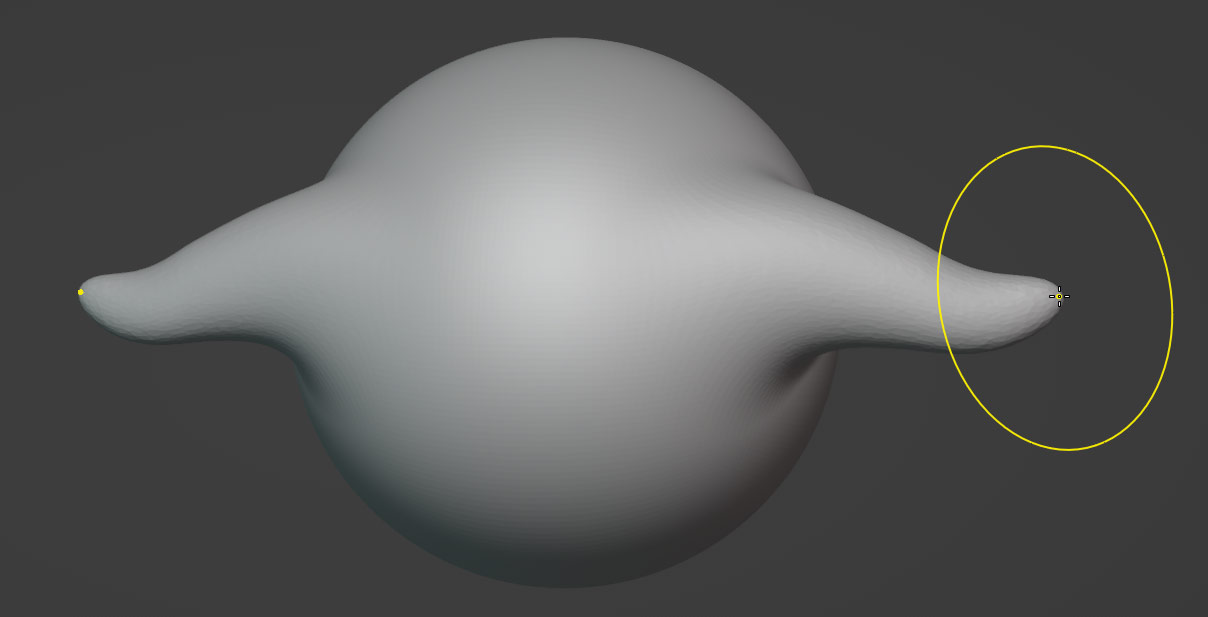
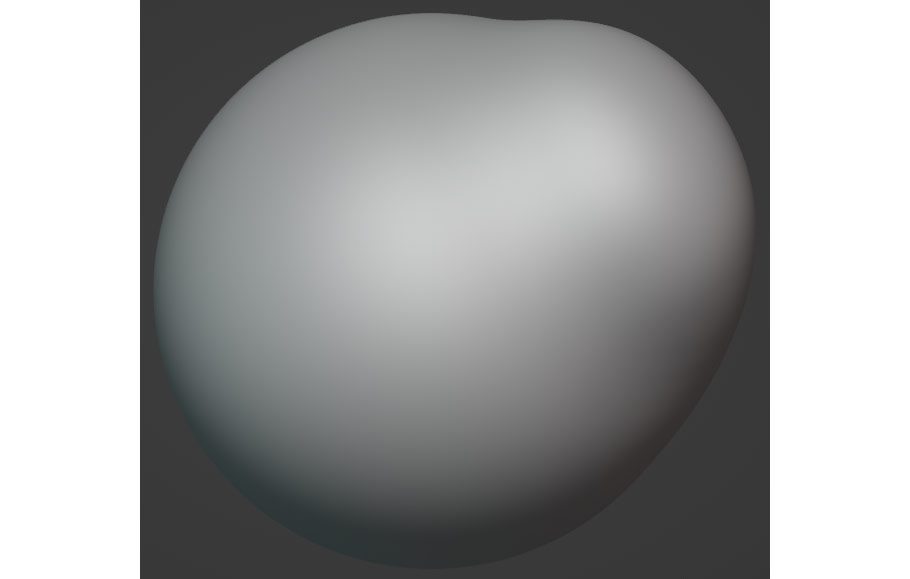
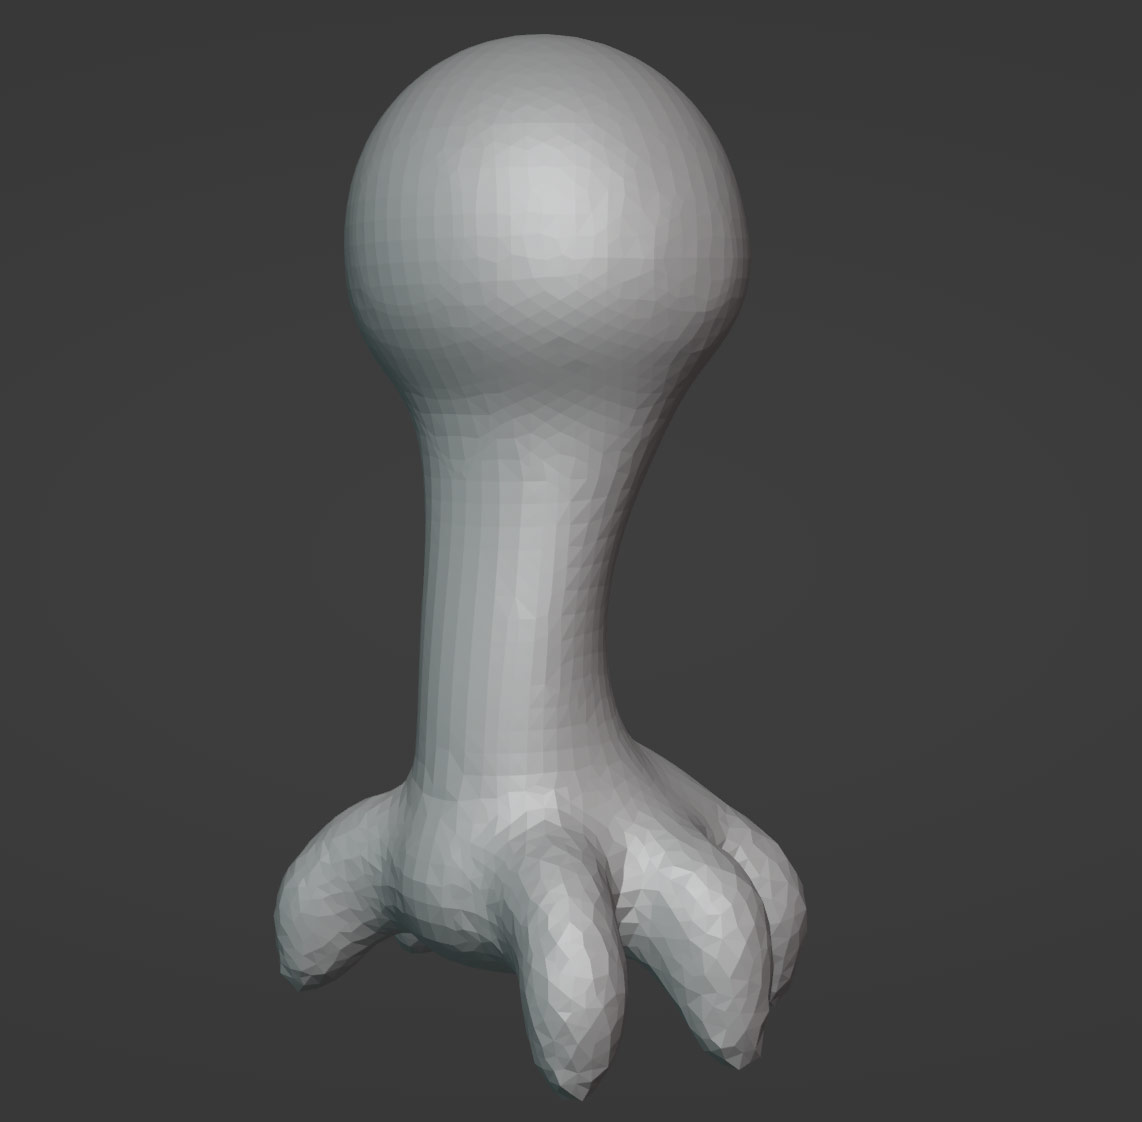
After enabling symmetry, the first stage of any sculpting project is the Blockout. In this stage, similarly to blockout in modeling and drawing, I’m just creating rough versions of all the shapes that need to be present in the final sculpt.
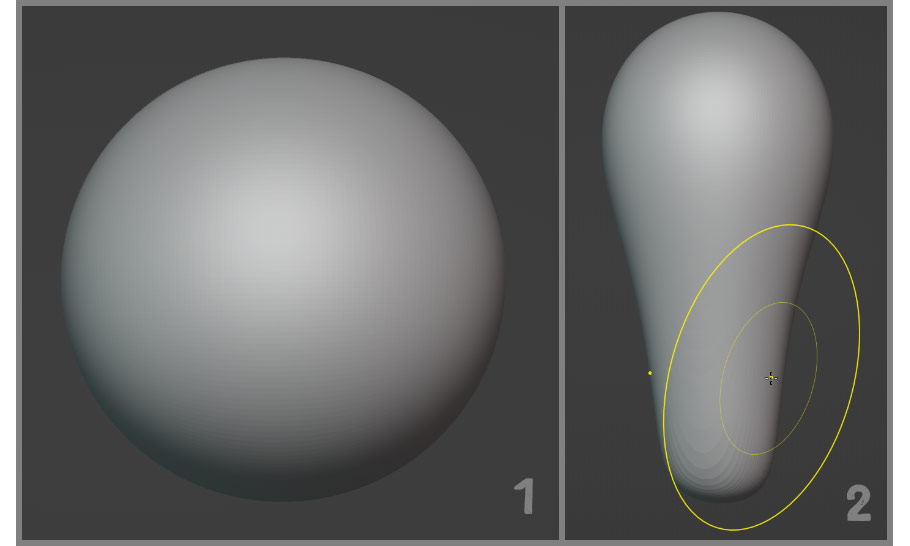
For this stage, I’m mostly using the Elastic Deform, Grab, and Inflate brushes to form the body and head of my alien character. When my mesh starts getting too stretched, I’m also using Remesh to quickly clean it up.
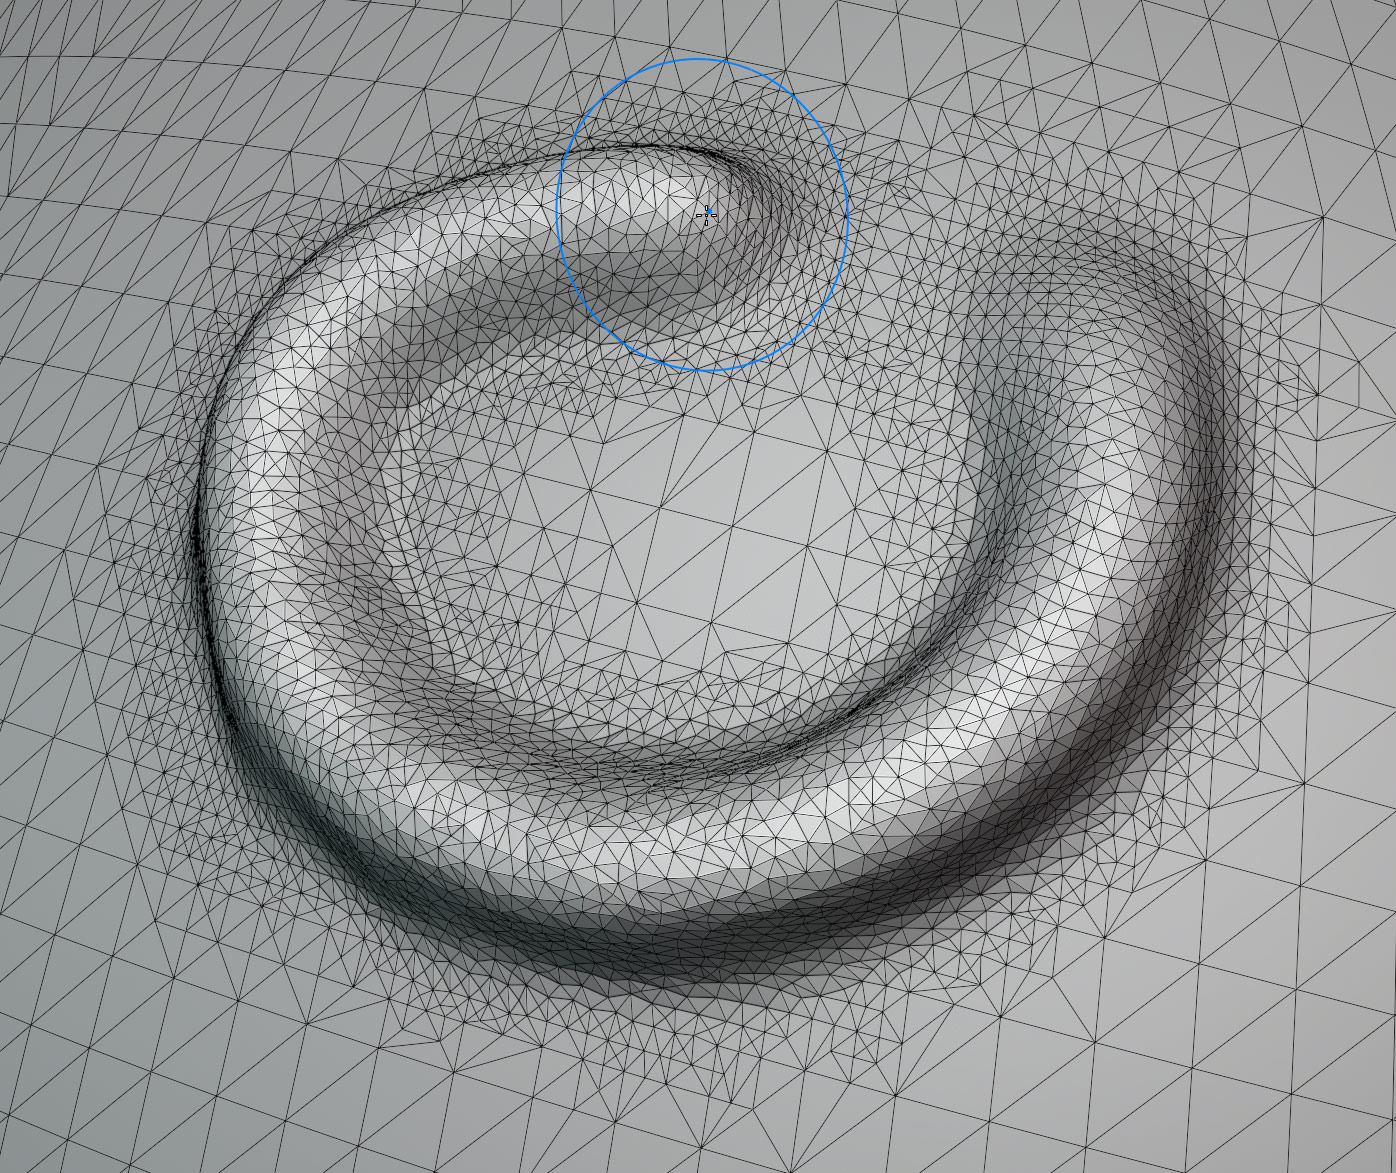
For the legs, I’m using the Snake Hook tool with Dyntopo turned on. At this stage of sculpting, make sure that the Dyntopo resolution isn’t too fine – for these legs I went with a Detail Size of 12.00 px.
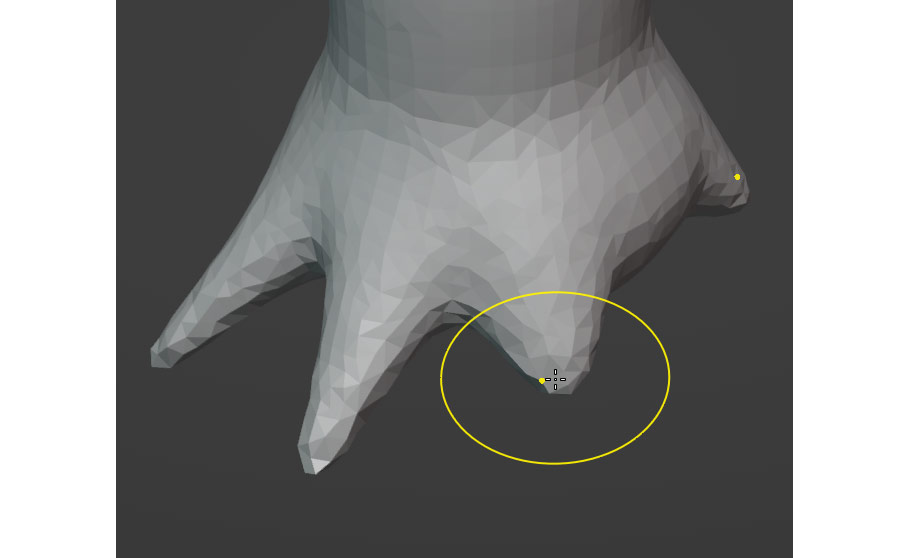
After this, I went over the legs with the Inflate and Elastic Deform brushes to thicken them up and give the base area a more defined shape.
While sculpting any project, a good rule of thumb is to always work from large to small detail. Start with the largest shapes on your model, and only once all the largest shapes are fleshed out, move to smaller ones.
If you instead start adding small details to one part of your mesh while other parts are still at an earlier stage, you may find that you need to adjust parts you’ve already added details to – and then you’ll end up needing to redo the details, which is a big waste of time. This can especially be an issue while using Dyntopo; it allows you to zoom in and work on tiny details, letting you ignore the rest of the model.
Often while sculpting, I find it works best to set Remesh to a certain low-resolution, sculpt everything I can at that resolution (while hitting Remesh regularly), and then only when I can’t sculpt anything else at that resolution do I set it higher. I find this to be a great way to make sure that I’m not sculpting too small of details early on in the process!
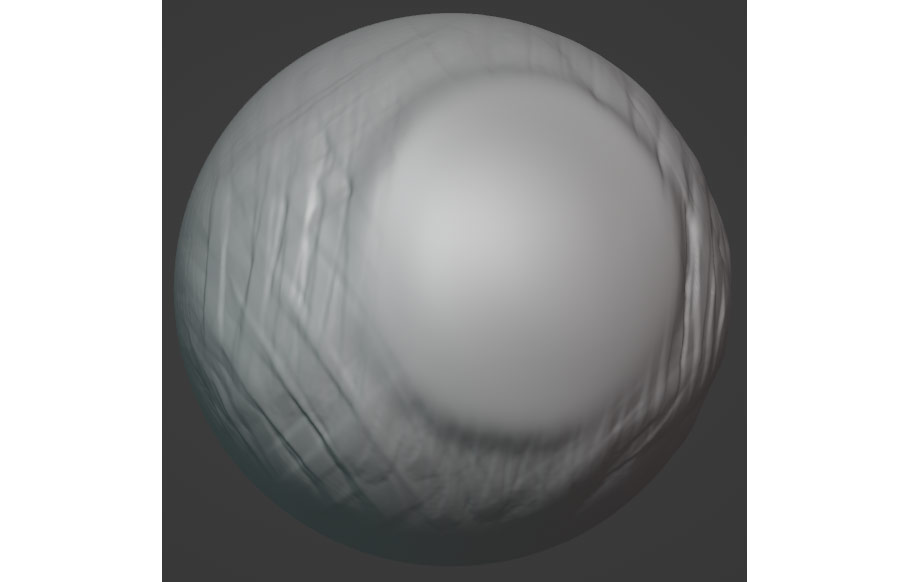
Once all the basic shapes on your model are blocked out and positioned, you’ll need to start refining and detailing the shapes on your model. The Smooth and Flatten brushes are useful here, as well as Draw Sharp for refining creases and edges on your sculpt. You can also keep using the Grab, Elastic Deform, and Inflate brushes to get the shapes on your model exactly how you want them – at this stage, small, subtle changes are everything!
At this stage in my sculpting process, I decided to add a separate object as an eyeball. I’m also overall refining shapes all over the sculpt and adding some small details. At this stage, I’m now making use of most of the brushes I outlined above; I’m also using the Smooth brush extensively to keep everything rounded and even, and Remeshing frequently.
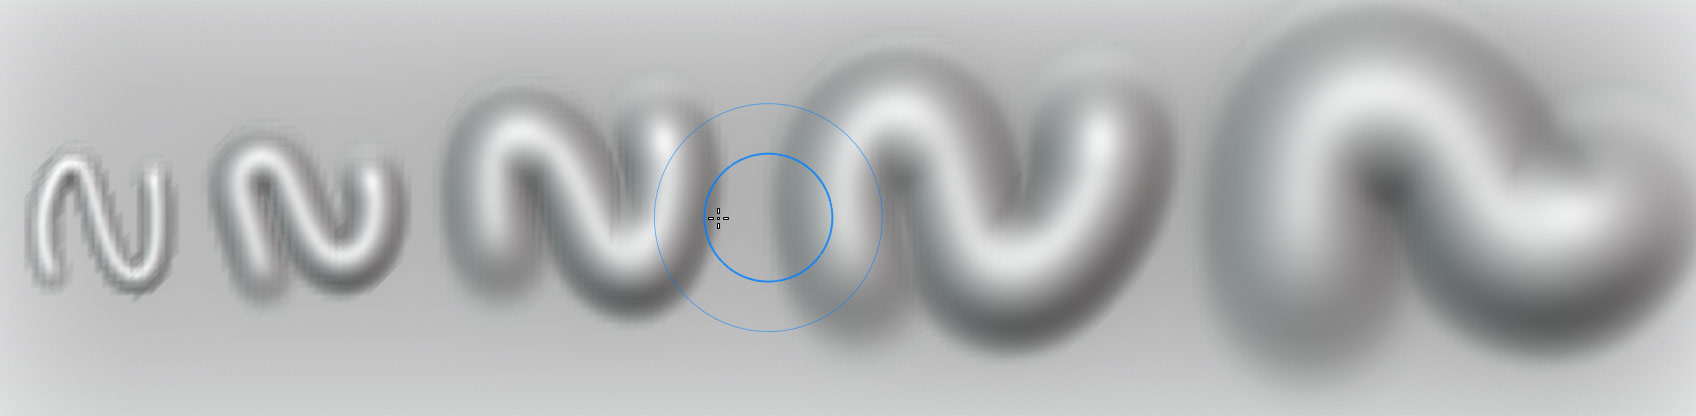
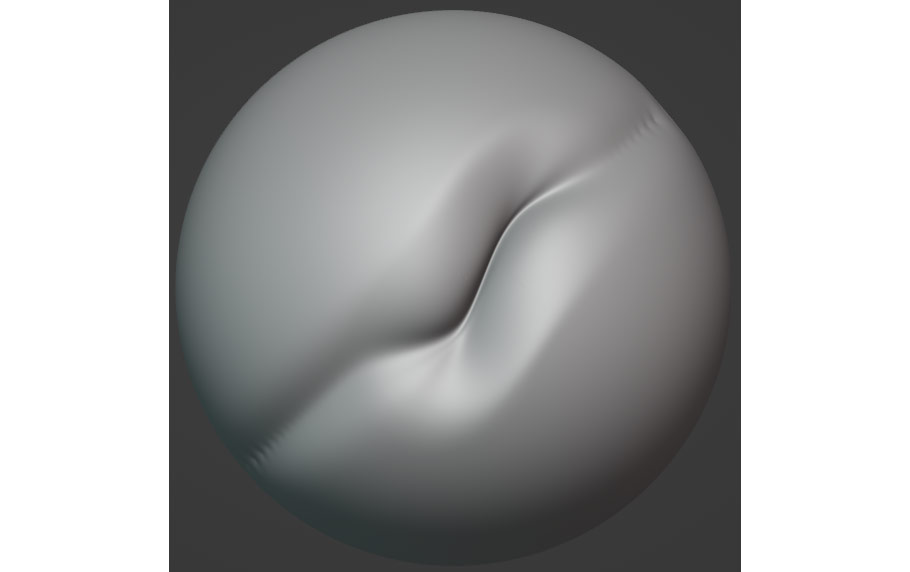
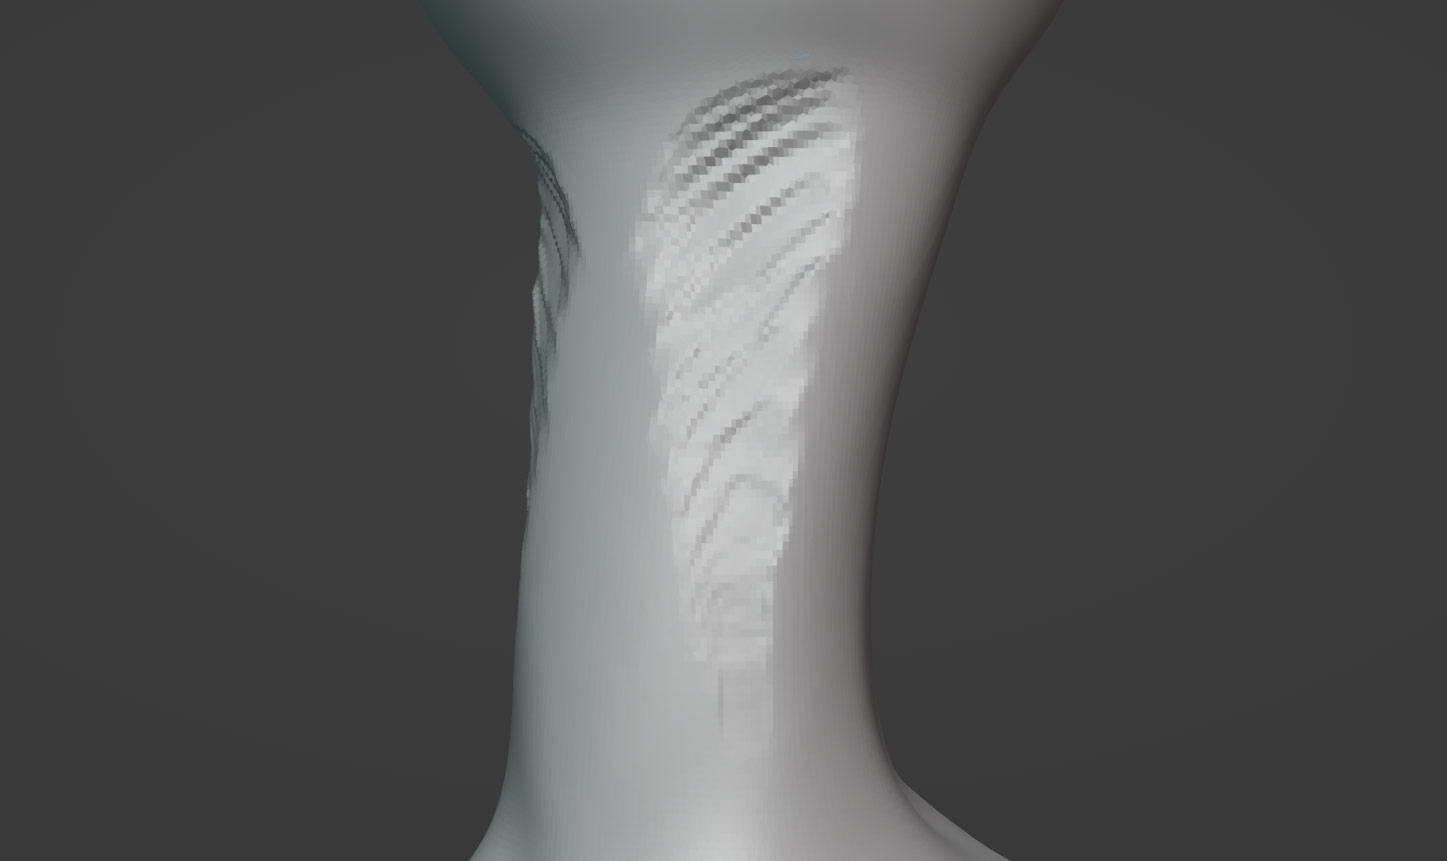
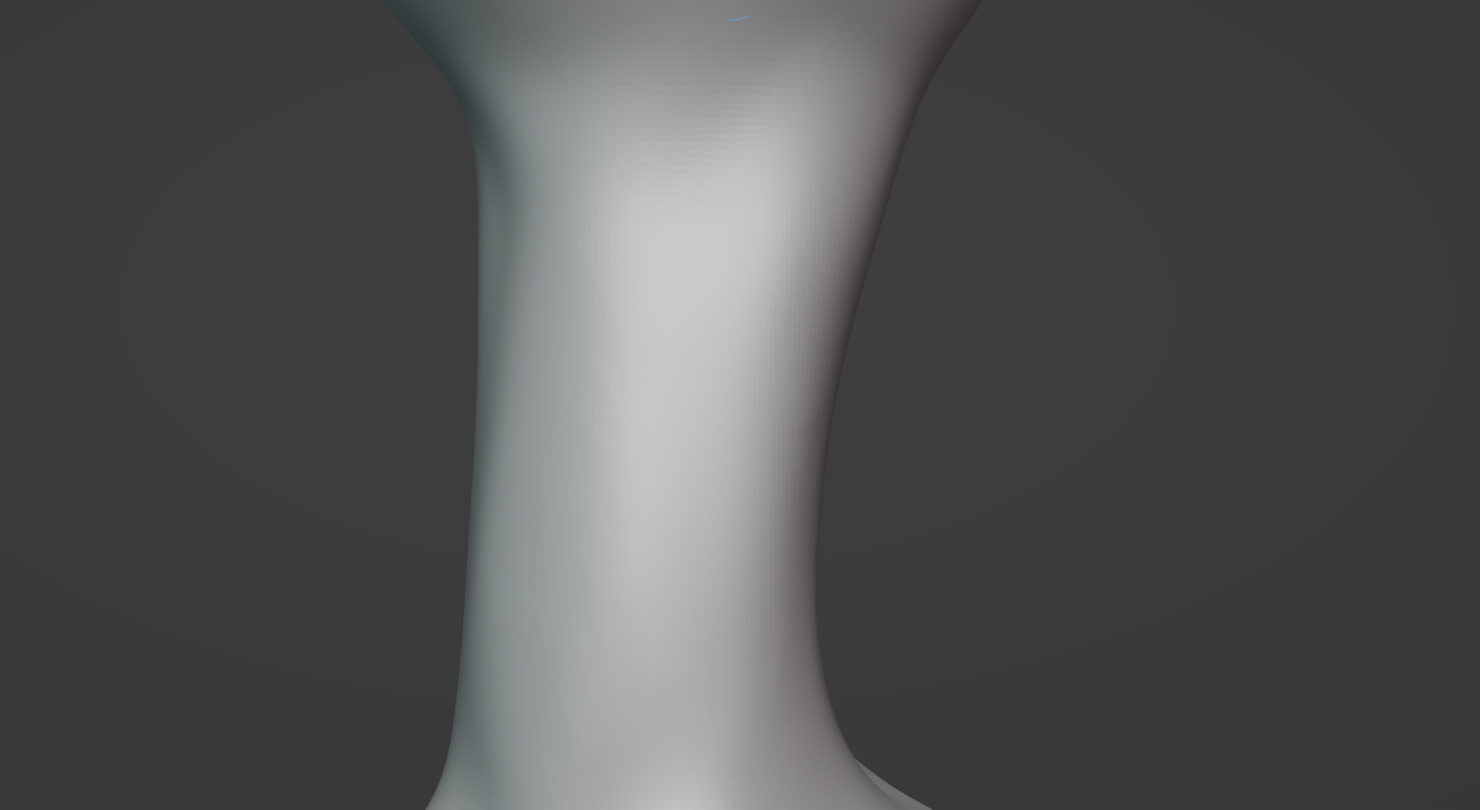
A very helpful brush at all stages of sculpting is the Clay Strips brush – this is good for blocking out shapes on your model, which are then smoothed over to integrate them. For example, I wanted to add a slight depression to this area of the neck on my alien:
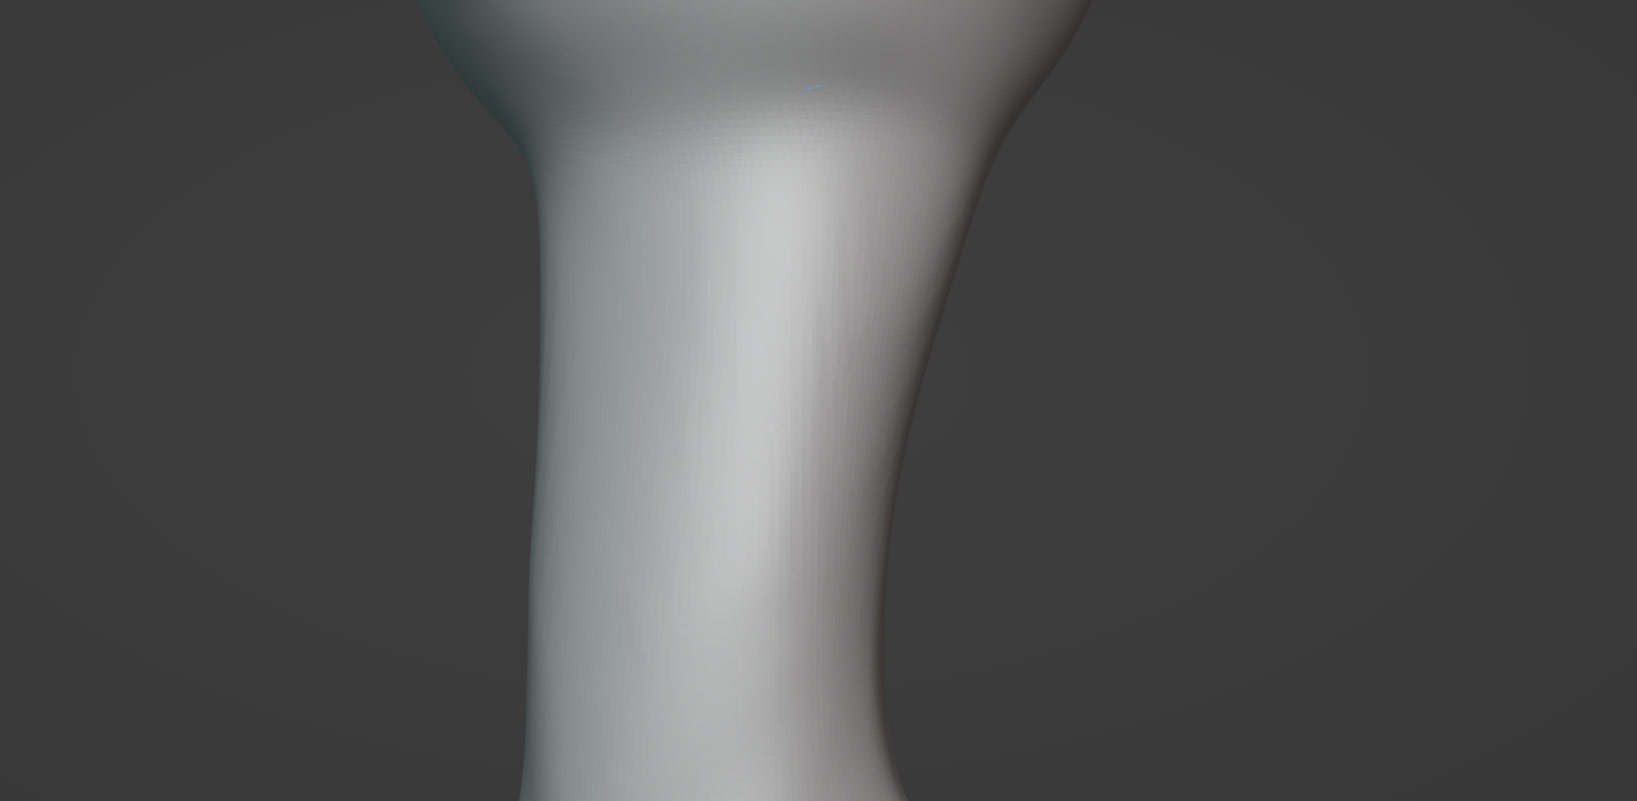
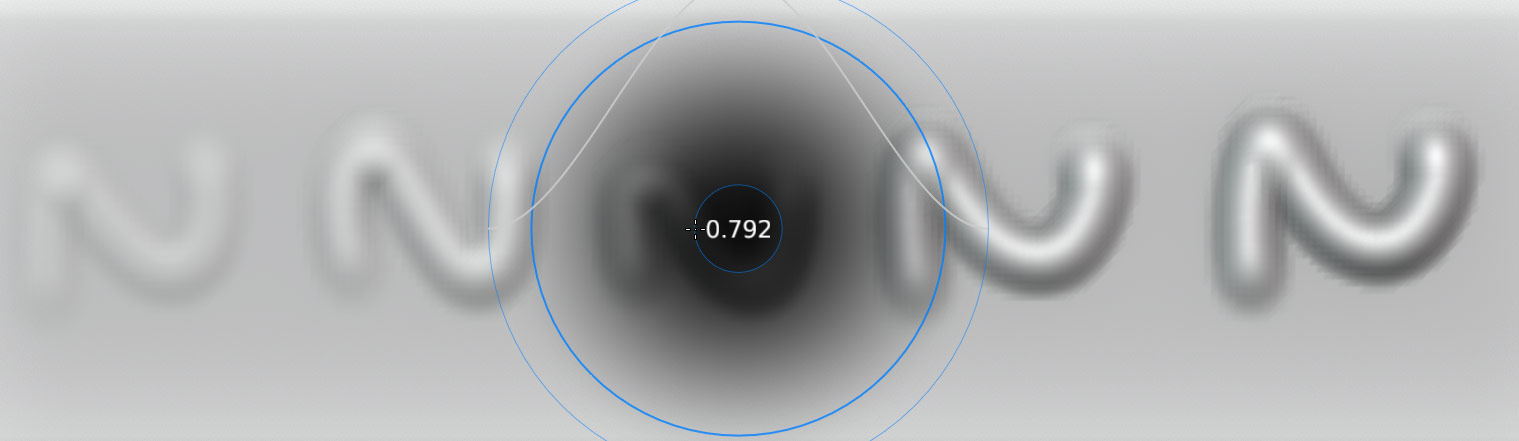
So first, I carved a slight hole in the shape I wanted using the Clay Strips brush, while holding Ctrl/Cmd to invert it:
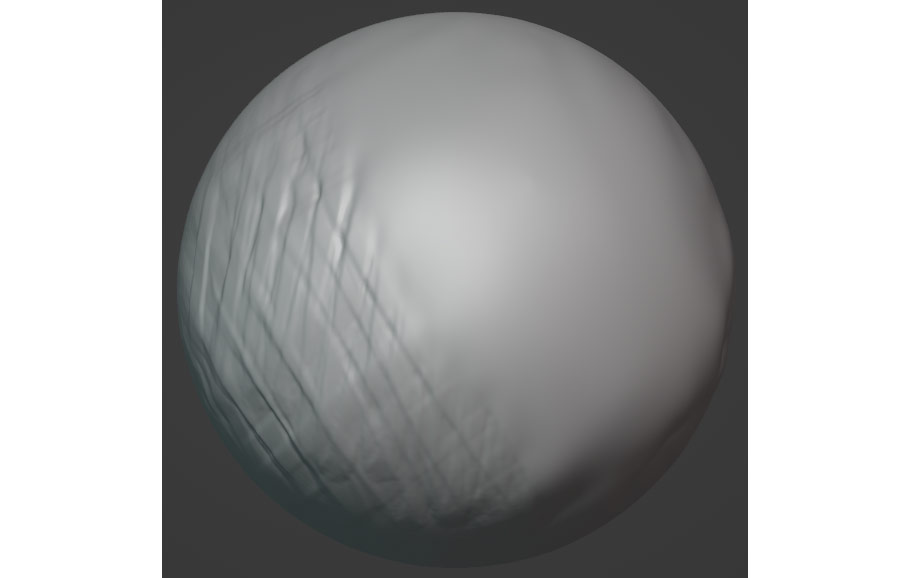
Afterwards, I used the Smooth brush (by holding Shift) to smooth it out and integrate it into the rest of the mesh, leaving a subtle but visible difference!
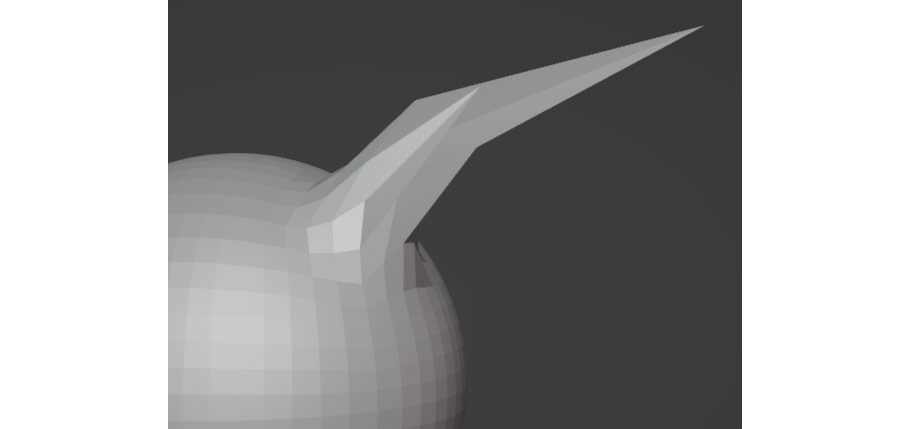
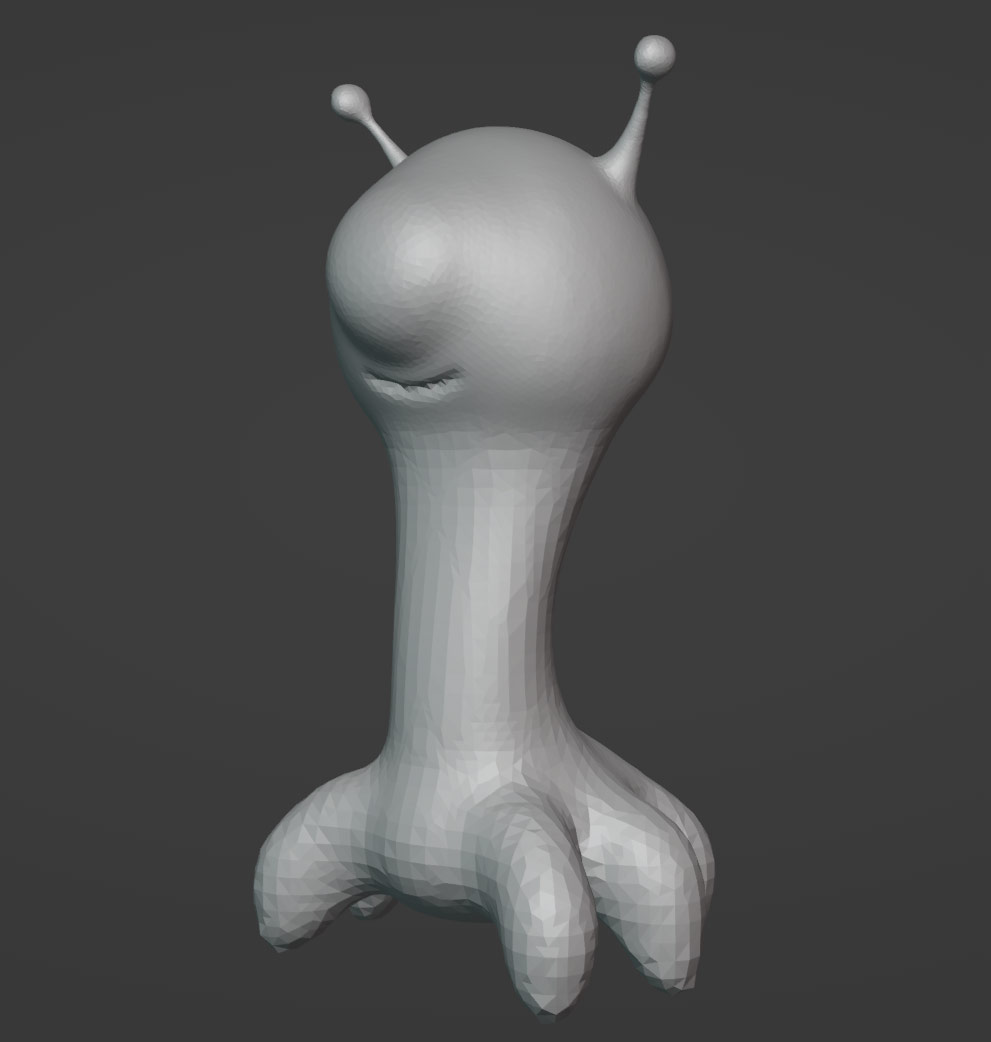
In the end, after many small adjustments and refinements, this was my final result! You’ll notice I added a few simple horns along the back of the model – I modeled these traditionally out of cylinders, and pasted them along the back of the creature.
If sculpting isn’t working on your model, make sure you have enough geometry – sculpting only works if there are enough vertices and faces to support it. A quick fix for this is to turn on Dyntopo in the Tool Options bar at the top of the 3D view in sculpt mode – this will automatically add faces where needed as you sculpt! You can also use the Remesh tool right next to Dyntopo to quickly generate more geometry on your model instead.

Also, check that your model hasn’t been masked accidentally. To test this, simply press Alt/Option – M; this should remove all masks from your model if there are any.
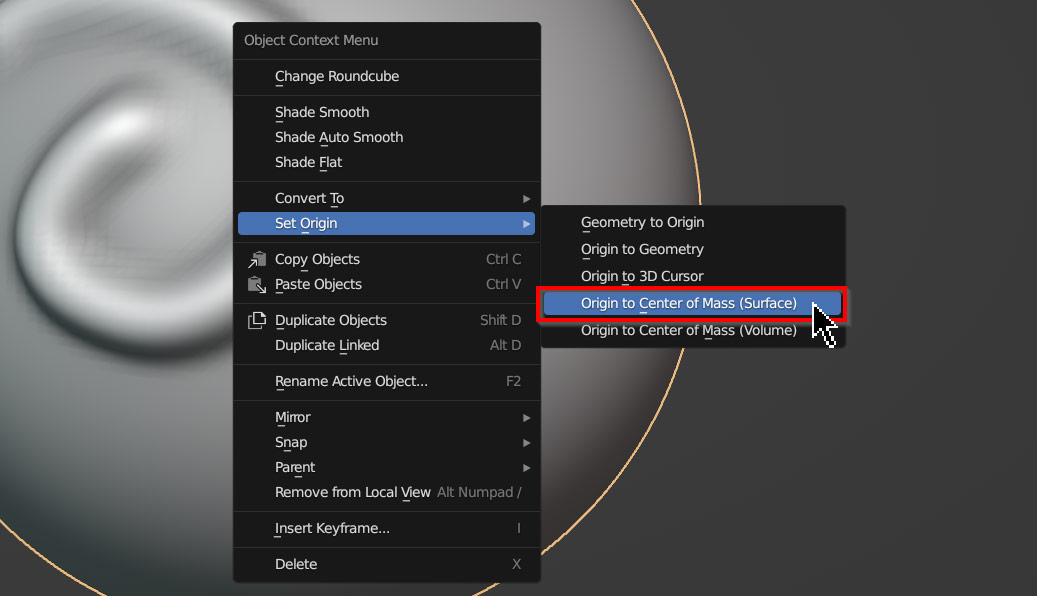
If brush strokes don’t mirror to the other side of your model as expected when symmetry is turned on, it may be because your object’s Origin isn’t centered. To reset the origin to the center of your object, Right Click on your model while in Object Mode, and under Set Origin, choose Origin to Center Of Mass (Surface).
If the brush and brushstrokes are appearing stretched on your model, it may mean that your object has Non Uniform Scale. This means that at some point you probably scaled your object in Object Mode without applying it. To fix this, simply enter Object Mode with the Ctrl/Cmd – Tab menu, press Ctrl/Cmd – A to bring up the Apply menu, and choose Scale. If you go back to sculpt mode and continue sculpting now, things should be back to normal!
It’s possible to hide parts of your model during sculpting using the Box Hide tool, but it’s important to know how to unhide them as well! To unhide faces and objects in Blender, use Alt/Option – H.
And now it looks like we’ve reached the end! Whether you’re totally new to 3D, or already have a bit of experience, I hope you were able to find something helpful in this article. Of course, it’s impossible to cover all of sculpting in a single tutorial (however long it ends up being); but with the tools and techniques I’ve talked about now under your belt, you should be well on your way to becoming a skilled digital sculptor.
Best of luck in all your 3D endeavors, and thanks for reading!

Hello! I’m a self-taught 3D modeler and texture artist with experience on a variety of projects, ranging from planet creation to game props, vehicles, and environments. Although I’ve tried out a bit of everything, my main software is Blender. I’m a big fan of sci-fi and fantasy shows and books like The Expanse and Lord of the Rings, so most of my personal work has a fantasy or sci-fi theme – but I also love to experiment and try new things!


Add a comment